by Michael Cropper | Apr 1, 2021 | Client Friendly, Developer |
This is one of those things you come across once every year or two and you can never remember exactly how to do it. The issue is when your Java WAR File that is compiled and packaged during your build process keeps growing in size over time as you are adding extra features and functionality to your Java web application. It’s a good problem to come across as it means that you are building things your customers love. We’ll not go into the discussion of large applications VS micro services, we’ll leave that for another blog post at some point.
We’re looking at Apache Tomcat 7 here since this is the default out of the box version of Tomcat that comes packaged with Amazon Linux 2 which many people will be using. We’re going to assume that you’ve got that all set up the way you need it, so again, we’ll not be covering that off today.
The issue you’ve likely faced when you have come to upload your WAR file is that it simply doesn’t upload and you may have noticed that uploading your WAR file gets to a certain percentage complete then just seems to stop uploading. Thankfully this is quite an easy fix to do, once you know what you’re looking for and how to find the file you need to edit.
By default on Amazon Linux 2, Apache Tomcat 7 creates a shared location where the configuration files for the Tomcat Manager live, this is within;
/usr/share/tomcat/webapps/manager/
So all you need to go and do is edit the web.xml file in the following location by running the command;
sudo nano /usr/share/tomcat/webapps/manager/WEB-INF/web.xml
And you’ll see a section of code in there that allows you to change the MaxFileSize configuration settings. If you’re more familiar with PHP, this is similar to the upload_max_filesize and post_max_size PHP directives in your php.ini configuration file.
    <multipart-config>
        <!-- 50MB max -->
        <!--<max-file-size>52428800</max-file-size>-->
        <!--<max-request-size>52428800</max-request-size>-->
        <!-- 100MB max -->
        <max-file-size>104857600</max-file-size>
        <max-request-size>104857600</max-request-size>
        <file-size-threshold>0</file-size-threshold>
    </multipart-config>
Simply change those details to whatever file size you need. The default for Apache Tomcat is a 50MB file size. So just configure that to whatever you need. As touched upon earlier, always consider when you’re doing this is you need to start thinking about breaking up the application into smaller components that work together in a micro services approach. But this comes with more challenges that you need to be considering at that point too.
Once you’ve got this configured, simply restart Apache Tomcat 7 and you’re good to go.
sudo service tomcat restart
You should now be able to upload your larger WAR file via the Tomcat Manager interface.
by Michael Cropper | Mar 18, 2021 | Client Friendly, IT, Networking |
Ok, so you’ve got yourself a nice new Ubiquiti UniFi AP-AC-Lite Wireless Access Point to modernise your network – Awesome. If you are still in the research stage, then take a look through a recent blog post about Unboxing and Testing the Ubiquiti UniFi Access Point AP-AC-Lite so at least you can see what you get in the box and some of the awesome reporting statistics that you can see once you have the device up and running. We’re not going to be covering the topics that are covered in that blog post, we’re going to assume you’ve got it out of the box and have plugged it in then we can look at how to actually get it set up on your network – since plugging the device in itself isn’t enough with UniFi equipment.
First Plugin of UniFi AP-AC-Lite Wireless Access Point
Ok, so now you’ve plugged your device into your network, it’s time to bring the device onto your network. What I mean by that is that just because you’ve plugged the device in, unlike many other IT network hardware equipment where you plug it in and it’s automatically available for use without configuration (albeit, without configuration certain manufacturers and devices would cease to work anyhow…), with the UniFi equipment you need to officially welcome it onto your network as a trusted device. This process is called the Adoption process.
Once you’ve got the device plugged in, you’ll notice that the physical device has a solid white light on, then turns to a flashing white light for a minute or so, then turns back to a solid white light. What this means is that your device is not yet adopted by your network.
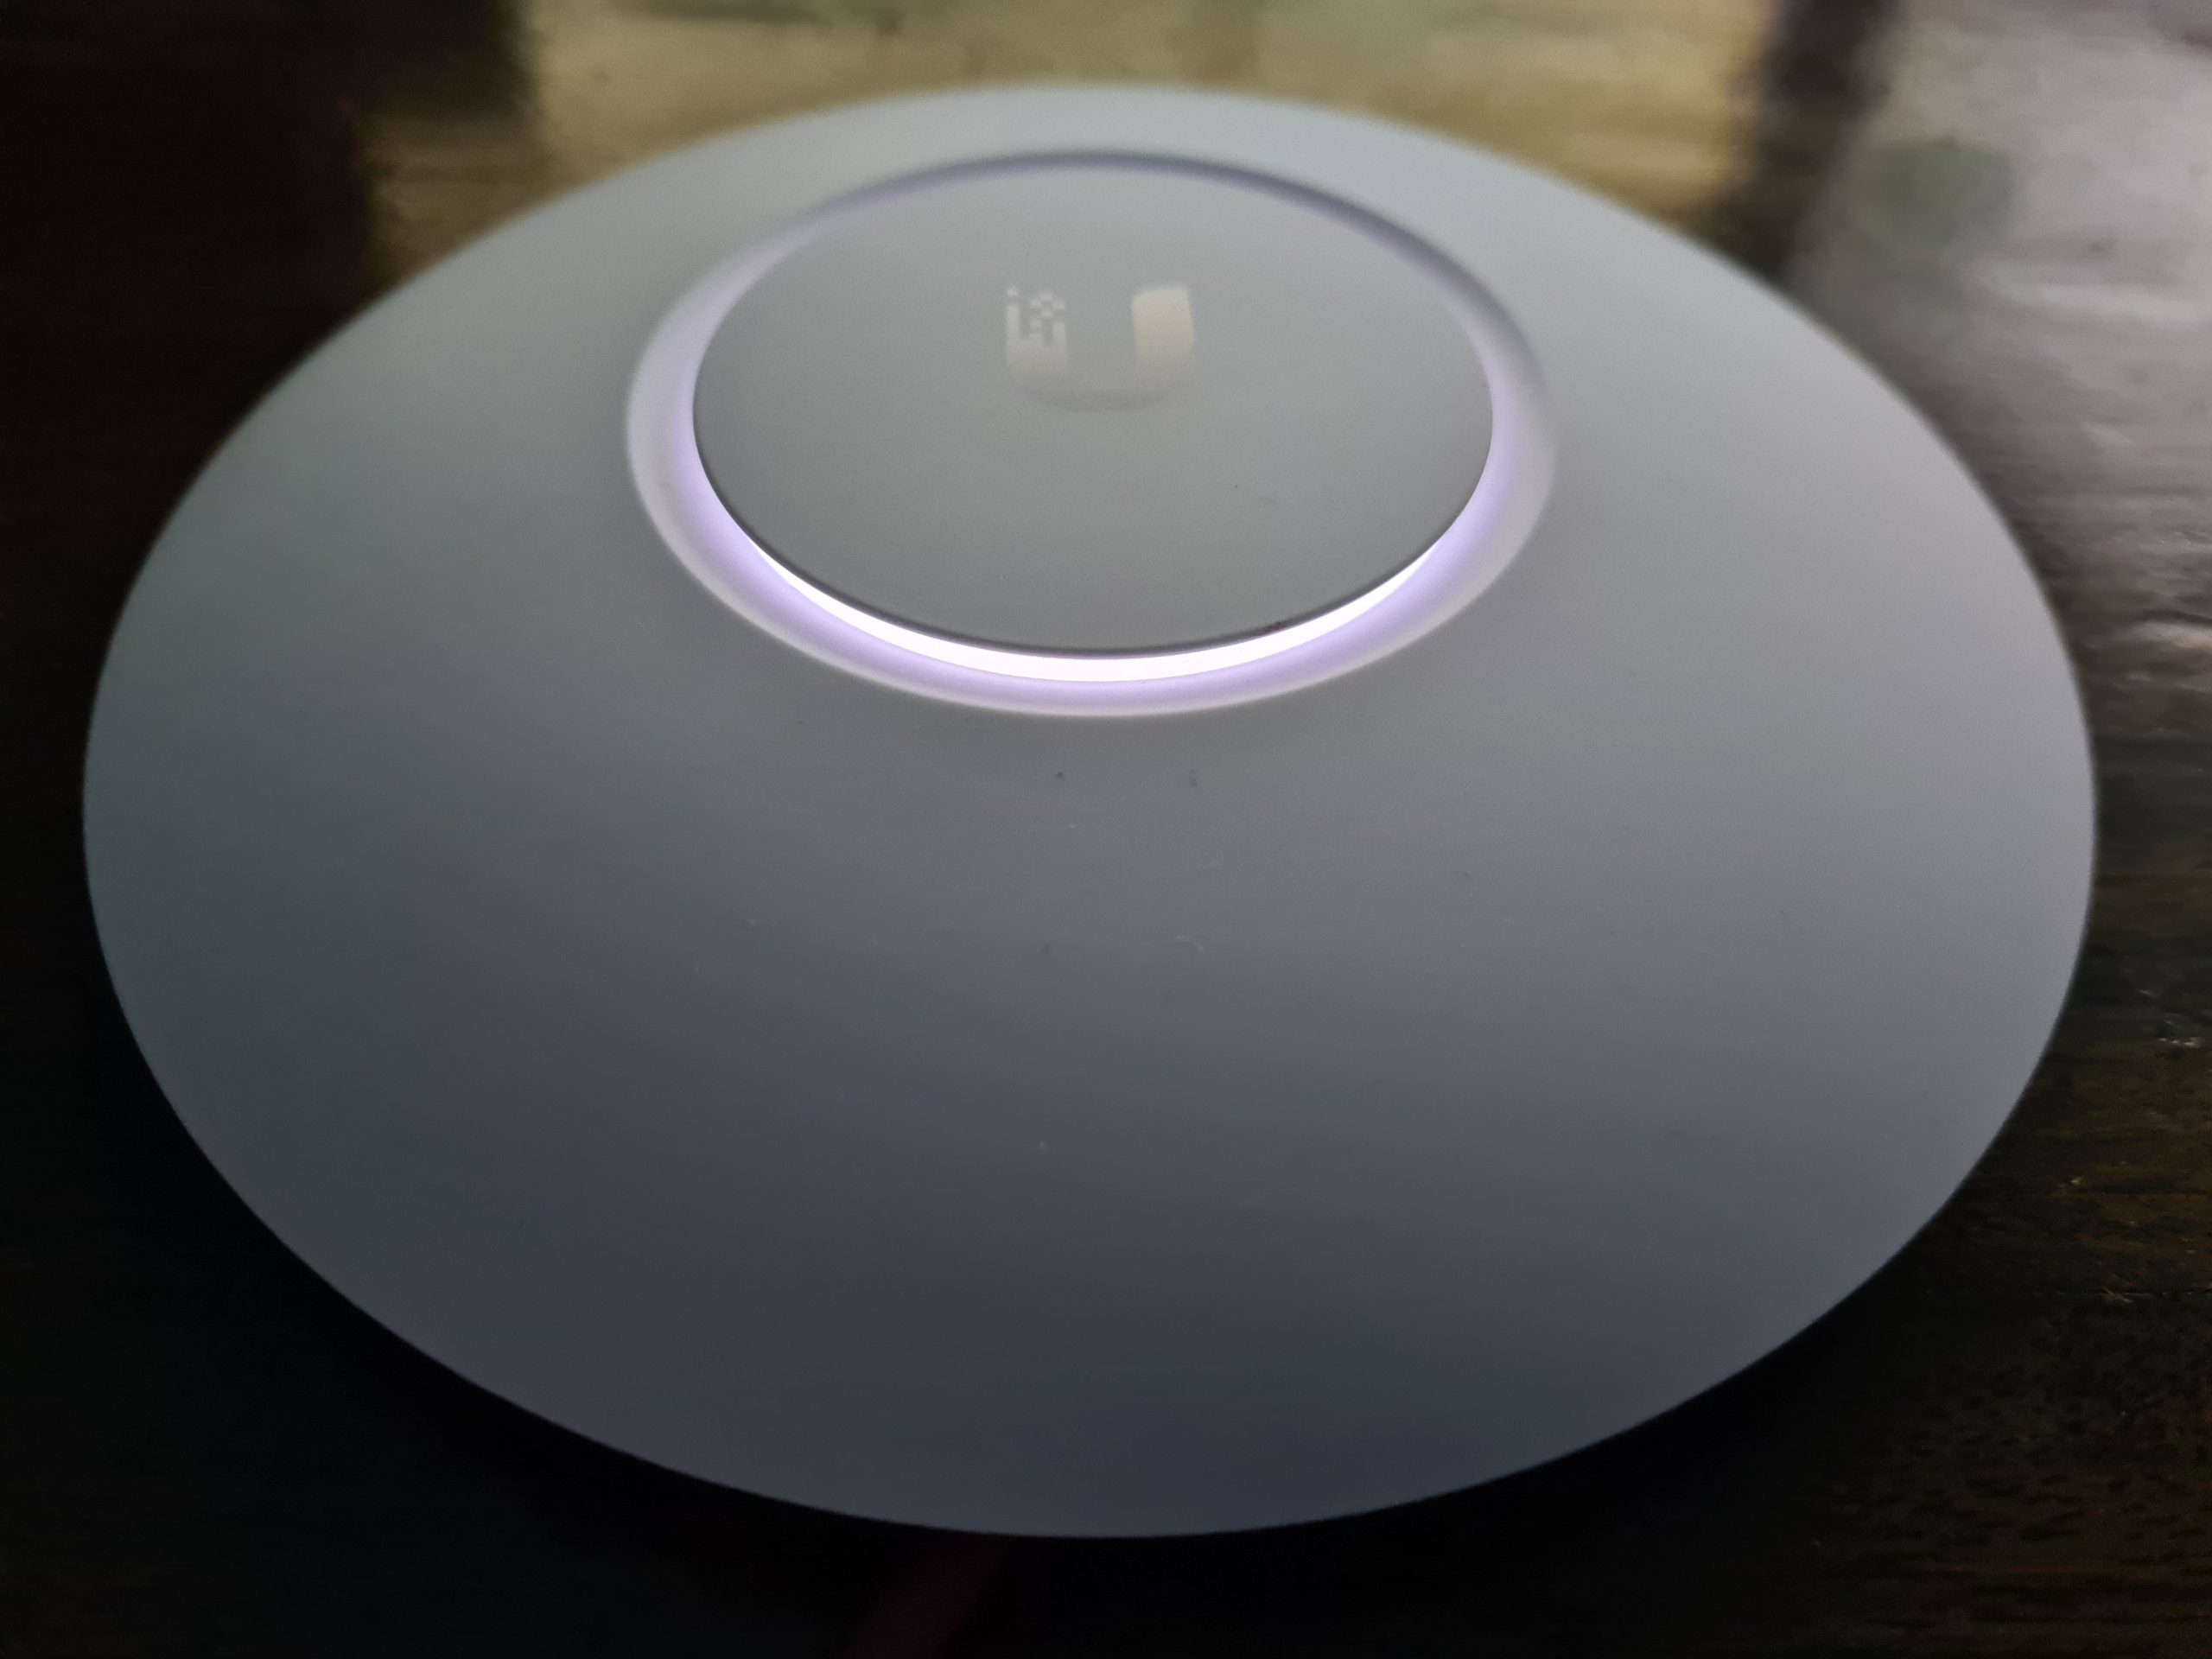
And here’s what that looks like in your UniFi Controller Software. If you aren’t sure what that is, we’ve done a few other blog posts that cover this off in a bit more detail including How to Setup a Ubiquiti UniFi Managed Switch On Your Network so take a read over that if you haven’t yet got your UniFi Controller Software set up and running.
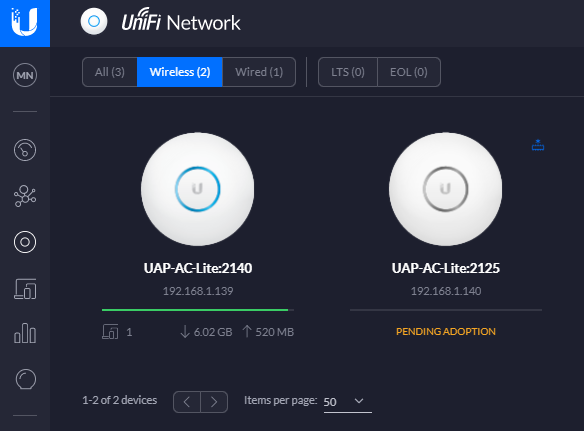
In the above image you can see there are two wireless access points on the network, one that has already been adopted and one that is yet to be adopted so you can see the difference for how the devices display.
Adopt the UniFi AP-AC-Lite Wireless Access Point Device
To welcome your new device onto your network officially simply click onto the device that is pending adoption which will open a pop out window as can be seen below;
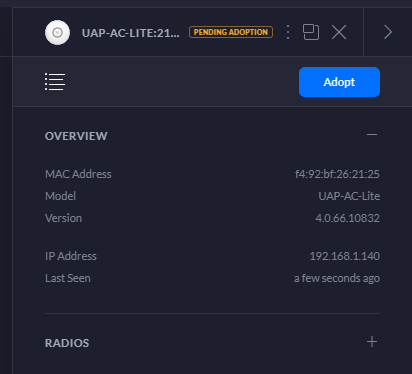
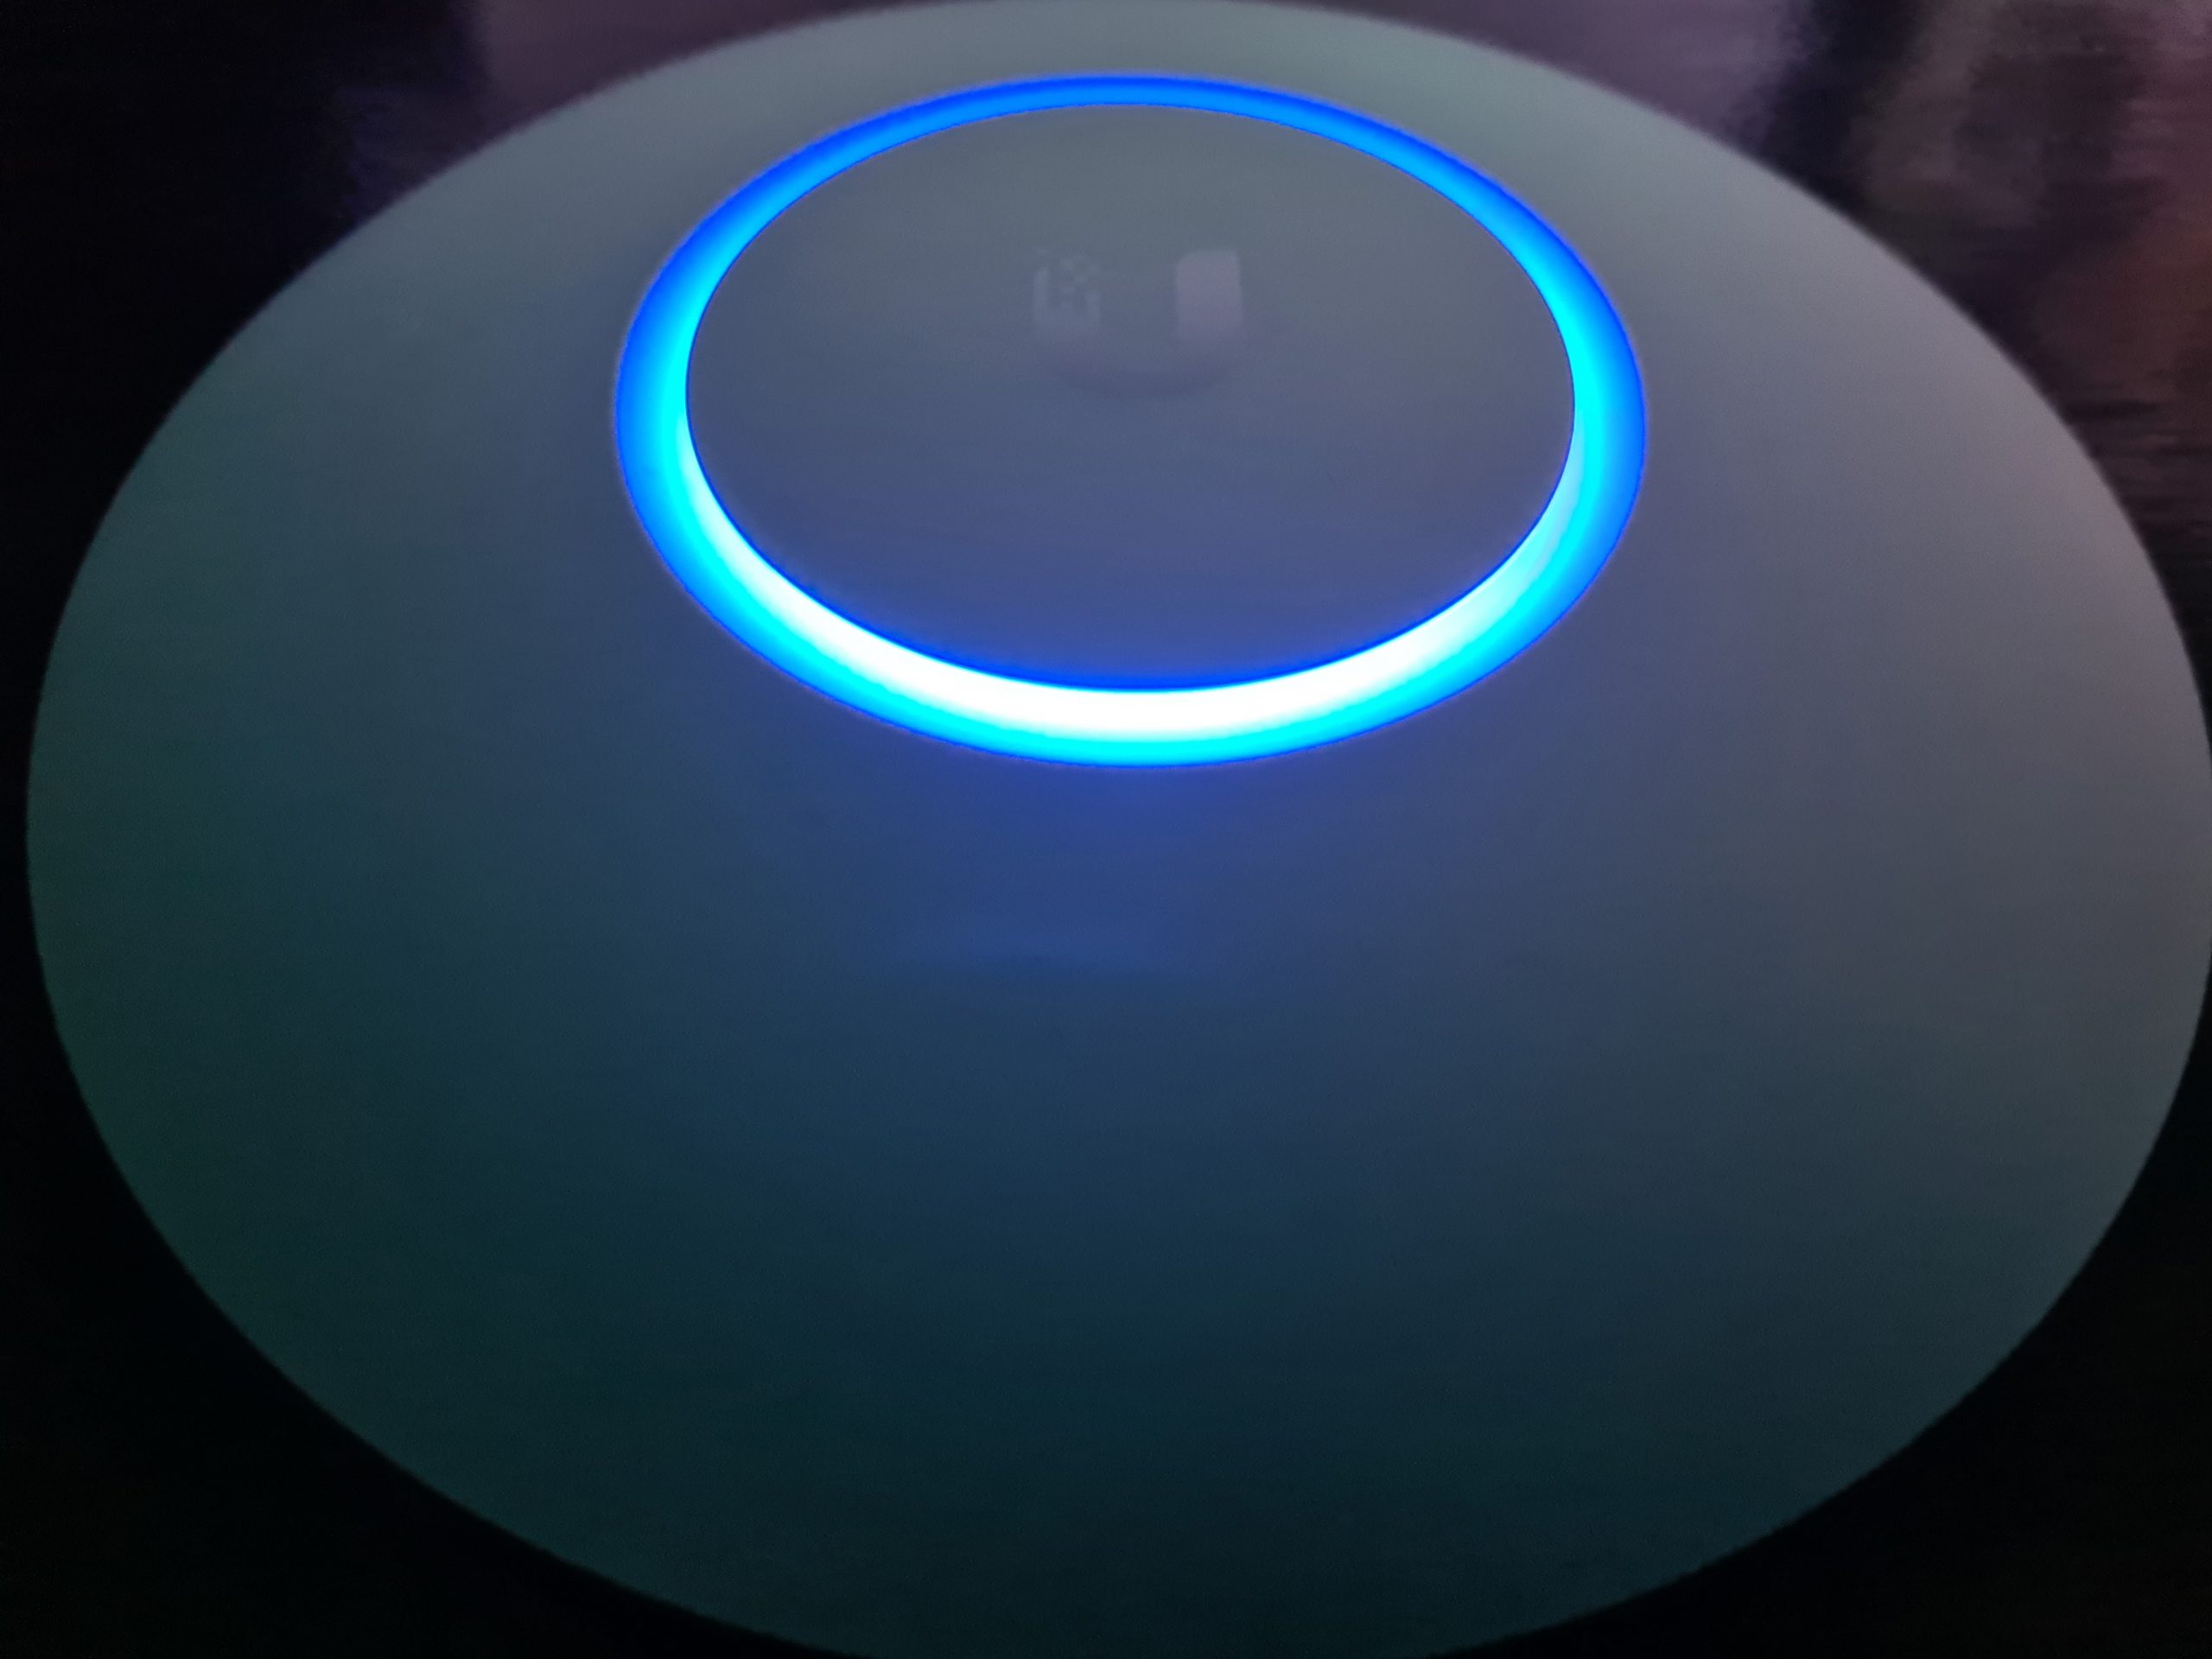
Simply click on the Adopt button to get started. Once you’ve done this, you’ll notice the status of the device turn to a blue light and within the UniFi Controller Software the device will switch to Pending Adoption, then Provisioning. Once it’s done you’ll notice the device is ready to go;
Then you’ll notice that your device is ready to go within the UniFi Controller Software too. The device doesn’t have a green light beneath it as there are no connected wireless clients connected to the device yet.
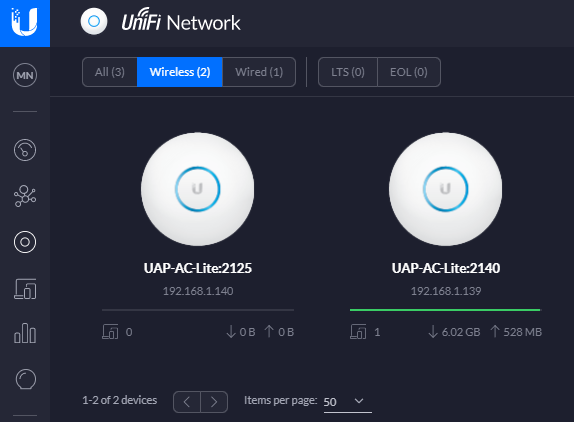
One point to note is that if you’ve just received your UniFi Wireless Access Point, then it’s highly likely that there are some updates waiting for you to install on the firmware itself. You’ll notice a little icon in the top right of the device in the above image (not shown, as all devices are up to date) so just click on that and get your devices up to date. There is always going to be the natural lag between when the firmware was originally installed at the manufacturing plant to when it arrives on your doorstep. So thankfully with smart software technology and smart devices you can easily bring your devices up to date with ease. Traditional legacy network hardware often isn’t as smart with this, although many do try to have some form of notification that there are firmware updates ready for installation, once you can find the hidden notification in the system.
Configure a Wireless Network
Now that you’ve got your devices connected, you need to create yourself a wireless network. Out of the box you don’t get a wireless networks configured, you need to configure this yourself. This mainly consists of two parts;
- Creating an SSID, aka. a Service Set IDentifier, or more commonly known as the broadcast name of your wireless network like what you see when you try to connect to local wireless networks, it’s the name that identifies itself
- Giving your wireless network a password so that your users can connect securely
To do this, simply navigate to your Settings page (bottom left of the UniFi Controller Softwre, the Cog icon). And you’ll be able to create a wireless network within there. For simplicity in this blog post we’re going to just look at a LAN, so no VLANs and complex Profiles etc. Just so you can get up and running quickly. Top tip – Switch to the Classic Settings user interface as at the time of writing, this still supports more features and functionality. You’re probably fine with basic networks using the more modern interface, but you’ll soon find that basic networking infrastructure settings are invisible in the modern interface at the moment, they will be coming in due course though.
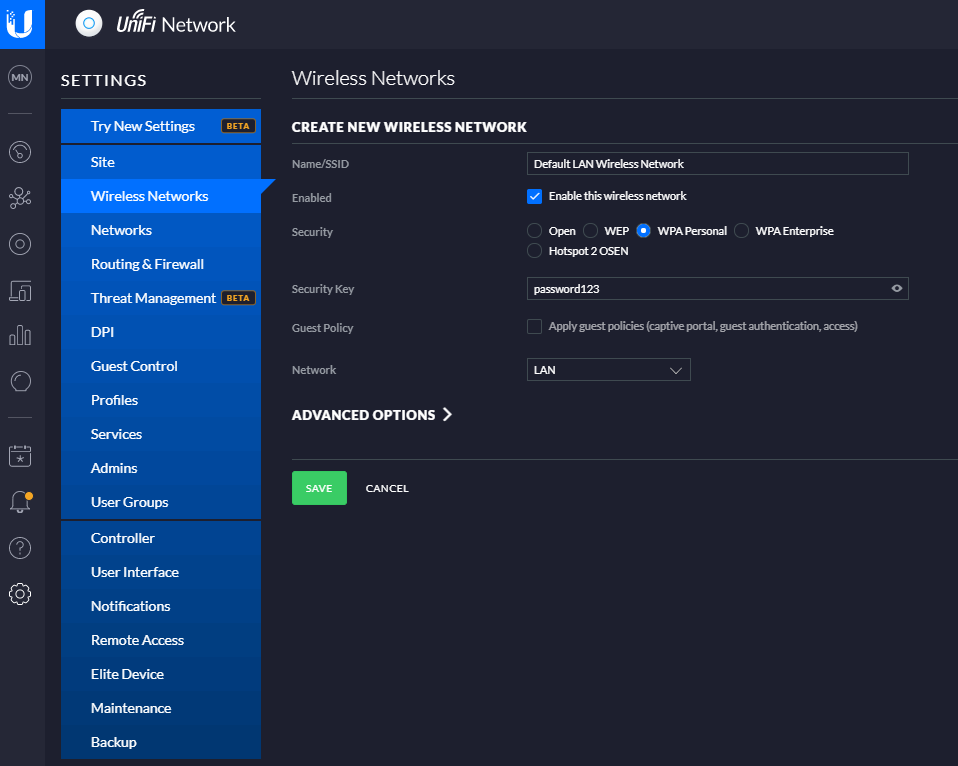
And before anyone points out the obvious…. Yes, give your wireless network (SSID) a decent name and don’t choose ‘password123’ as the security key. Also you probably don’t want to select the option to be an Open network from a Security perspective. This is rarely a good idea, and even when you’re using secure VLANs, you should really consider this from a business perspective before providing open, free and inconspicuous WiFi connectivity as there are legal considerations you need to make. But anyhow that’s for another conversation at another time, so for now, that’s how you set up a basic wireless network for your UniFi AP-AC-Lite Wireless Access Point device (and any other similar models…). Once you’re done with this, you’ll then be able to connect to your wireless network from any devices within range. Simple.
Summary
Awesome, you’re good to go! We’re going to keep this blog post simple and not cover anything related to VLANs or managed switches and unmanaged switches. We’ve covered some of these topics before and we’ll be covering some of the other topics in the near future. For now, you’re all set up with your Ubiquiti UniFi AP-AC-Lite Wireless Access Point so you’re good to start using it.
Hopefully this blog post has been useful to get you up and running with a very basic network configuration using the Ubiquiti UniFi AP-AC-Lite Wireless Access Point on your network. There are many different models from the UniFi range that this same logic applies to for your UniFi Wireless Access Point devices, so this isn’t really specific to this model.
by Michael Cropper | Mar 16, 2021 | Client Friendly, IT, Networking |
I wanted to do a quick unboxing blog post on the Ubiquiti UniFi Access Point, AP-AC-Lite, so that you know what you’re getting when you make the purchase. This will be a fairly quick blog post.
UniFi Access Point AP-AC-Lite Unboxing
First of all, one thing that really stands out with the quality of the box, how well packaged the device is inside the box and just the general feel of all the hardware your are touching, it just feels good quality. You know what I mean by this if you’ve handled a lot of different computer and network hardware, you can really tell how well something is made just by having a good touch and feel of it.
The UniFi AP-AC-Lite model from UniFi is their basic entry level access point which is designed for smaller number of clients accessing the access point. The reality is that there is no hard and fast rule for how many clients any access point can handle, you have to use your judgement on this based on the information you have at hand. And even then, you’ll probably get it wrong at times even with lots of experience – and that’s just the reality of working with IT hardware, sometimes you need to adjust depending on the reality of your use case in the real world.
The Box
One thing that is very noticeable when you get the UniFi Access Point AP-AC-Lite is that the box just feels nice. It feels extremely good quality from both the weight and the texture. It’s clear that they have thought a lot about these products right from the outset – even before opening the box.


What you’ll notice in the image below is some of the core components that are waiting for you inside the box itself. You’ll find the UniFi UAP AC Life device itself along with a ceiling/wall mounting kit (including screws) plus a very handy Gigabit Power over Ethernet (PoE) adapter which can come in very useful if you haven’t got PoE capable switches (or capacity!) for where you are planning on connecting your UniFi access point to. Quite handy to know is that this UAP AC Lite device is capable of reaching a range of up to 122 meters, aka. 400ft. For larger distances, the Ubiquiti UniFi range of hardware has better devices capable of broadcasting over longer ranges. Always be sure to know as much as you can about the variety of UniFi hardware available prior to making a purchase. Speak to your knowledgeable expert on the topic.

What is a nice little touch on how the UniFi AP-AC-Lite device is boxed up is the Amazon/USA style rip-to-open outer packaging. It is a nice feel that you are opening a product that is being delivered. This being said, it’s a huge hope that what is being delivered is suitable for your specific needs. Once opened, the returns policy is going to be very dependent on the local distributor from whom you purchased the device from. Most IT hardware suppliers are happy for you to return hardware as long as it is in a re-saleable condition, and unfortunately this is the only one slight drawback we have about this packaging, that is isn’t re-saleable due to the outer packaging design. But hey, the UniFi AP-AC-Lite Wireless Access Point works so well, that it’s unlikely that you’ll be returning this anyhow.

Inside the Box for the UniFi AP-AC-Lite Device
Ok, so here’s what we’re presented with once we’ve unpackaged the UniFi AP-AC-Lite wireless access point device. Just to re-iterate, the packaging between the boxed version above and the unboxed version below is extremely well packaged. Super compact and extremely well packaged to manage the terrains of product transit through the worst of delivery companies.
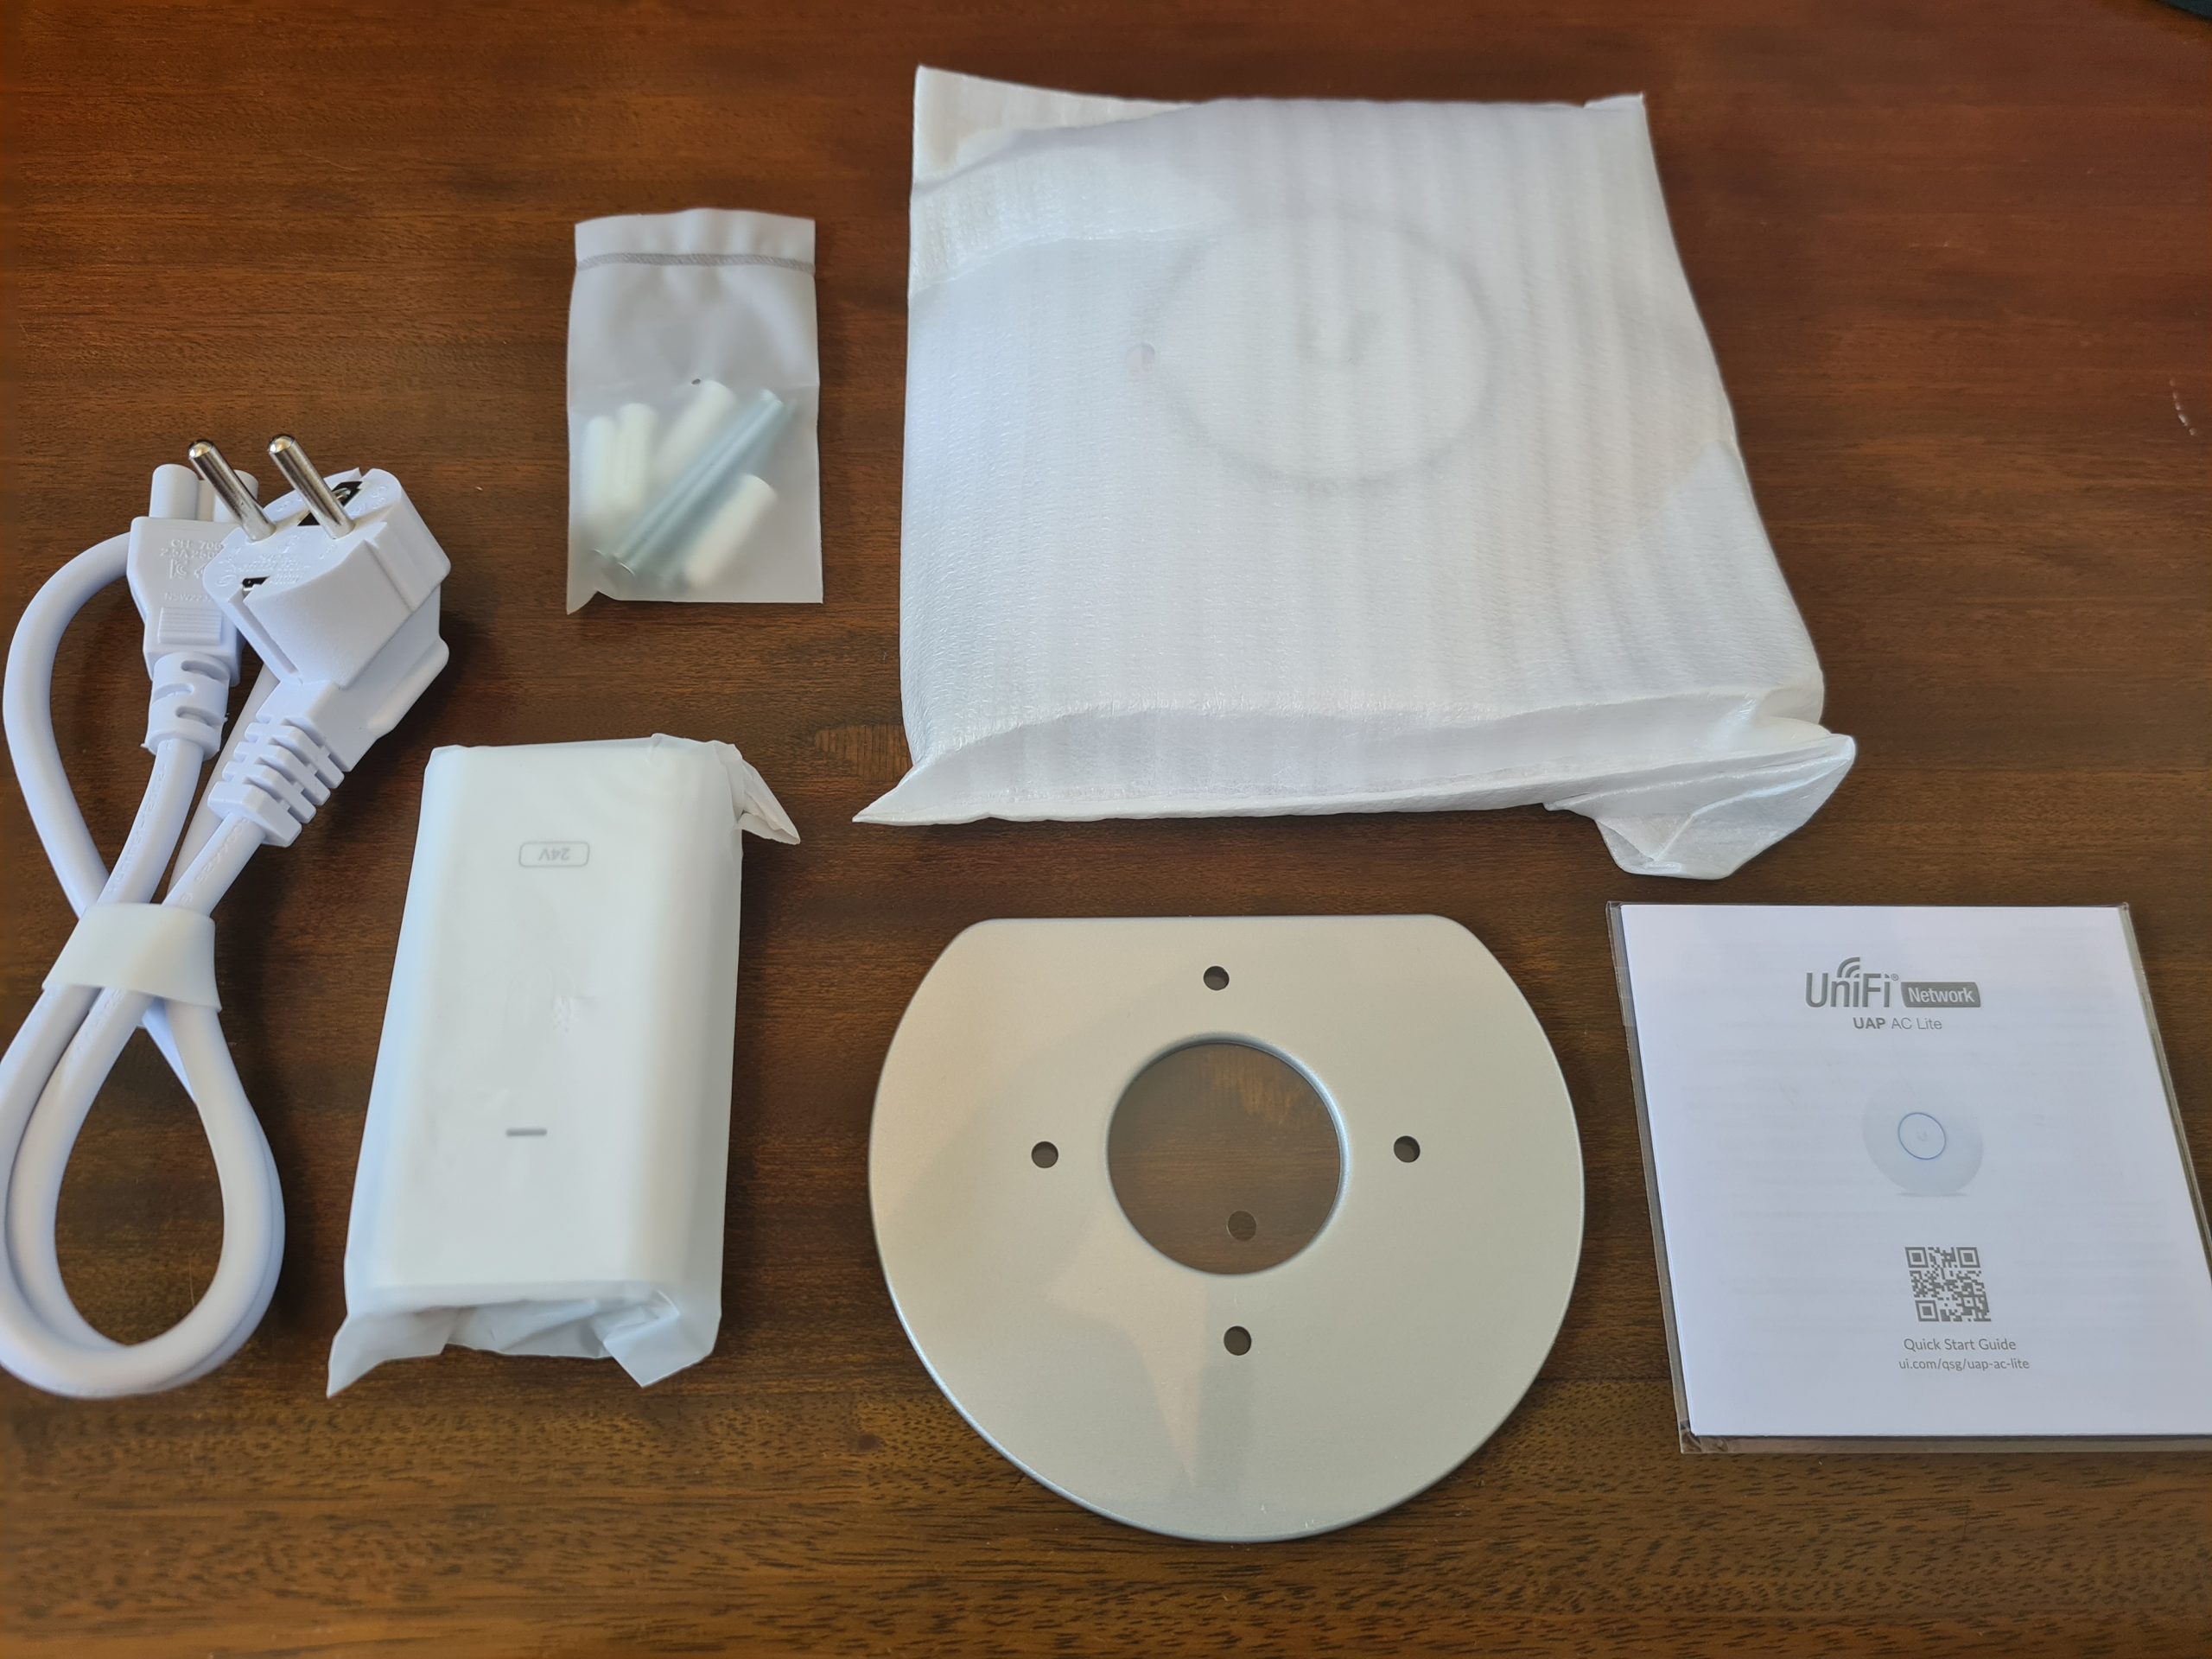
What you’ll notice above is that we’ve got several core items within the product box;
- USA Plug Adapter – Great if you’re USA based, but not so great if you’re UK Based. Thankfully our supplier for IT hardware equipment clearly has an arrangement in place with UniFi to supply a UK Based Plug for the device. Same UniFi branding / look / feel. Not sure if this is standard, but it’s just something to keep in mind when purchasing this IT hardware and equipment.
- UniFi Power over Ethernet (PoE) Device – This is the device that the above power adapter plugs into. This is potentially a device that you need. And this is because it depends if your managed switch supports PoE technology. Some devices support this heavily, others partially, and others simply don’t support PoE at all – hence why this device is often required in your setup. Personally I think that UniFi could significantly reduce the cost of their product by not shipping this device to their customers. A basic How-To guide for pre-purchase activities to enable customers to understand what they need to purchase under what circumstances would significantly help with this. I’d estimate that this would easily save £15 – £25 off the product cost if they were to implement a more structured purchasing process. Buy hey, I’ll leave that with them, if they want to reach our to me to discuss this business operational improvement then they are more than willing to do so.
- UniFi AP-AC-Lite Device itself – Kind of self-explanatory
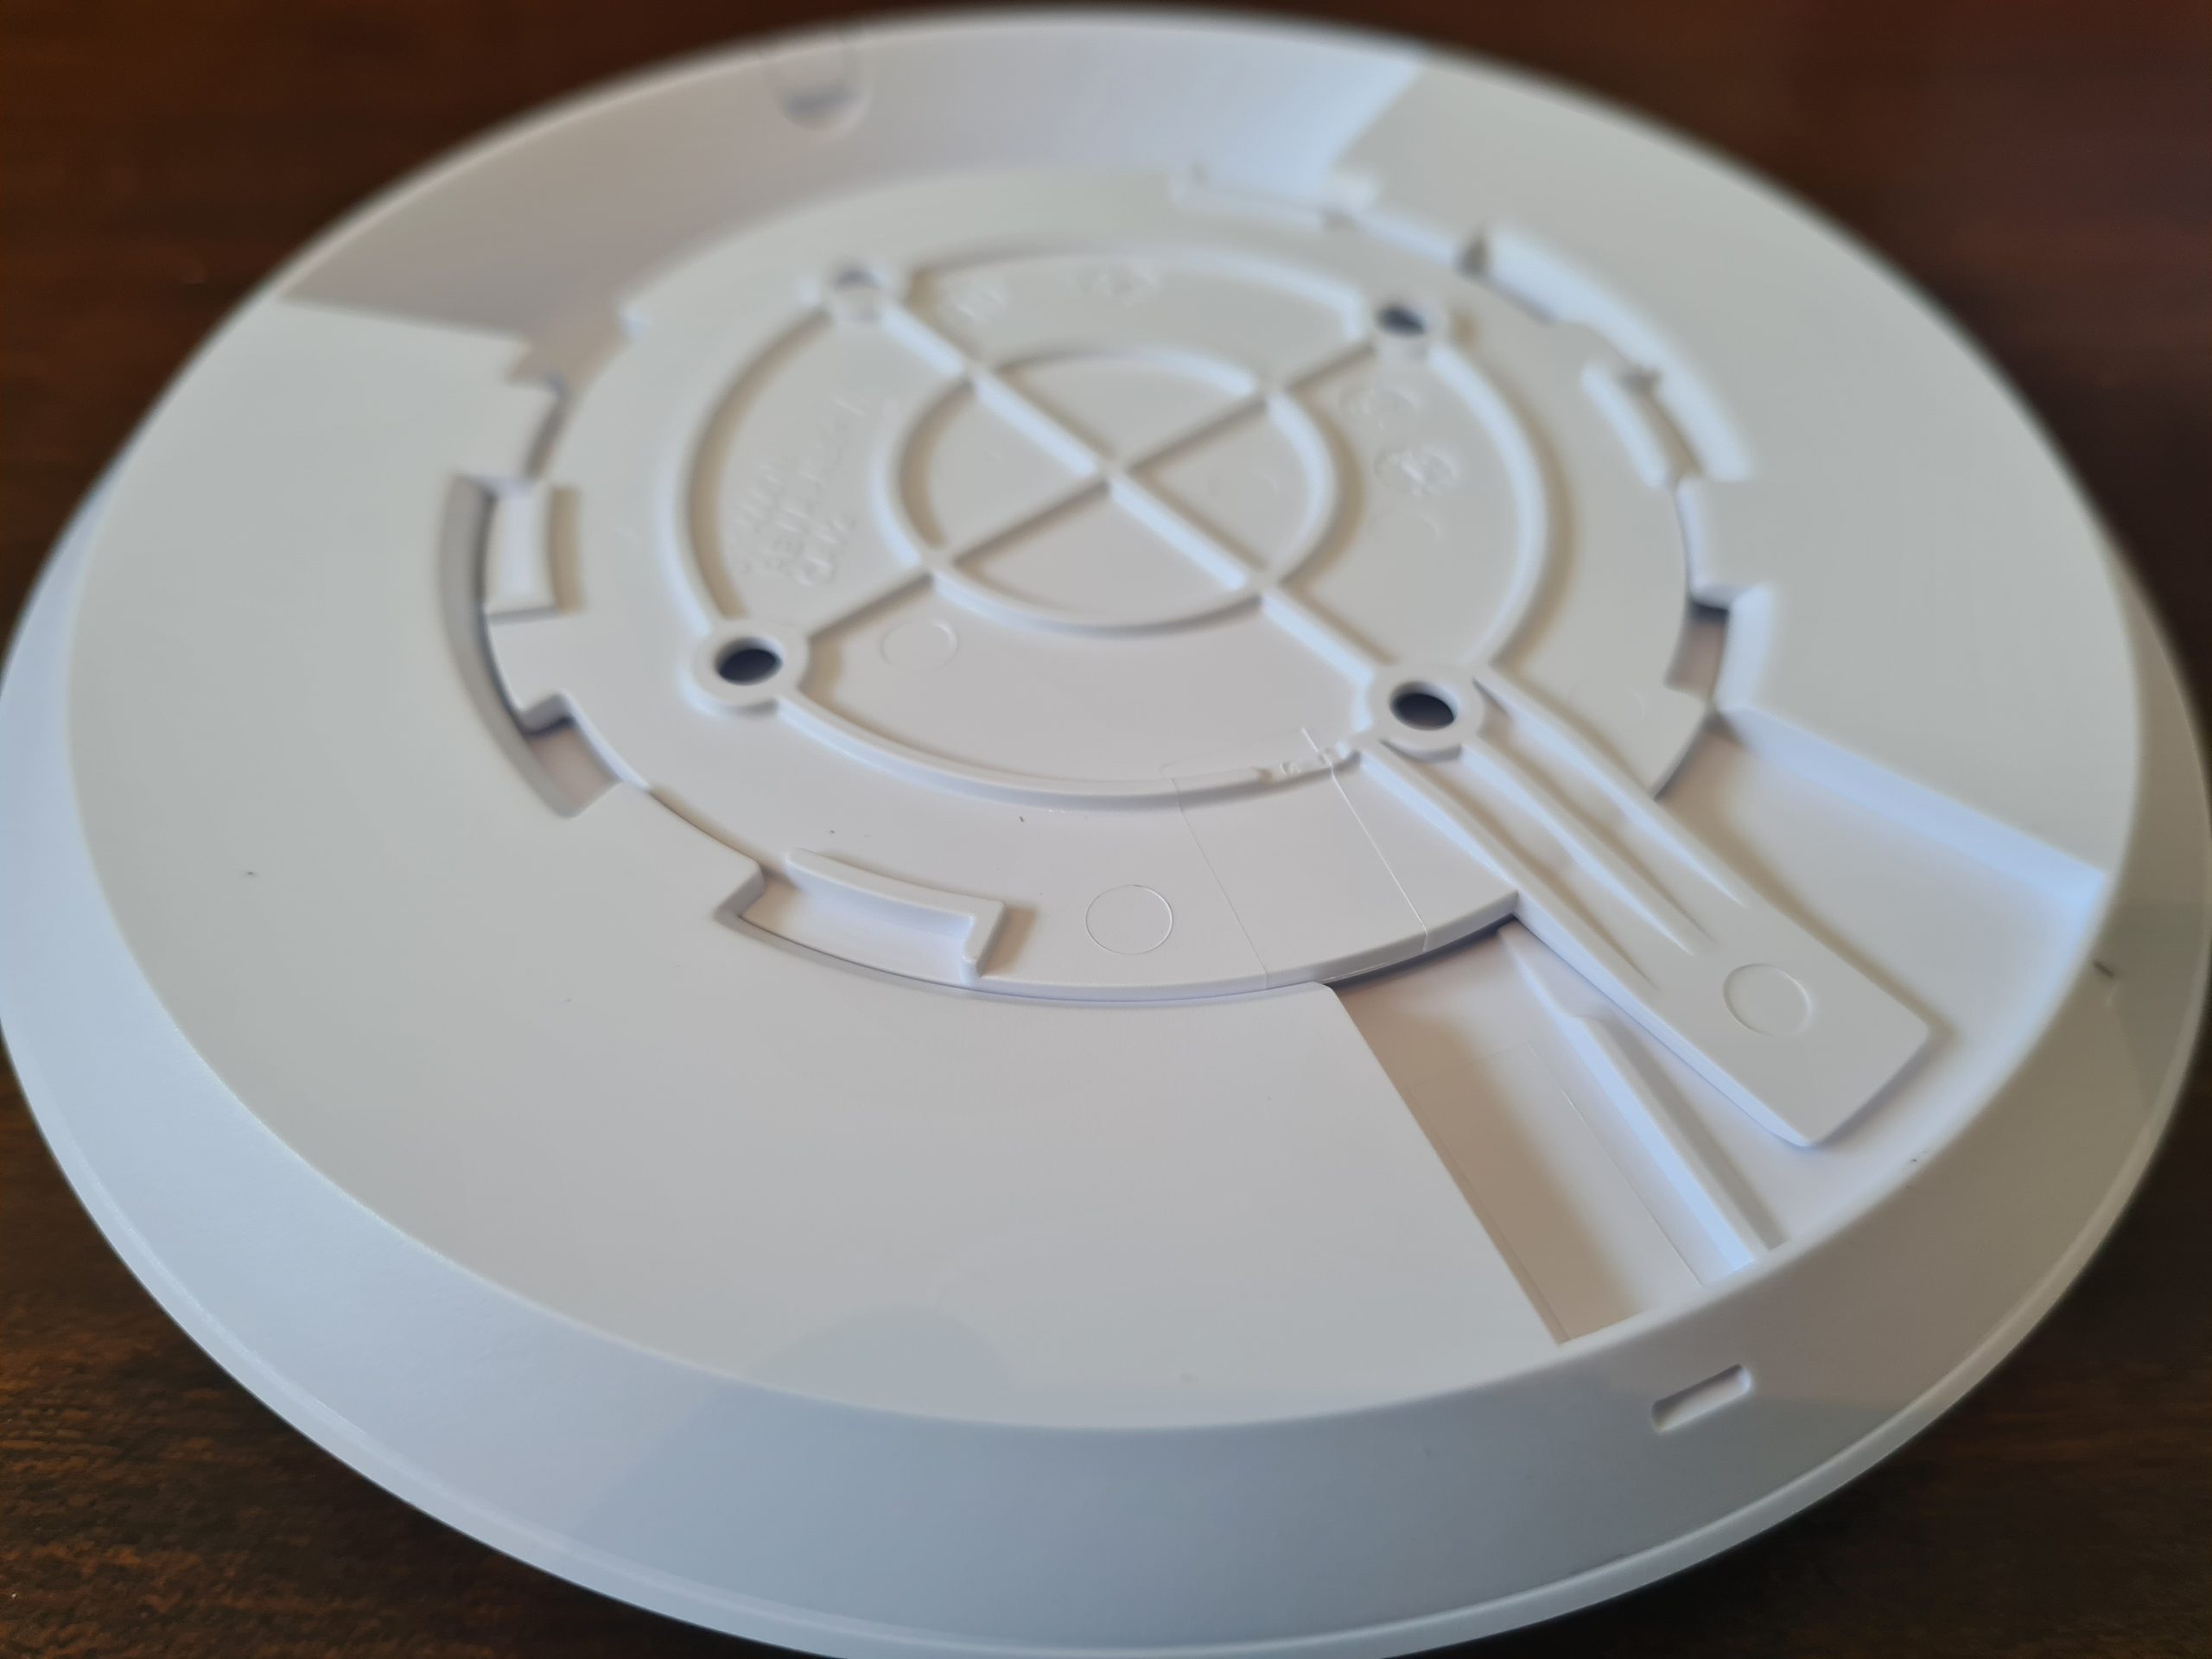
- Mounting Point – This is actually quite a nice device that let’s you easily secure your device to the wall or ceiling. As you’ll see later there is a handy detachable panel beneath the UniFi AP-AC-Lite access point that allows you easily connect this panel to the panel that attaches to the wall.
- Screws and Wall/Ceiling Plugs – Very handy so that you don’t have to source the specific sizes/lengths/width of screws and wall plugs to get the device attached to the location that you are looking to get this attached to. The reality is that these default screws are only a best guess, so it’s highly likely that you will need to source the specific screws and plugs that are relevant to where you are attaching the device to. But it’s a nice touch from Ubiquiti for common use cases.
Hardware Specifics
The Ubiquiti UniFi AP-AC-Lite Device;
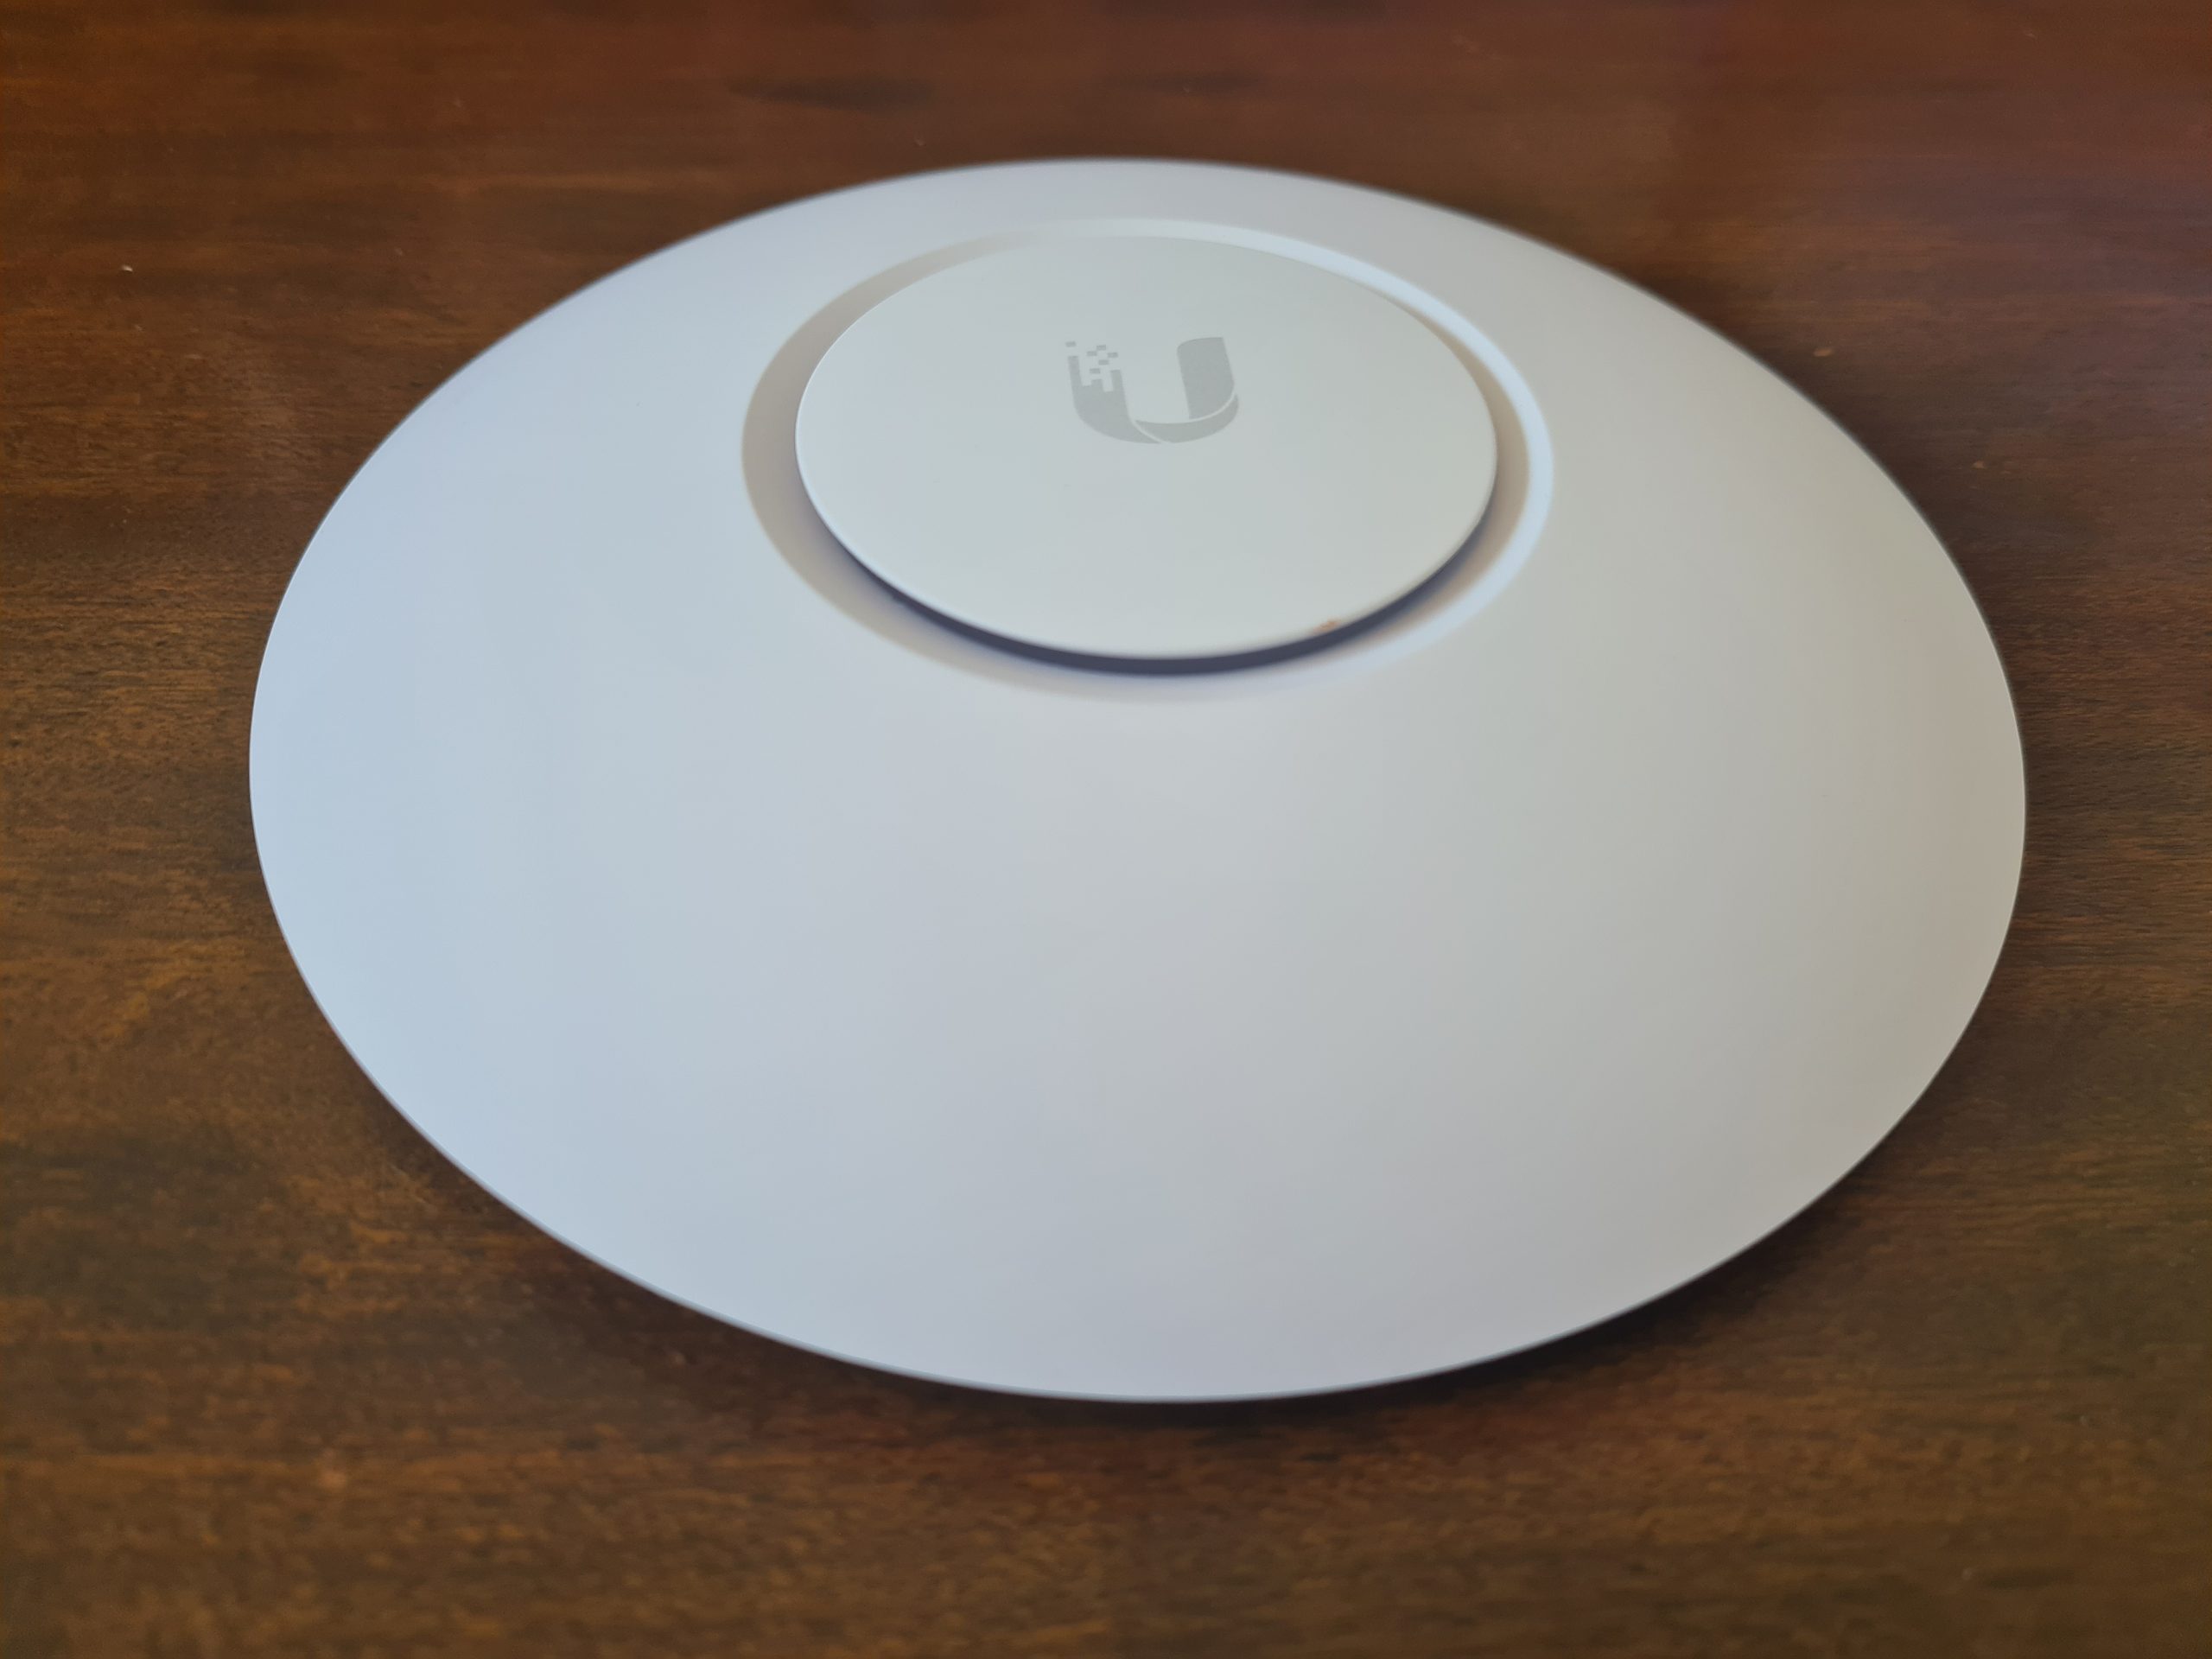
The device only has a single port and that is the RJ-45 port that allows you to connect the device to your network. And this is important as we briefly touched on earlier. This very much depends on if your network, or more importantly your managed switch, can support Power over Ethernet PoE technology or not. Depending on your answer to this question to yourself, you should be able to assess how this device is plugged into your network.
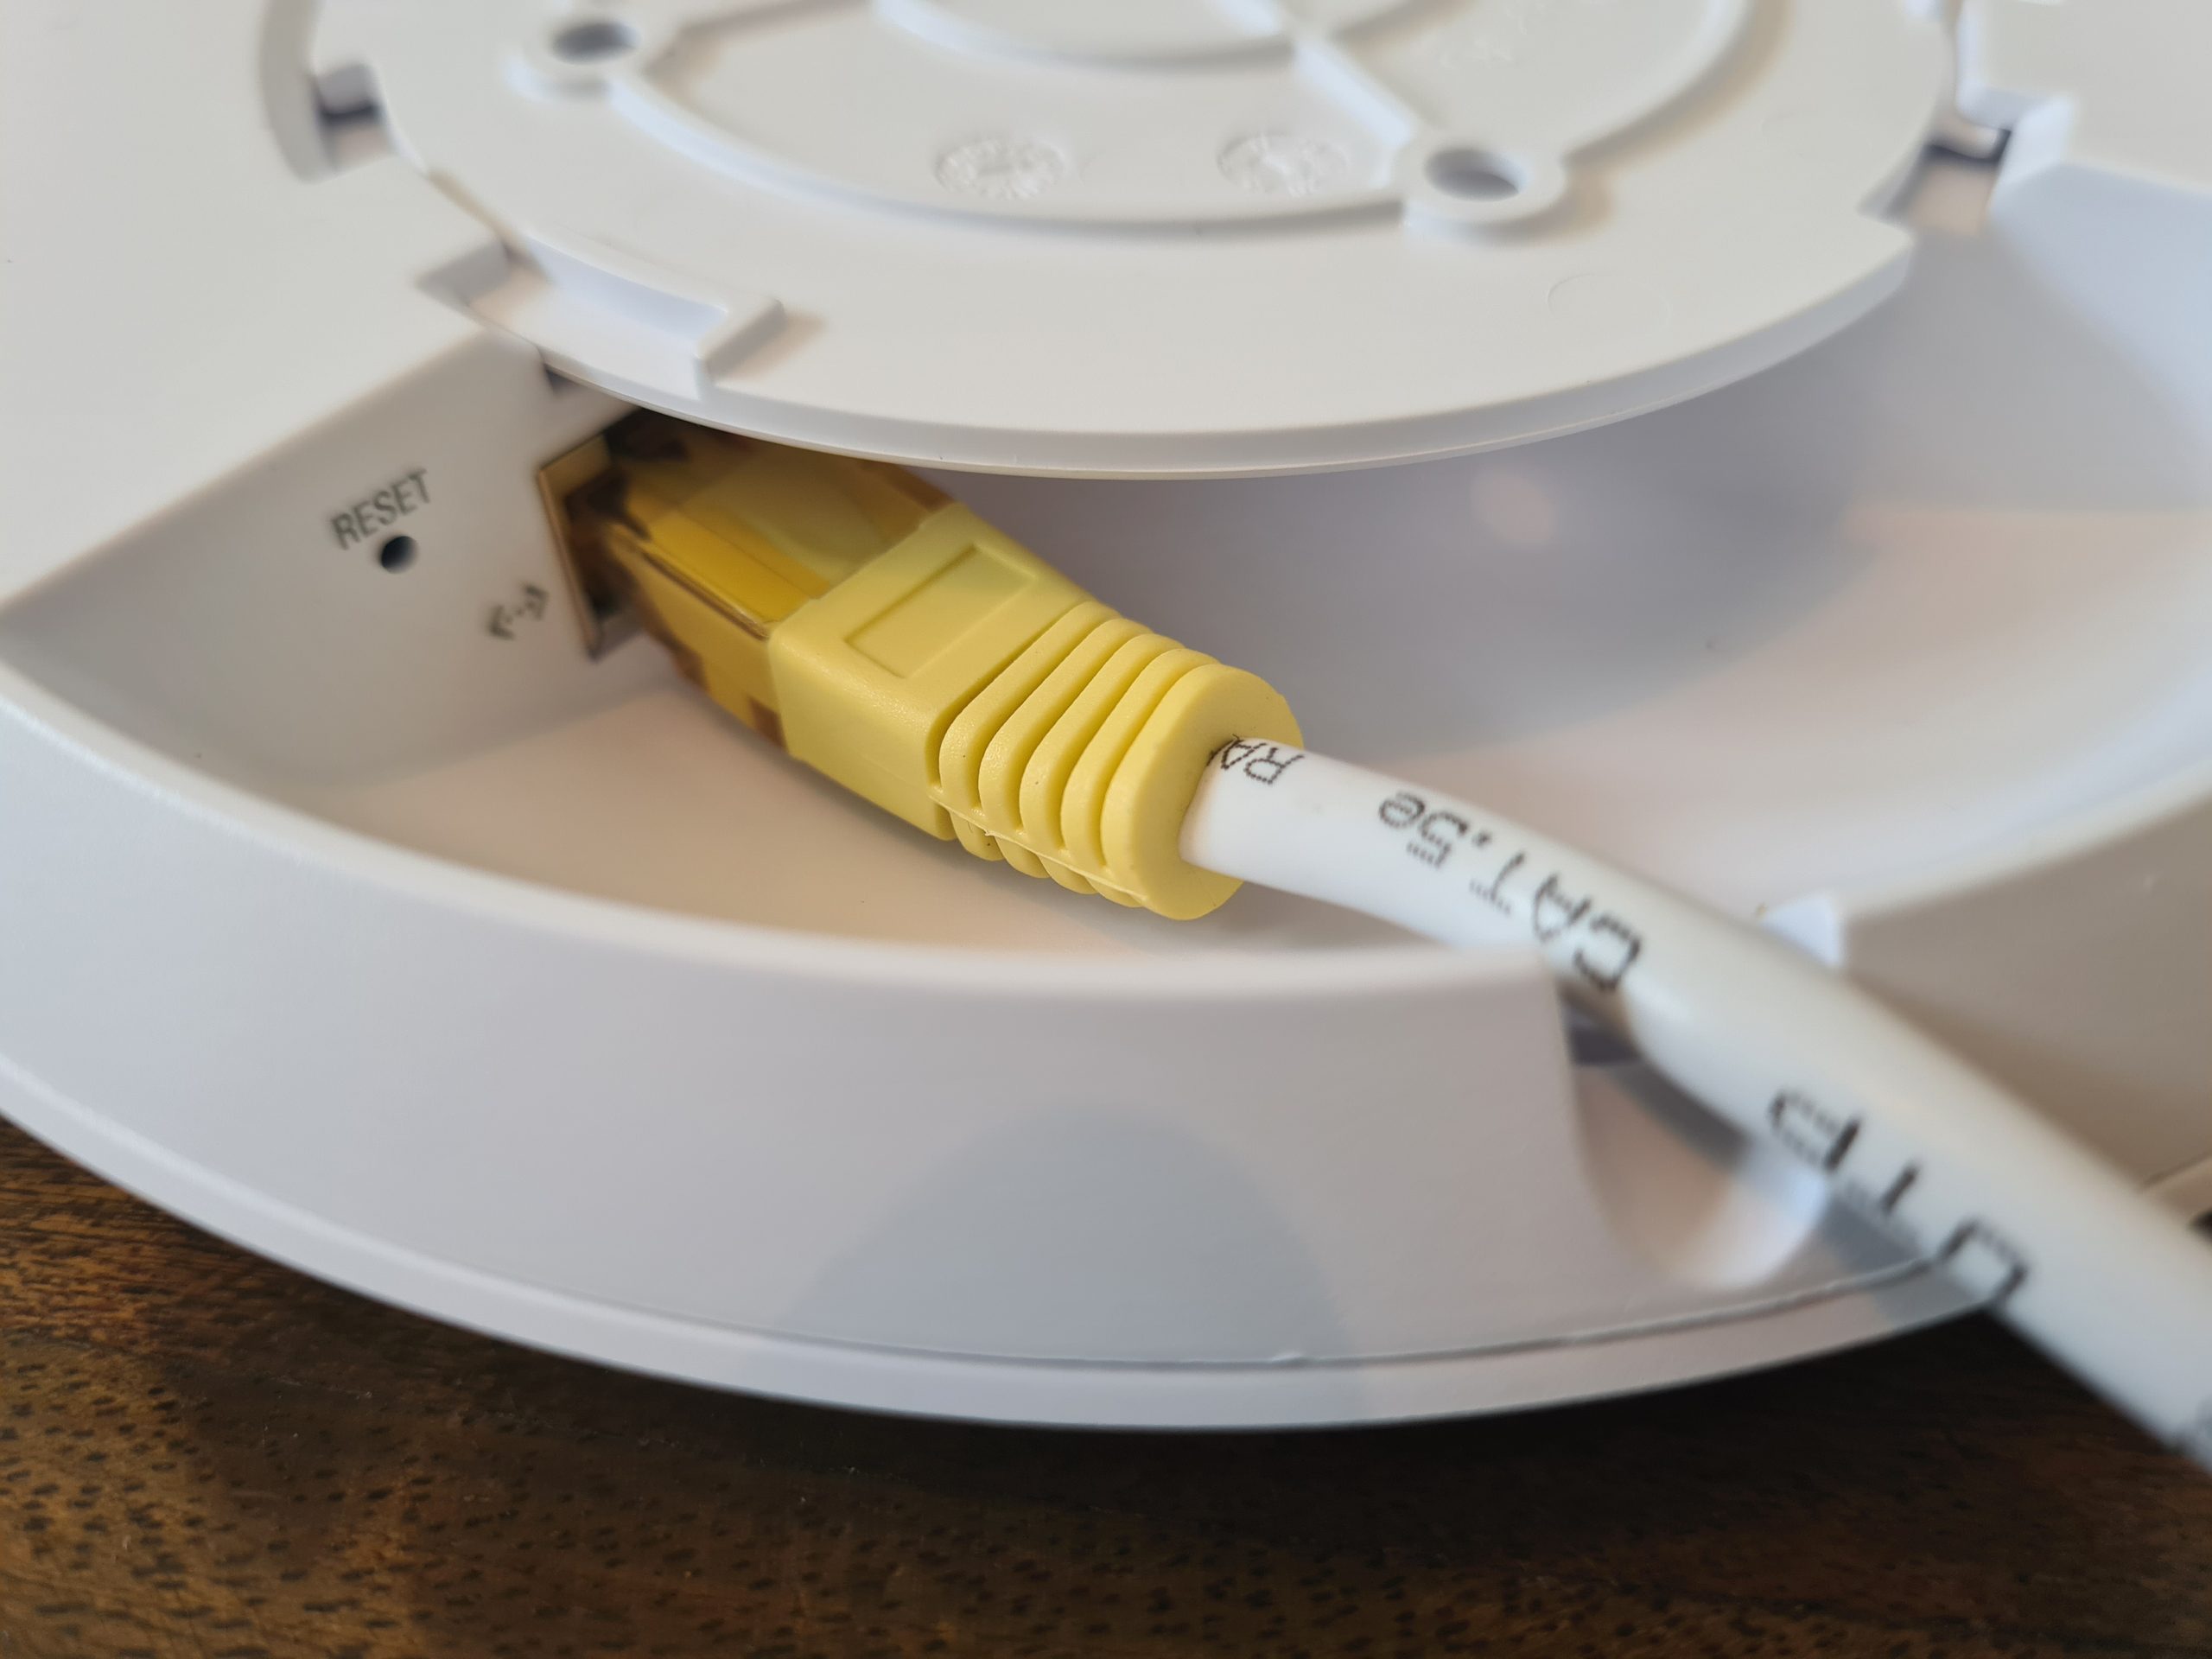
One handy feature is the small notch in the edge of the device that allows the ethernet cable to fit in the notch so the device can lay flat against your wall or ceiling.


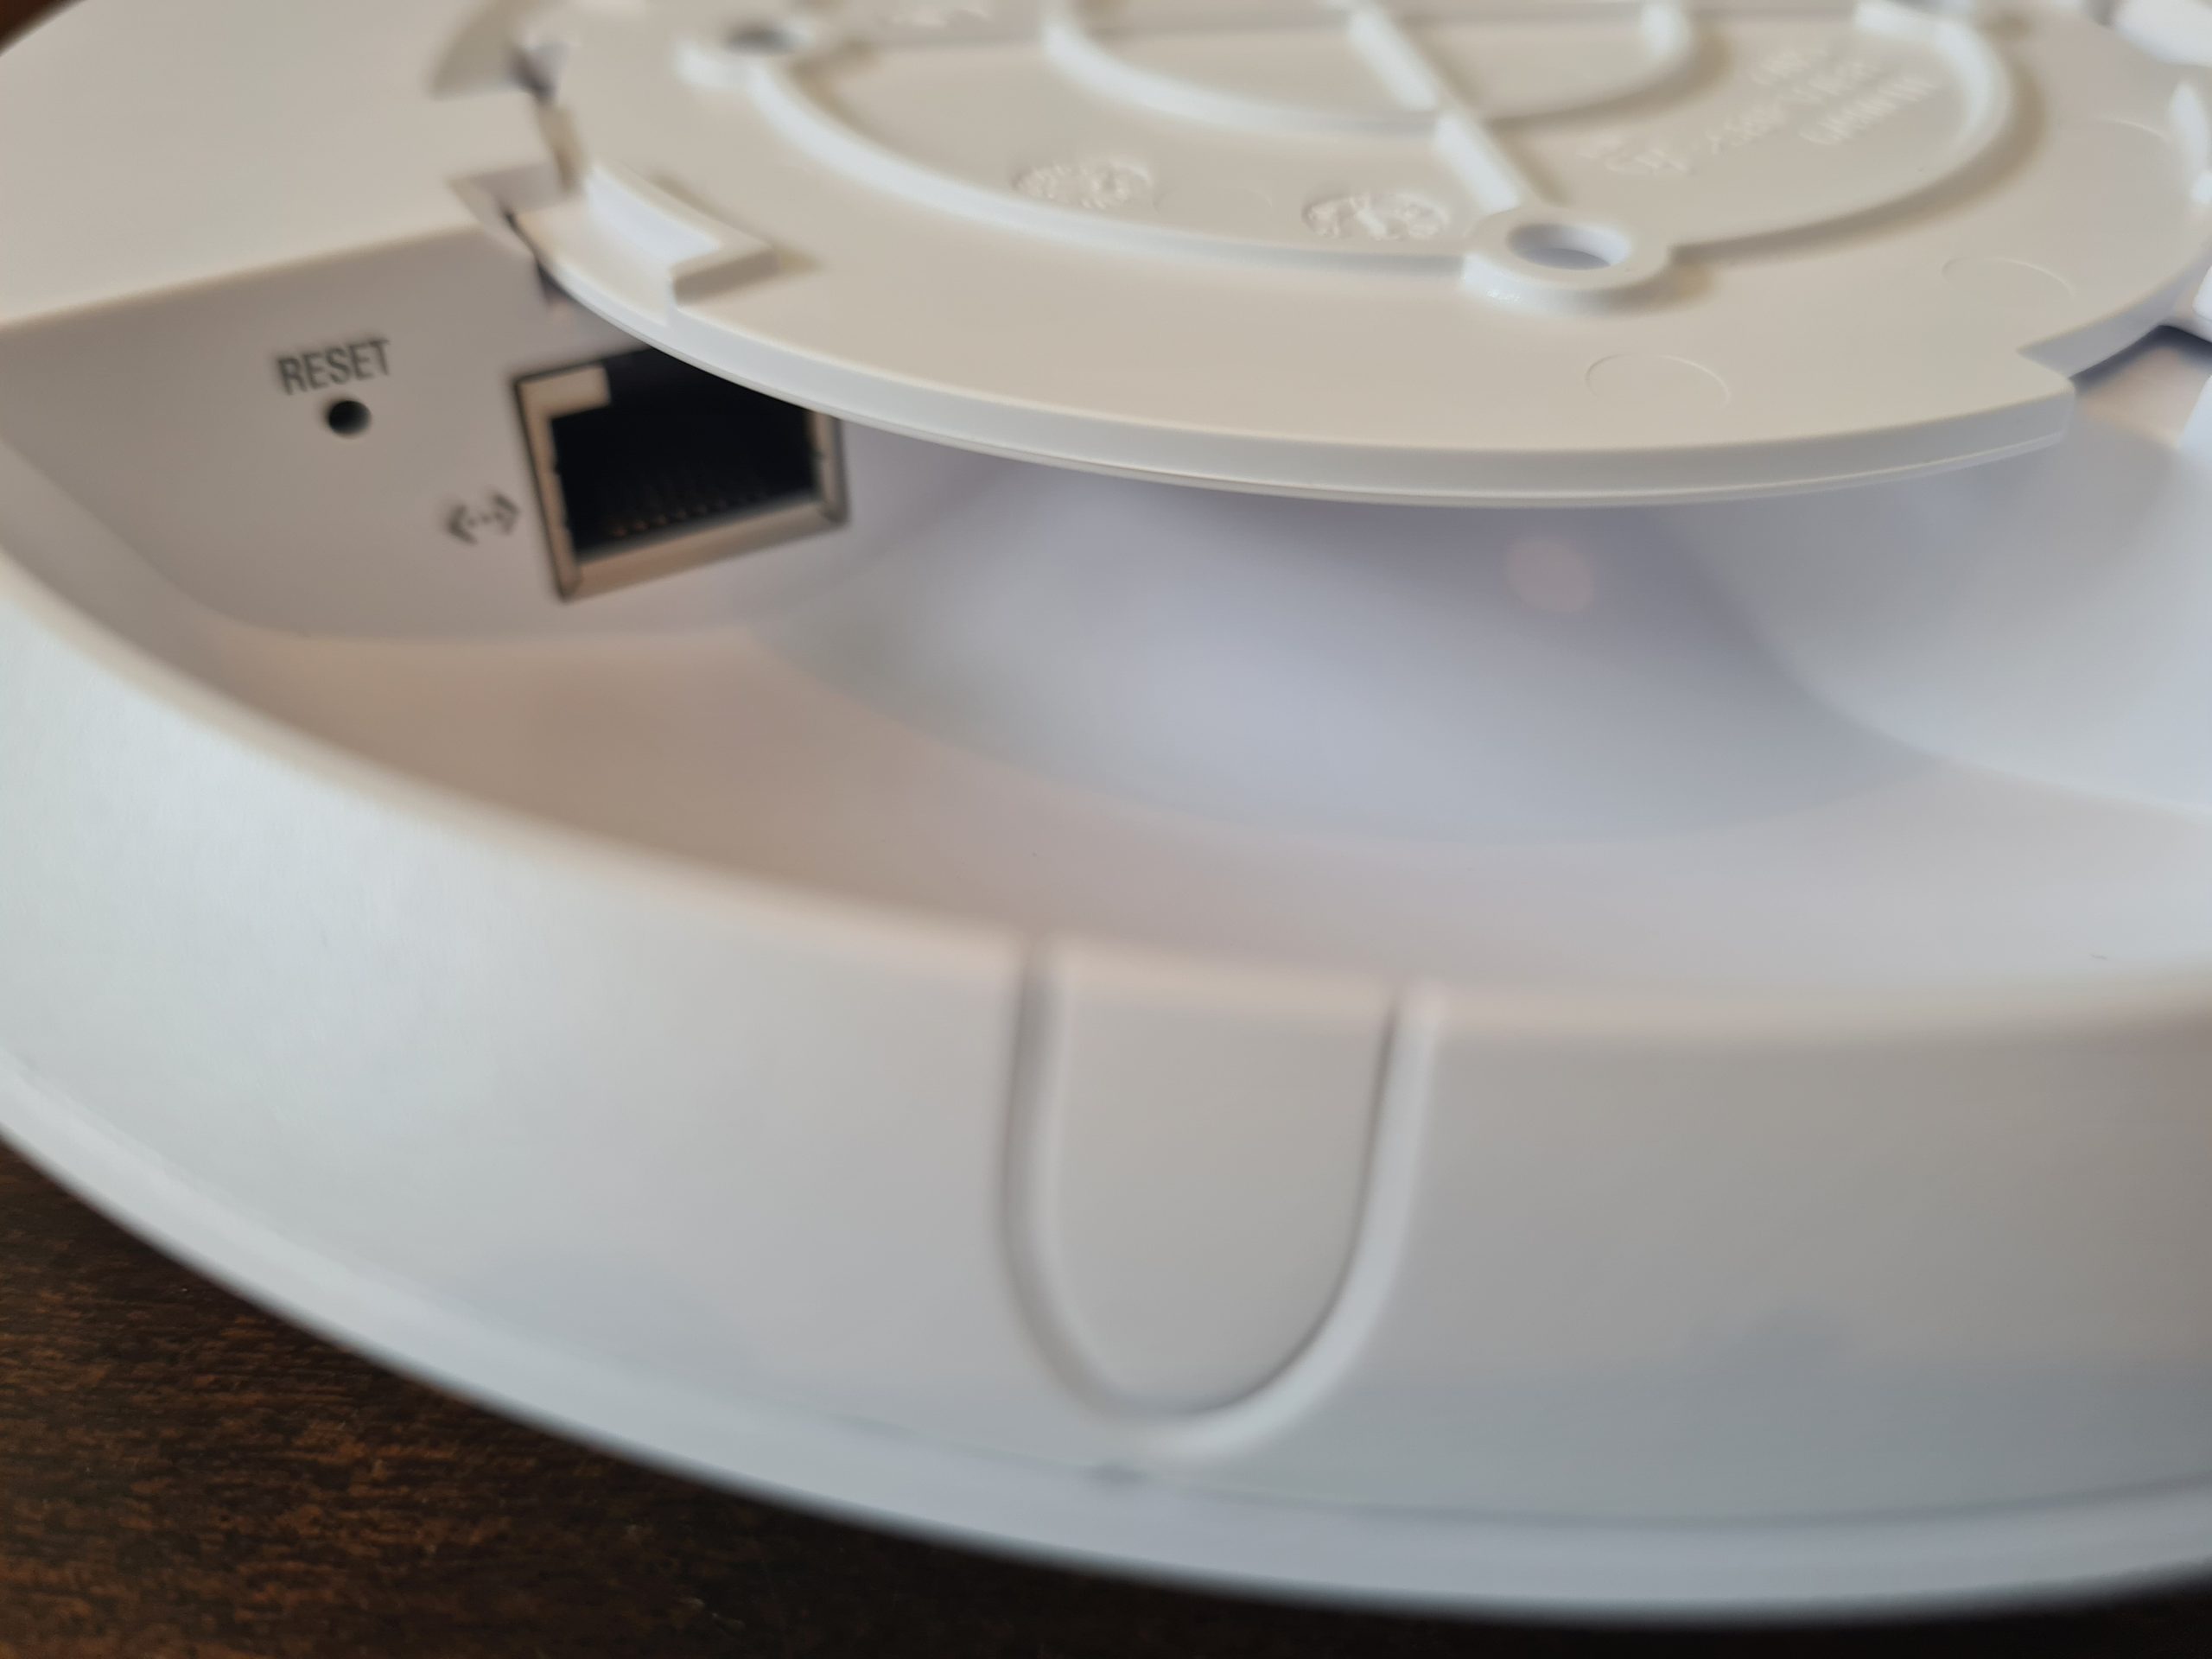
One item to note around how the inner disk connects to the main device is that once it is in place, it’s very tight to remove. When you are removing this when it isn’t wall mounted, this isn’t really an issue as you can easily get a small screwdriver or knife to unclip it. But you’ll notice that once this is connected to the wall or ceiling, you’ve only got a really tiny gap to get something in that is about 2mm tall, 5mm wide, and about 1cm deep – so you’ll probably need something like a paperclip to unhinge this once it’s connected to the wall.
Below you’ll see the Power over Ethernet (PoE) device.

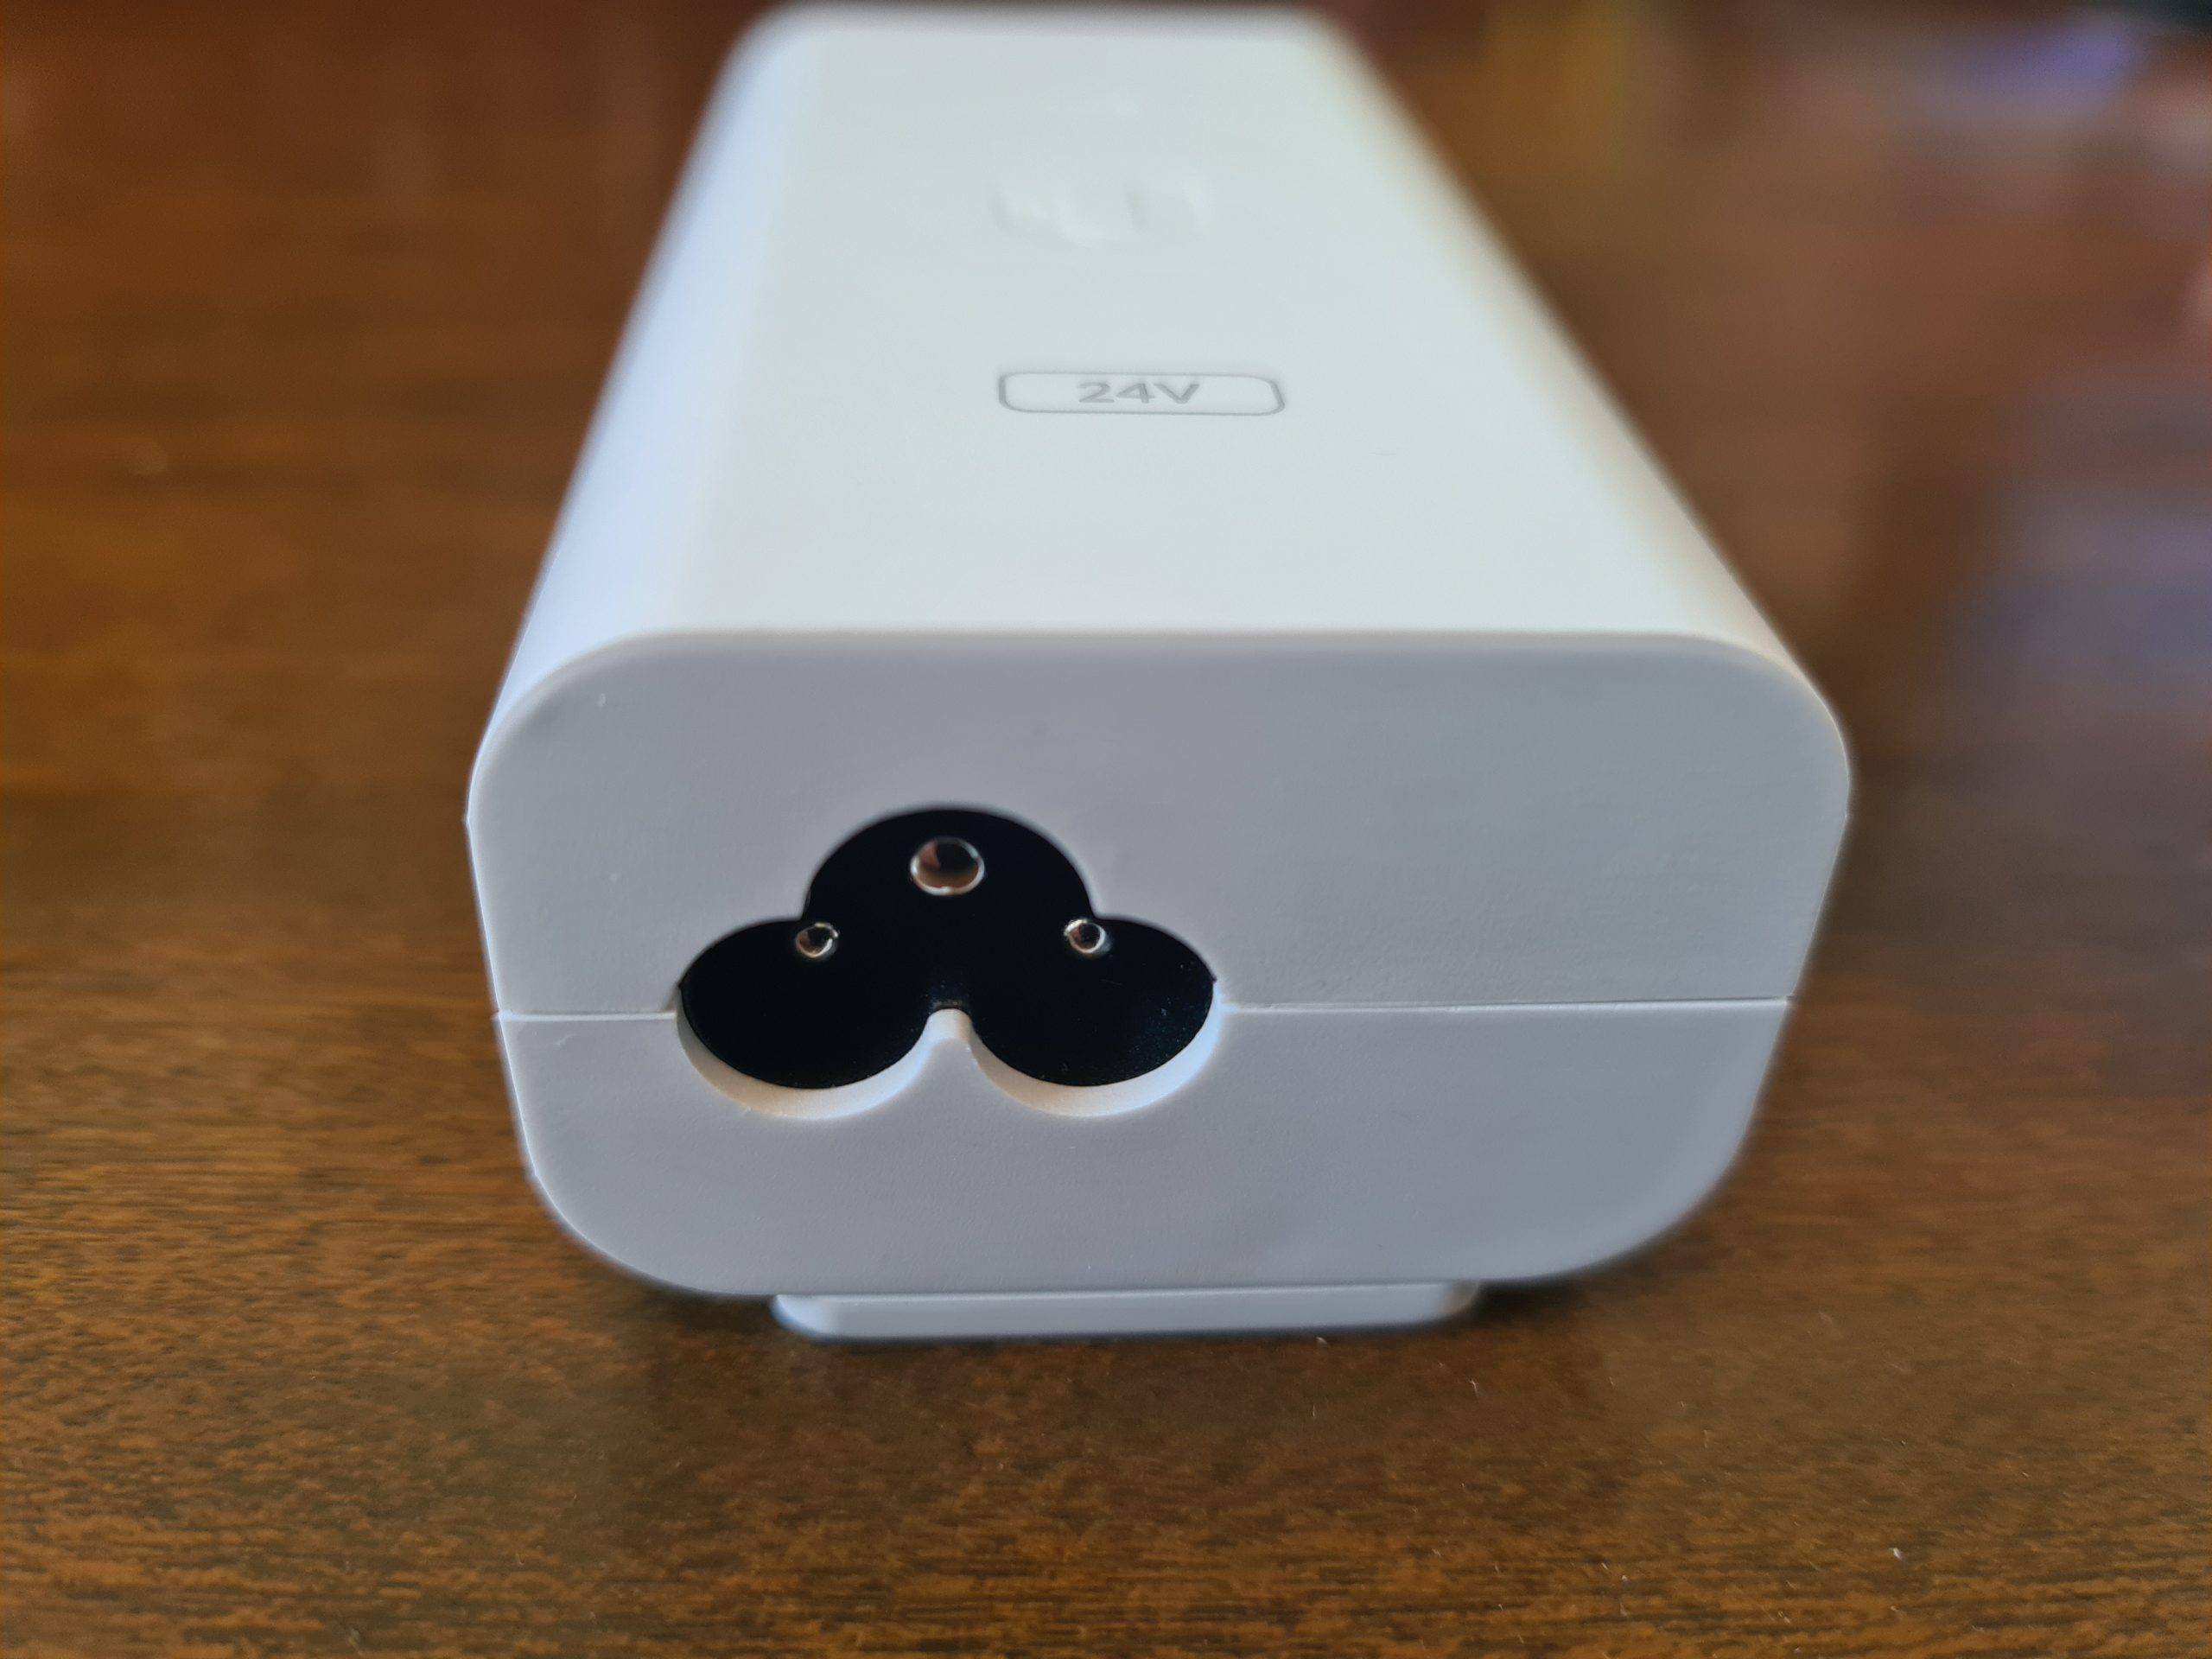
For connecting your PoE device to your UniFi AP-AC-Lite wireless access point, you’ll need to make sure you plug the ethernet cable into the PoE port on the left as that one contains power. The LAN port is where you plug in your ethernet cable that connects to your switch or router or firewall. If you have a managed switch with PoE ports, then you don’t even need to use this device unless you’re running our of power availability. But it’s nice that they have this as an option straight out of the box for you.
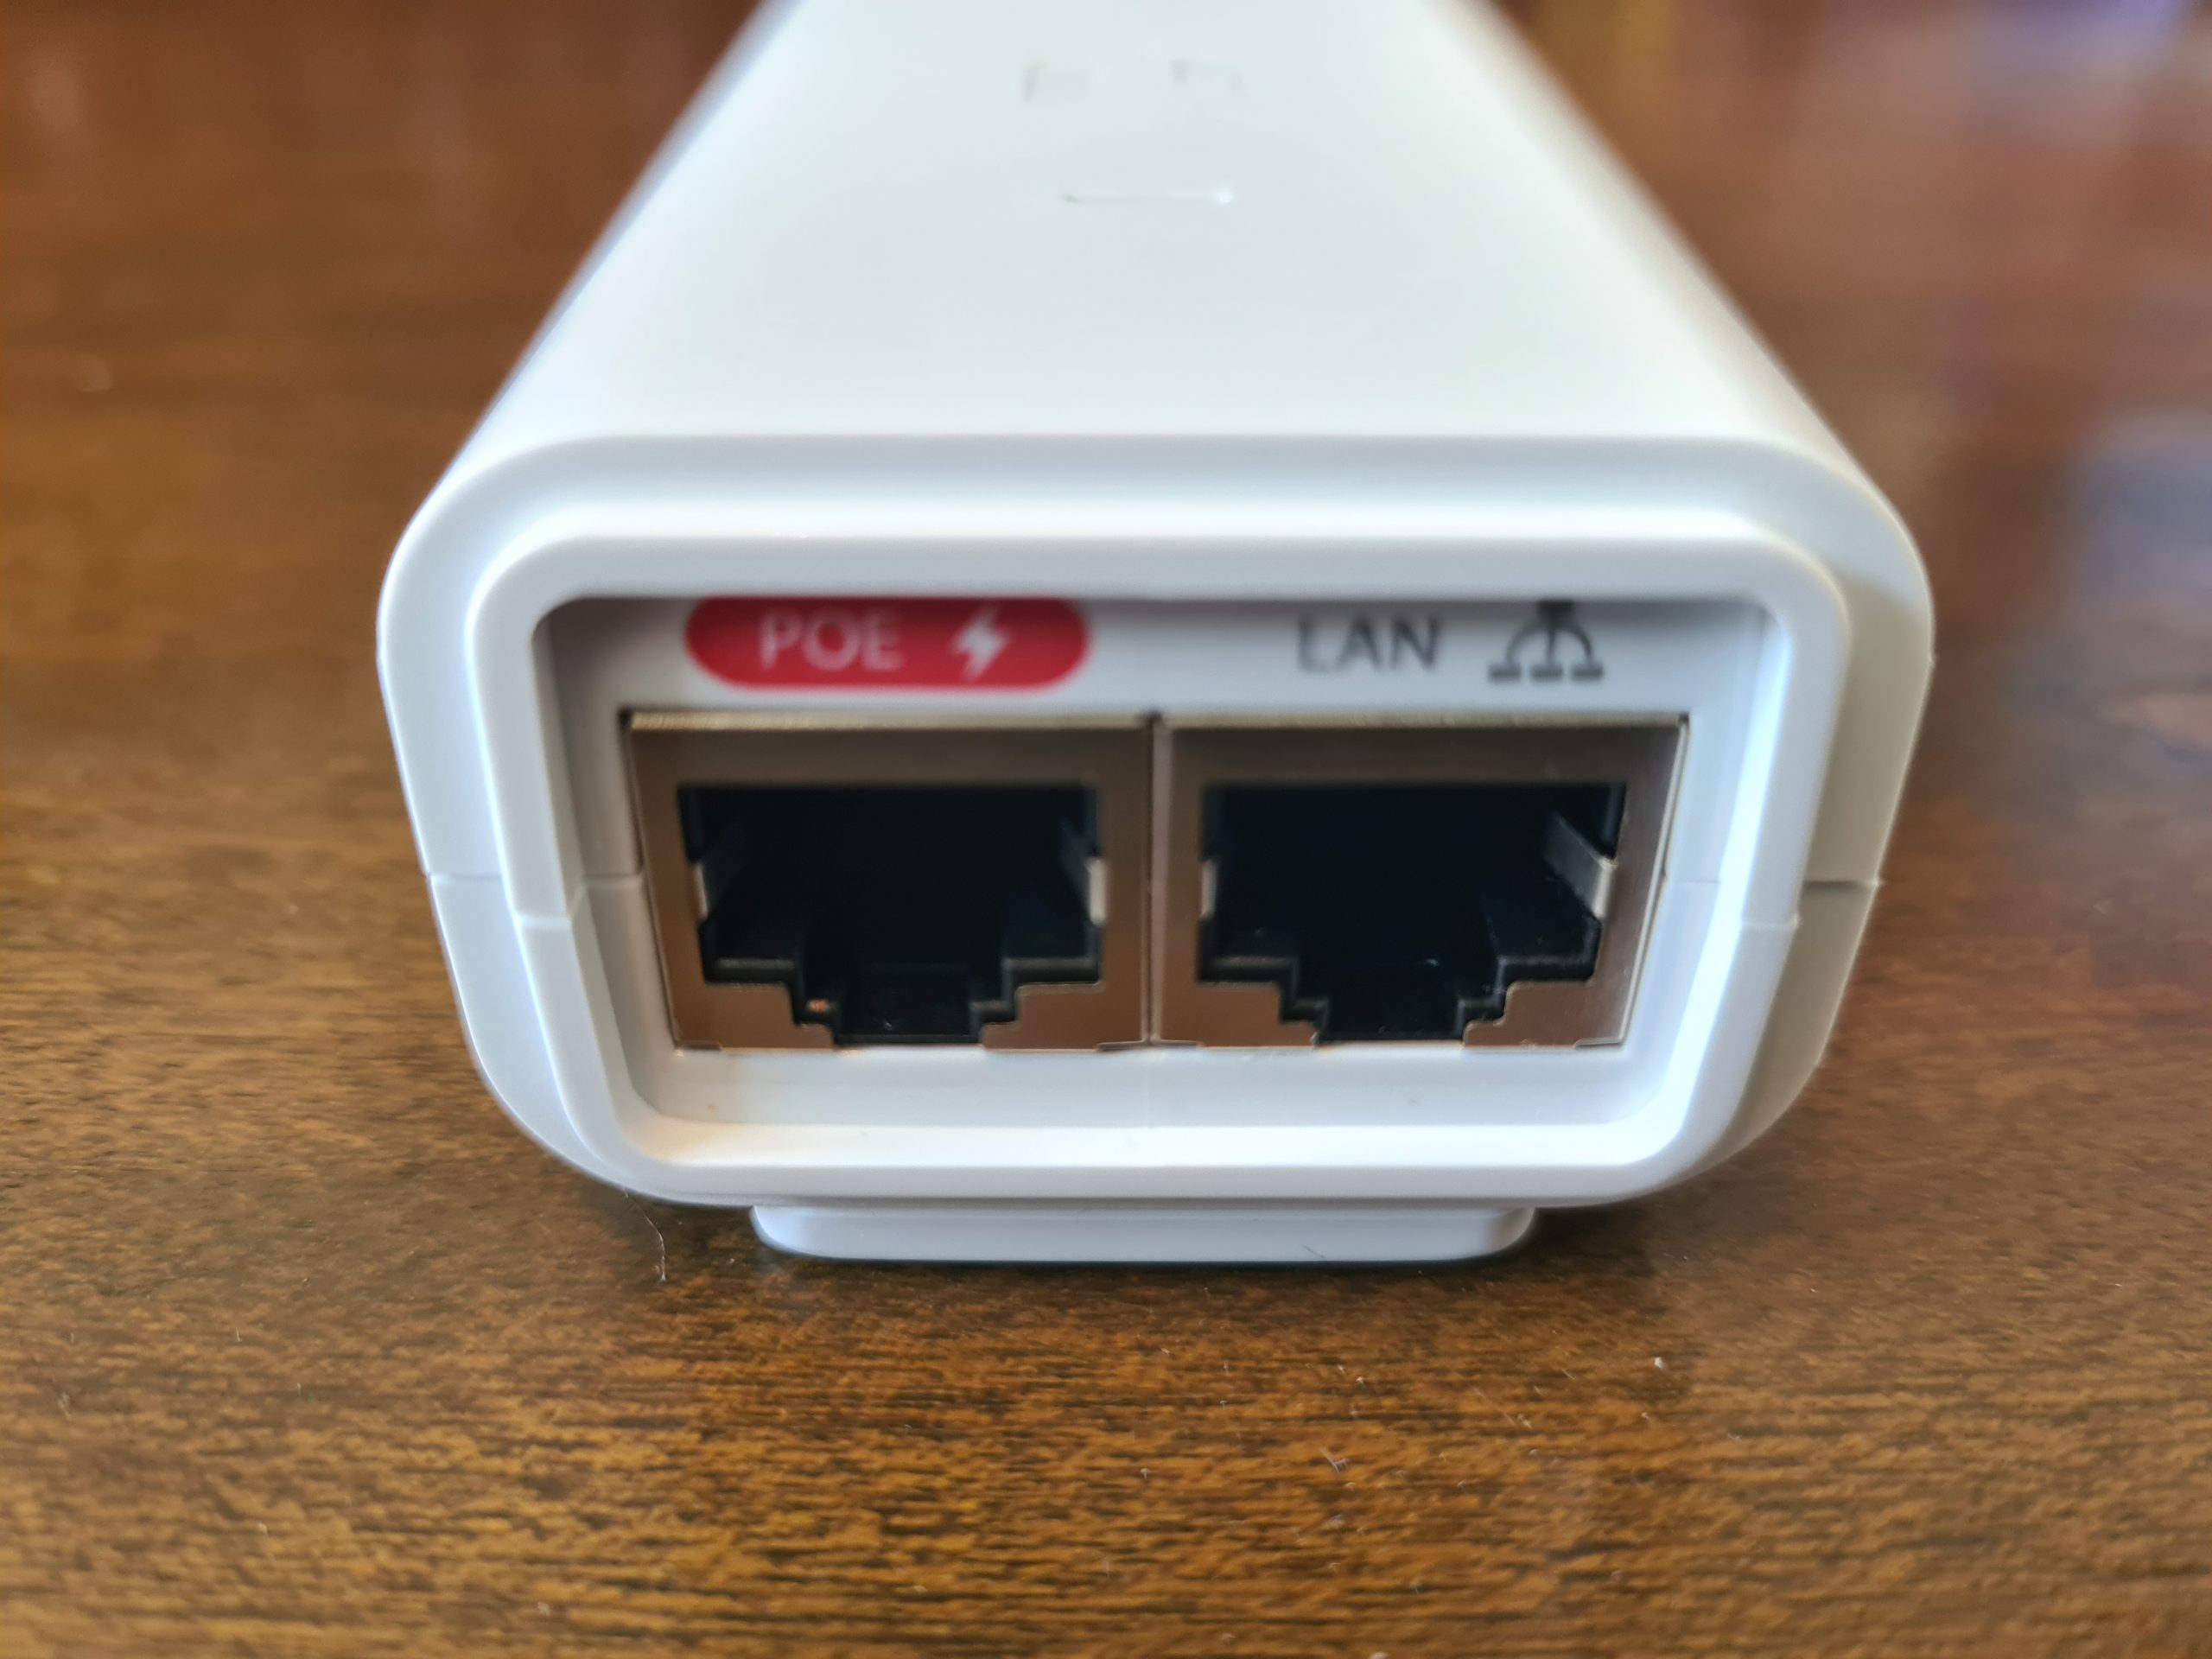
Another USA power lead going onto eBay…. 🙂
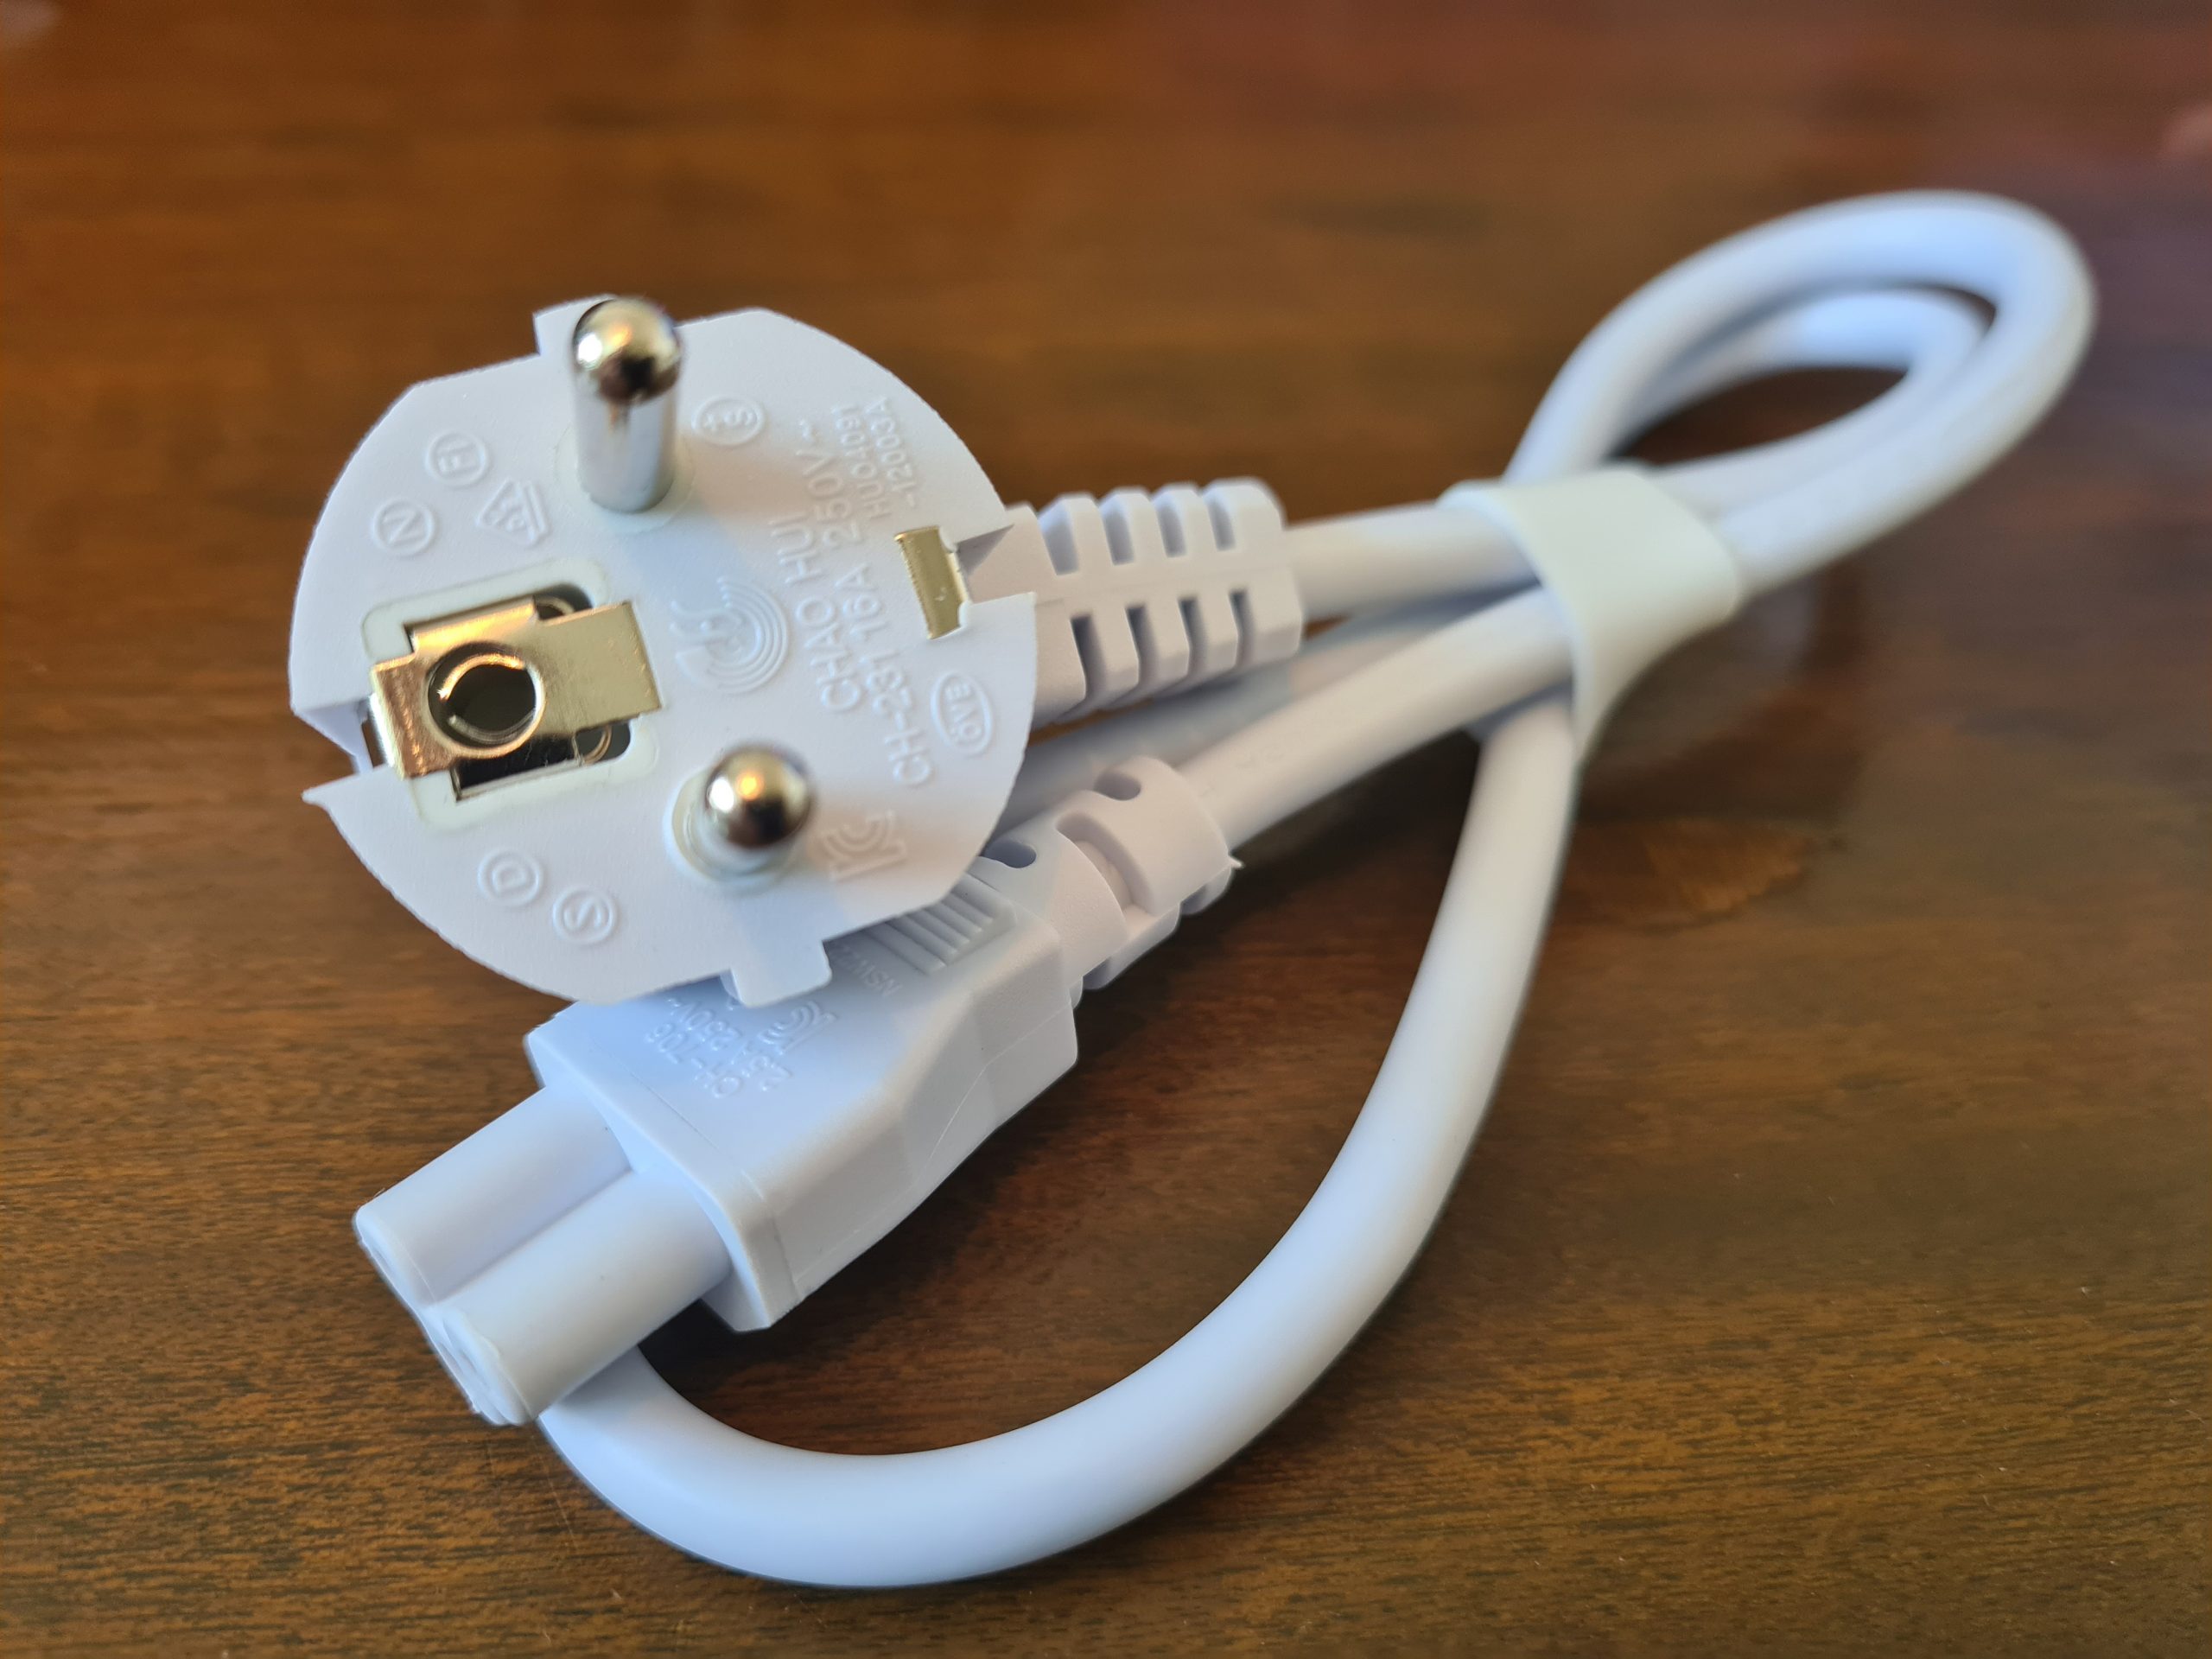
Ok, so that’s all the contents of the box for your new UniFi AP-AC-Lite wireless access point.
Statistics and Data from UniFi AP-AC-Lite Wireless Access Point via UniFi Controller
For completeness, let’s look at some of the handy bits of data that you can see within your UniFi Controller software against your wireless access point once you’ve got it plugged in and configured.
WiFi Traffic Distribution Statistics

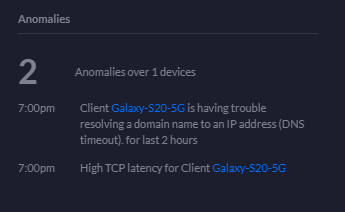
Anomalies Statistics
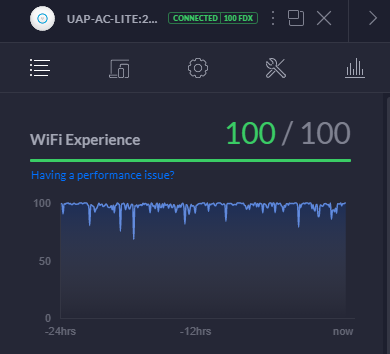
WiFi Experience Statistics
WiFi Clients Chart

Uplink Statistics
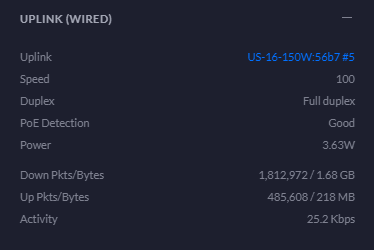
Time to Associate Graph

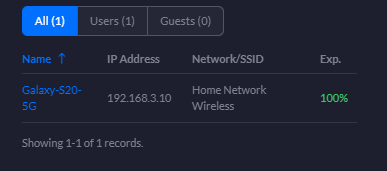
Showing Devices Connected to wireless access point
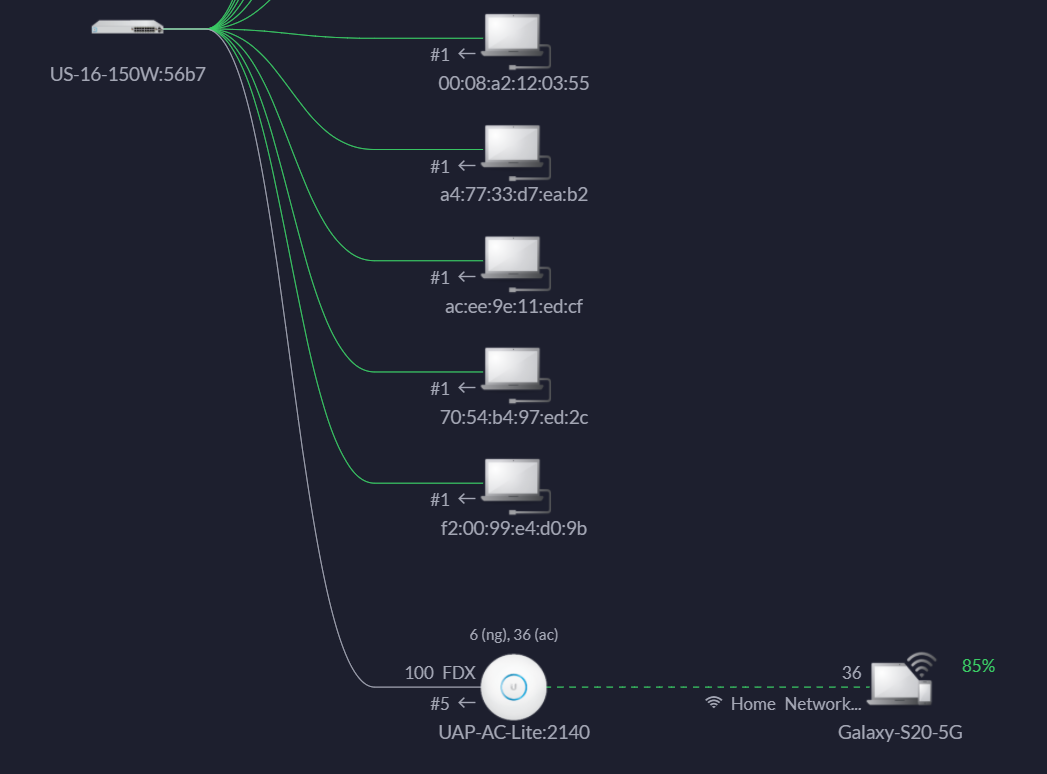
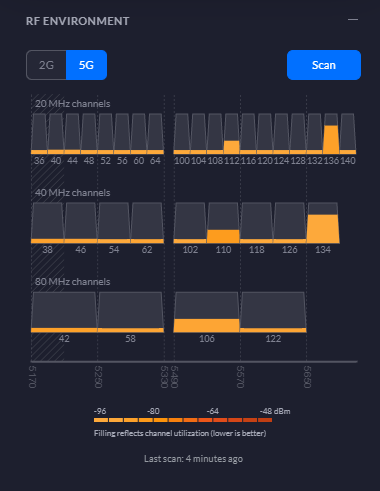
RF Environment 5G Statistics
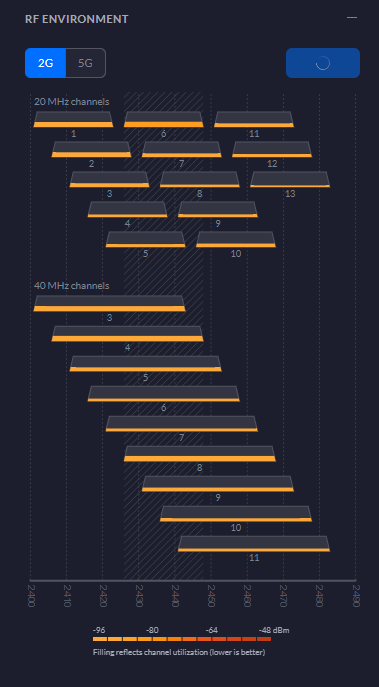
RF Environment 2G Statistics
Access Point Retry Rate Chart

Radios Statistics
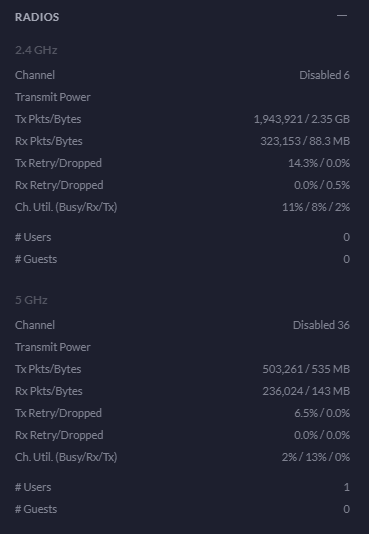
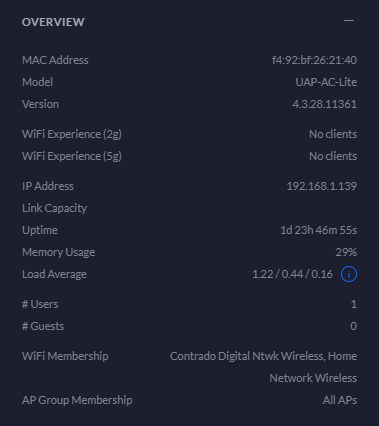
Overview Statistics
Dropped Packets Chart

CPU and Memory Usage Chart
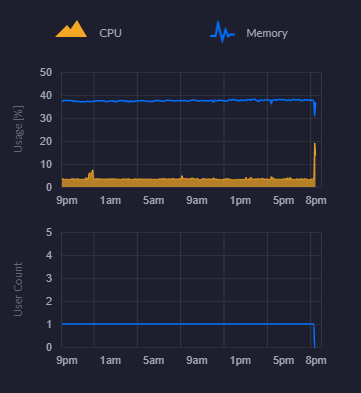
Connected Clients Statistics
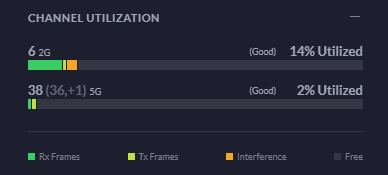
Channel Utilisation Statistics
This is a really handy piece of information from a planning perspective. You can easily use this information to plan your capacity based on real world usage. As you start to reach the higher limits of the hardware, it’s time to start planning an upgrade to hardware that is better suited to larger numbers of users. For context, the chart below is with a single mobile device connected.
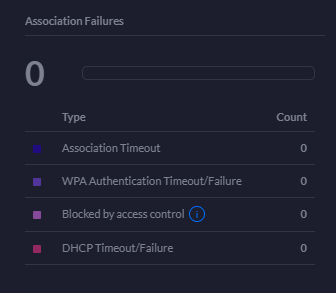
Association Failures Statistics
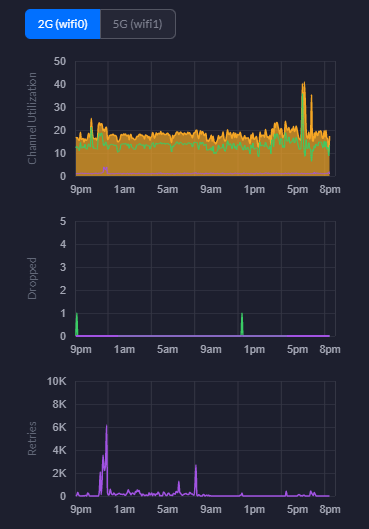
2G WiFi Charts – Channel Utilisation, Dropped Packets, Retries
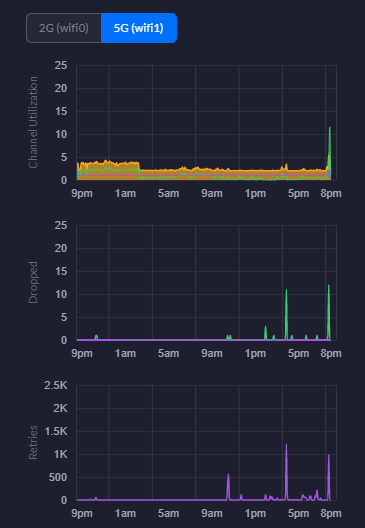
5G WiFi Charts – Channel Utilisation, Dropped Packets, Retries
Hopefully that gives you a good idea about what’s in the box and what’s out of the box once you’ve got everything set up and configured within your network.
by Michael Cropper | Mar 12, 2021 | Client Friendly, IT, Networking |
In this blog post we’re going to look at how to setup a UniFi managed switch on your network. For simplicity and to help people get started we’re going to assume that this is the first managed switch you are looking to add into your network. We’re also going to assume you’ve got commercial grade modem and router hardware, none of the consumer grade stuff that just doesn’t really work for these types of commercial type setups.
Basic Network Architecture for a UniFi Managed Switch
Ok so let’s assume you’re new to all this networking malarkey, we’re going to take you through how to setup a Ubiquiti UniFi managed switch so you can adopt this on your network. For the purpose of this blog post we’re going to use a very basic base level architecture;
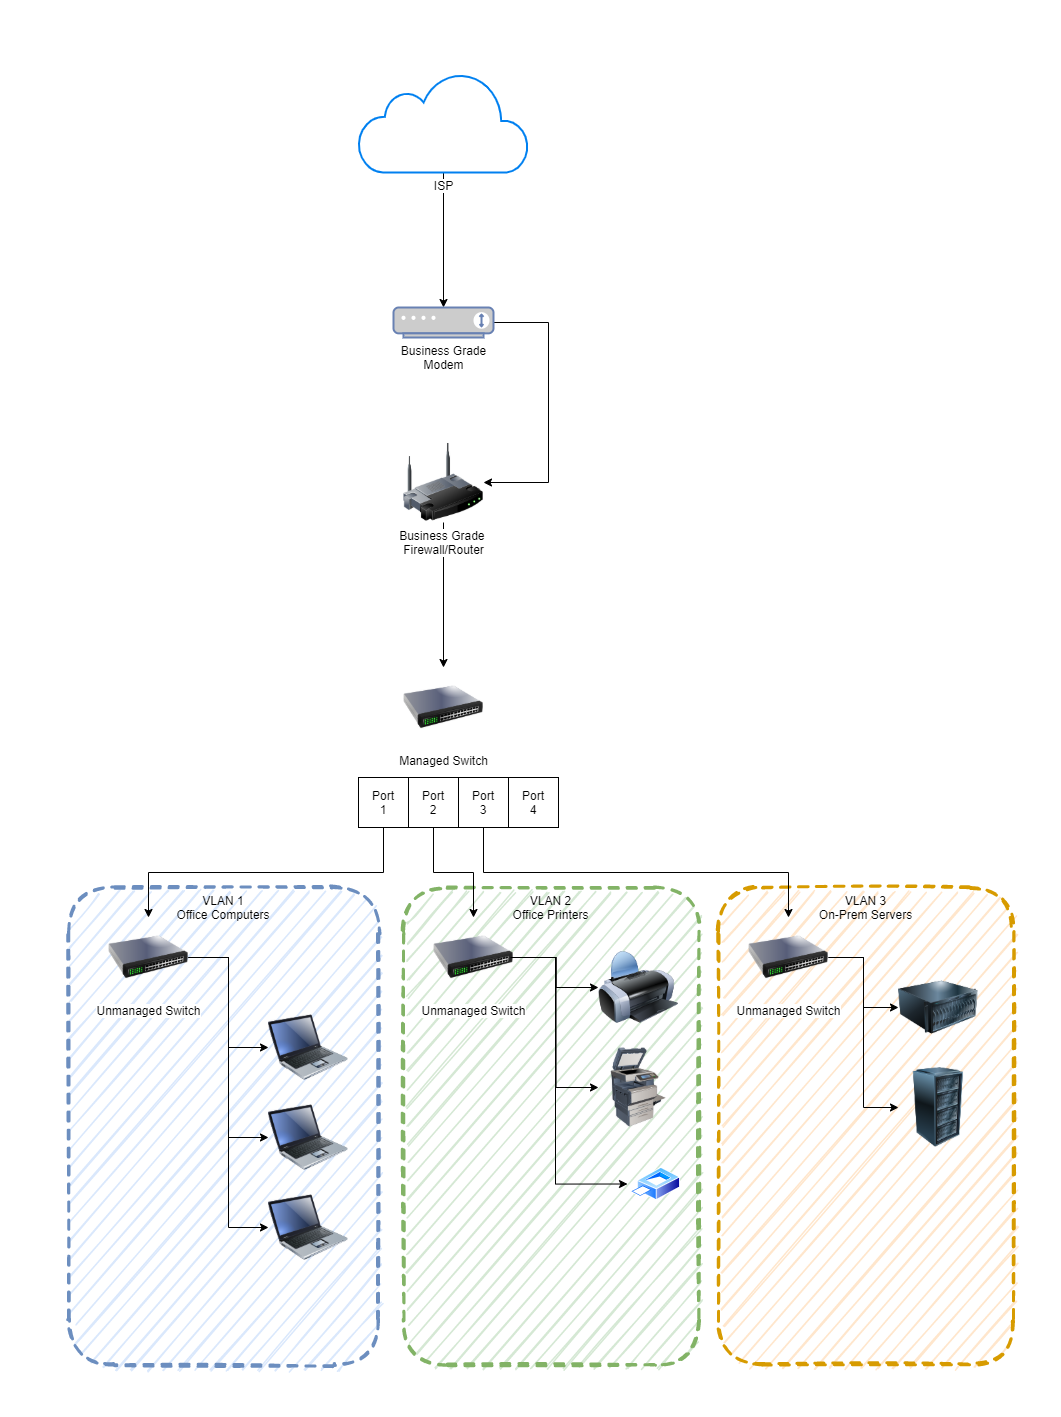
As you can see in the image above, the managed switch is bang in the centre. This is the Ubiquiti UniFi managed switch. Before we jump into how to get this set up and plugged into your network, if you aren’t sure about the differences, then we’ve done a blog post so you can easily understand What is the Difference Between a Managed Switch VS an Unmanaged Switch, have a read over that if you need a refresher.
Physical Ubiquiti UniFi Managed Switch Hardware
What we are working with here is basically this device;
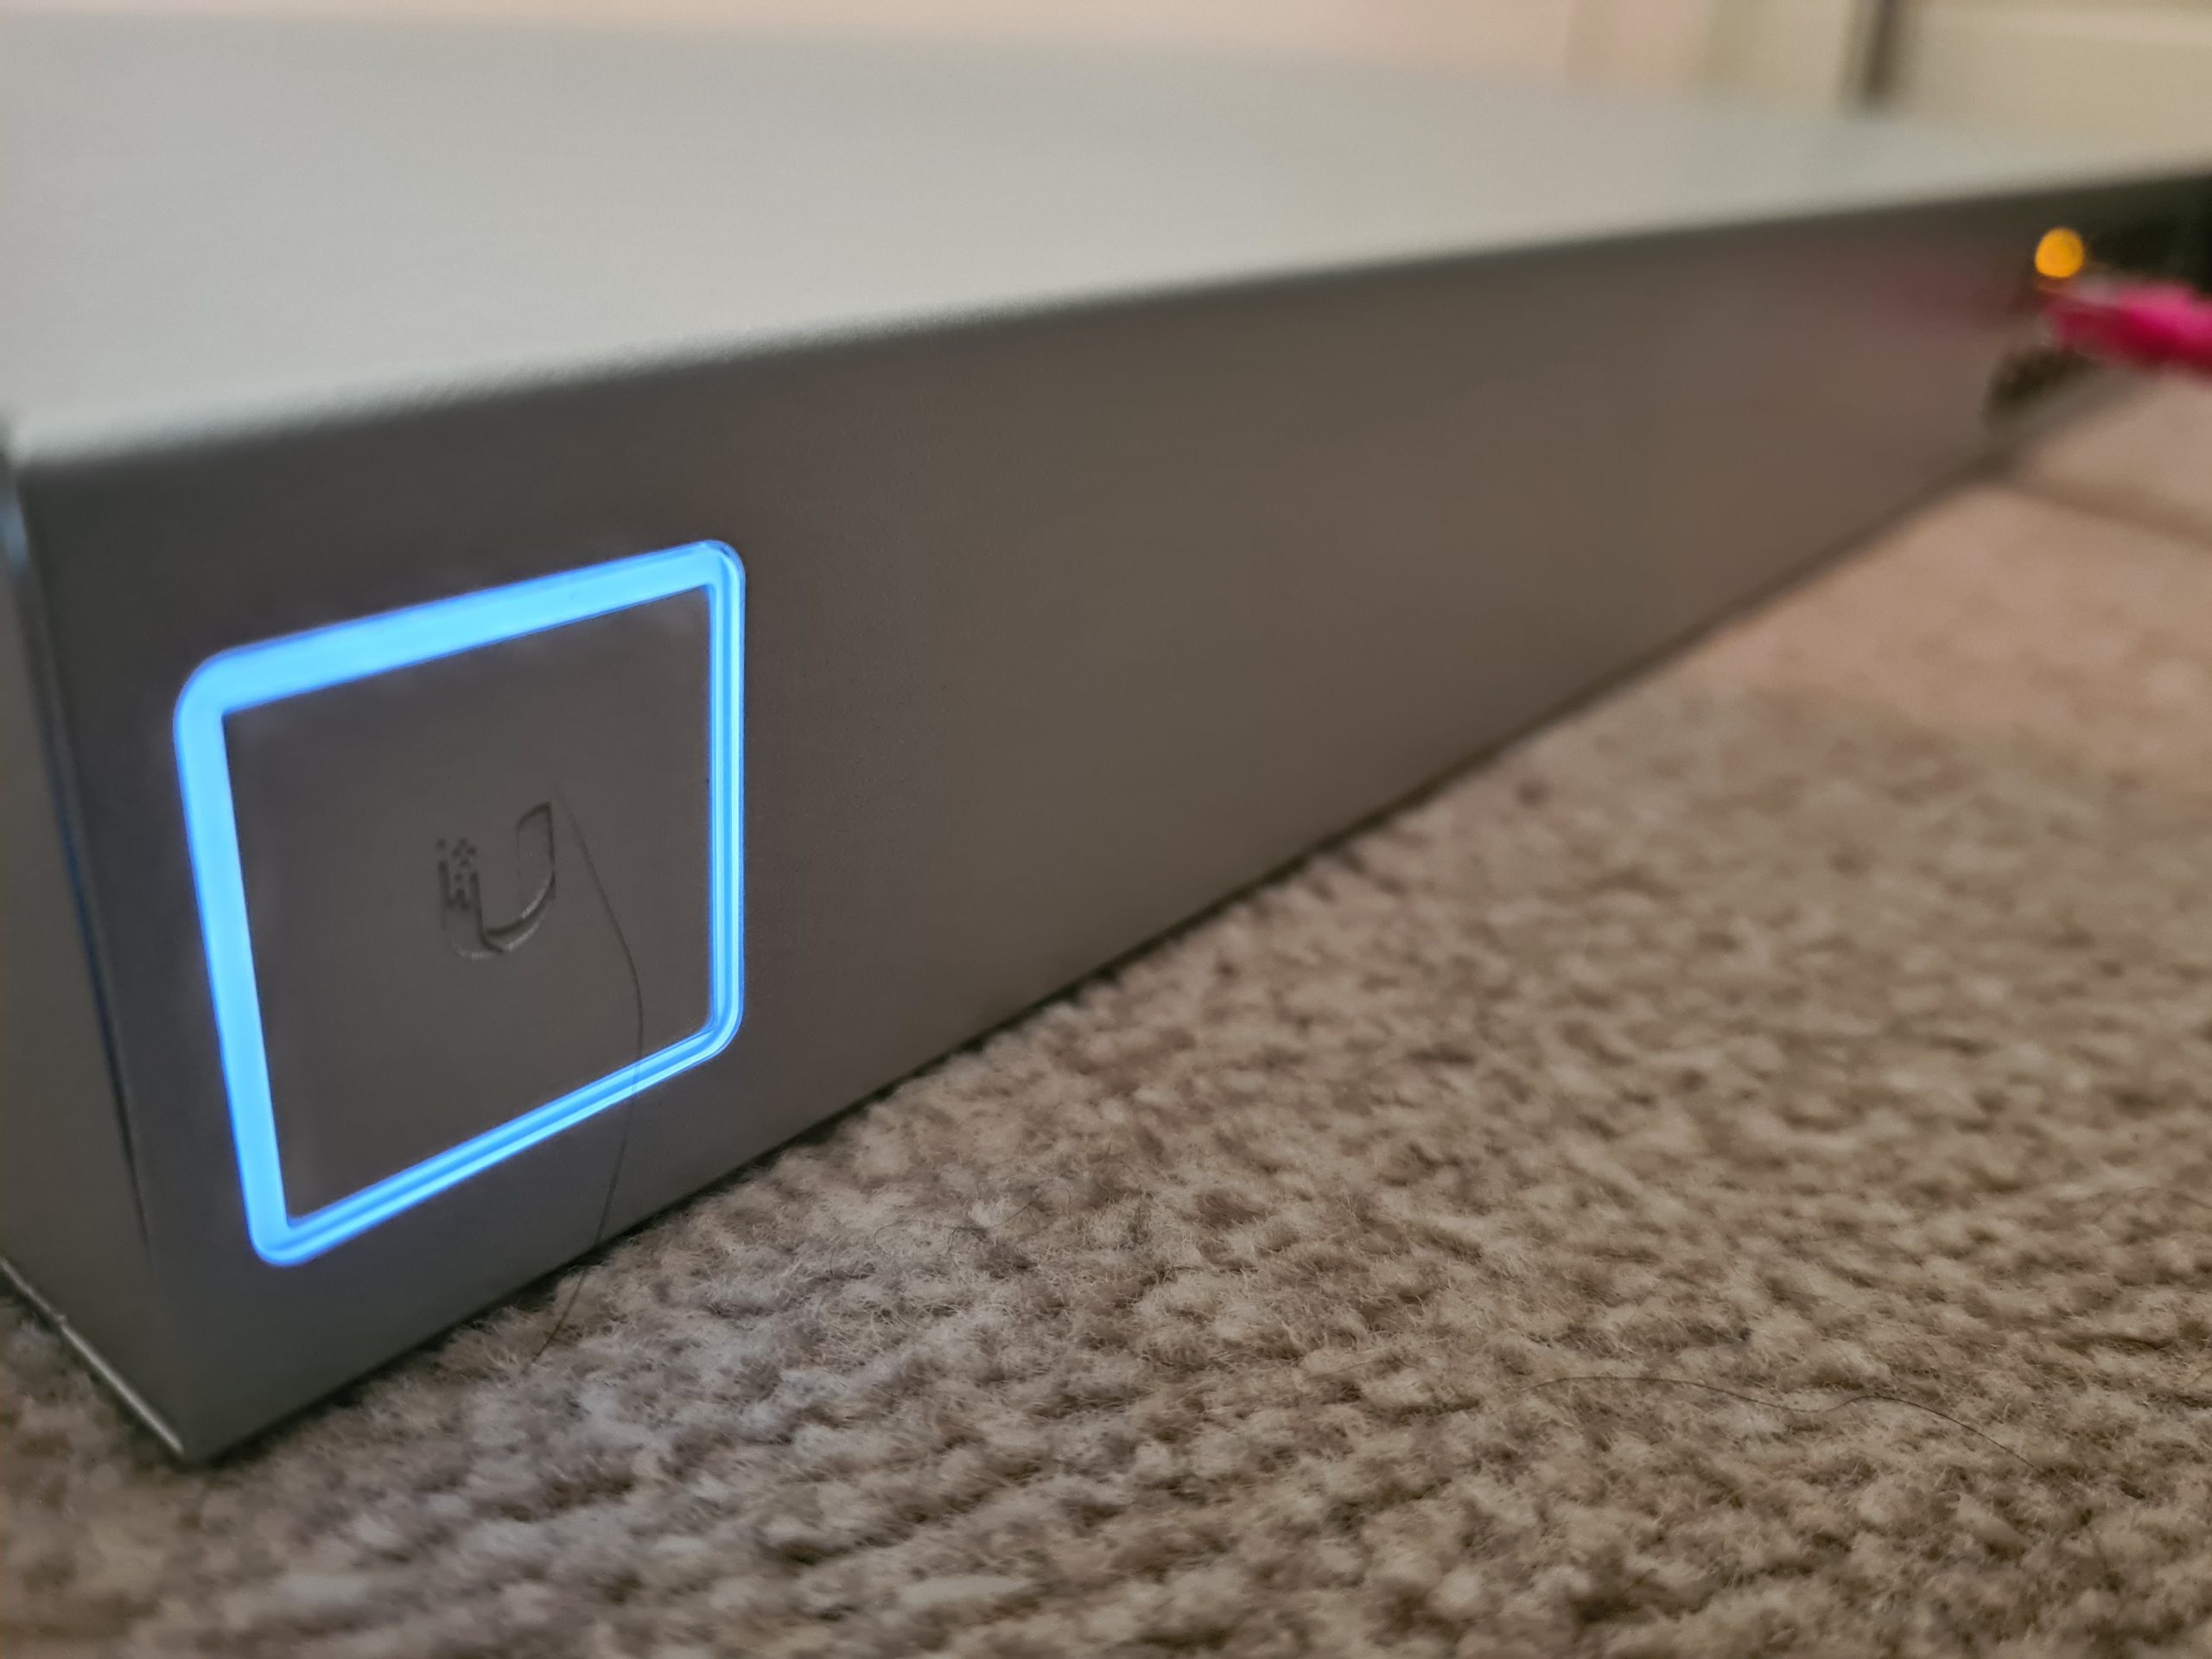
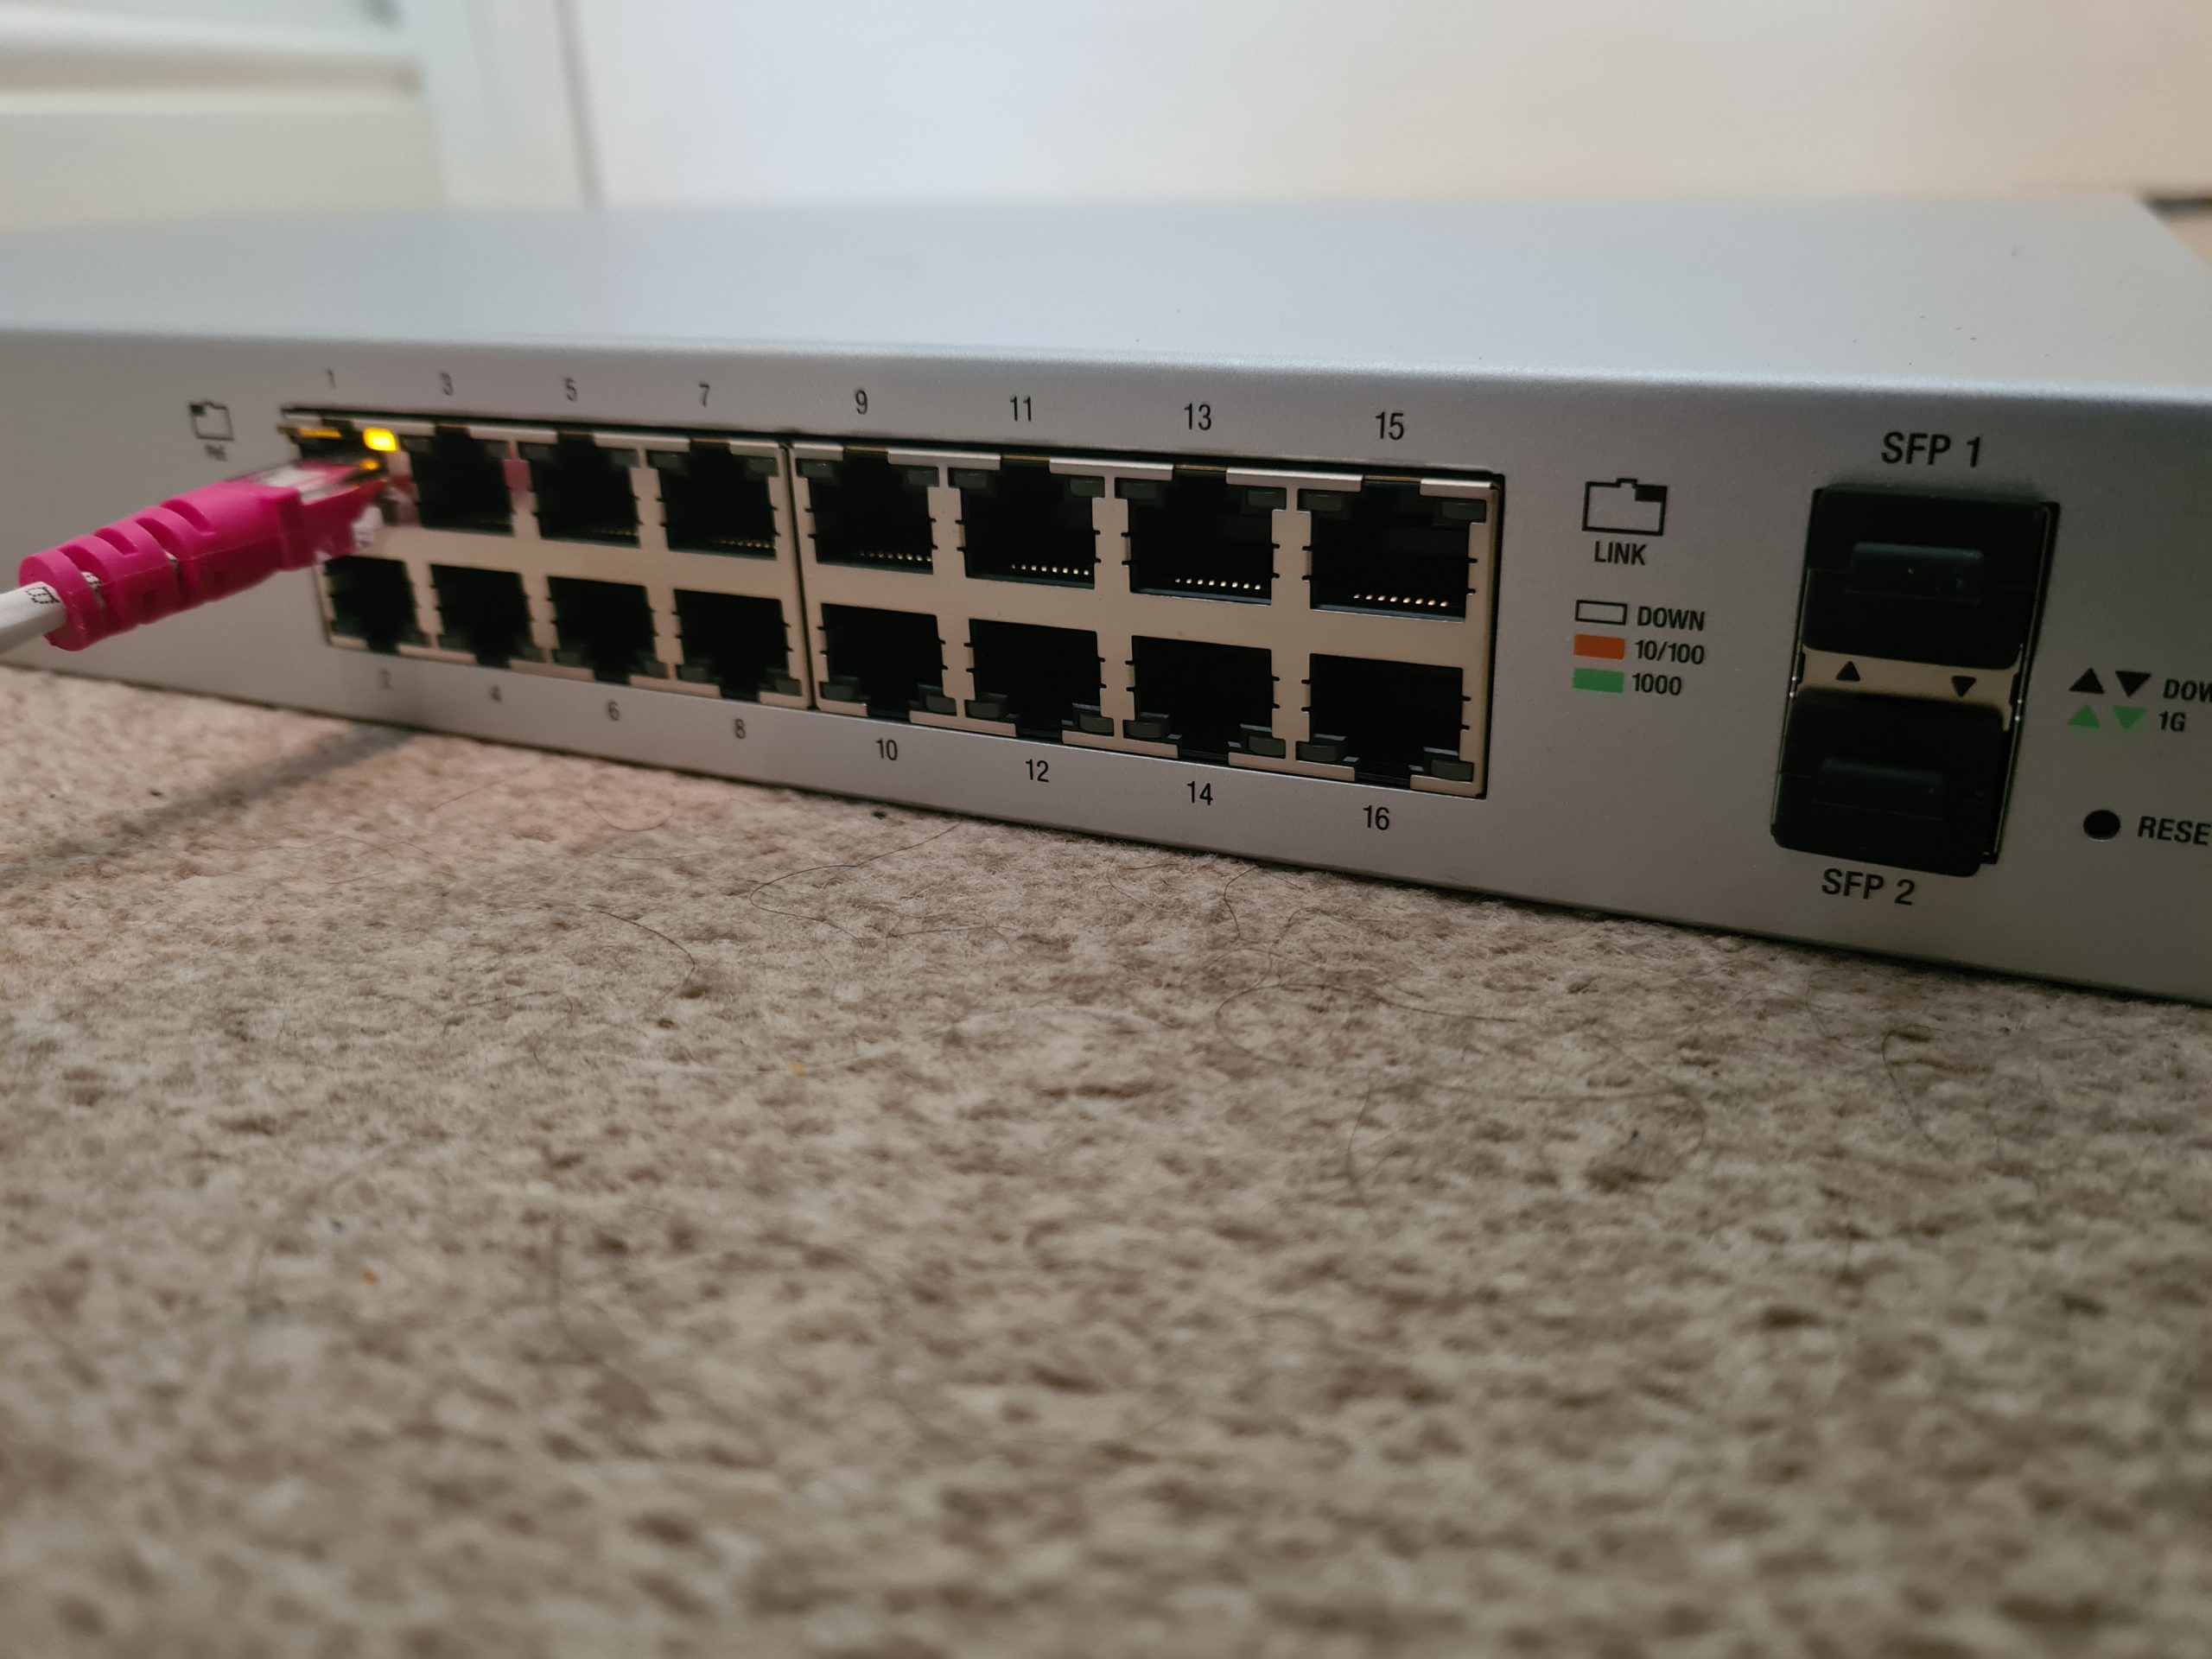
First of all, to get started simply plug the managed switch into your network. We’re assuming here that you’re currently working with a flat network so everything can see everything. You’re going to need to make sure you’re plugging the managed switch into the correct part of your network if you’re already got other managed switches and VLANs set up all over the place. But we’ll skip over that added complexity for the purpose of simplicity in this blog post.
Check UniFi Managed Switch is Showing in Firewall/Router
Ok, so now you’re plugged in, you need to head over to your Firewall/Router Admin screen and view the devices on the network. This is usually under a DHCP Leases type page within the admin interface. If you aren’t sure how to access your Firewall/Router admin interface, it’s highly likely to be either 192.168.0.1 or 192.168.1.1 which are fairly standard across a range of firewalls and routers. Simply type that into your web browser and you should be presented with a login screen. If you haven’t accessed this before (highly unlikely if you’re reading this blog post…. But for the purpose of completeness…) then just Google what the default username and password is for your specific device.
Once you’ve found the IP address of the device you’ve just added, excellent. You now know that the device is on the network;

Understanding the UniFi Controller Architecture
Now what is interesting with Ubiquiti UniFi managed switches is that if you type the IP address of your managed switch into the web browser, nothing happens. Nothing loads. And this is because the Ubiquiti UniFi hardware works differently than the vast majority of other networking hardware in the sense that we configure everything via an external piece of software called the Ubiquiti UniFi Controller. This is a piece of software that lives on a separate device such as your laptop or desktop computer. Here’s what this looks like to visualise how all this interacts;
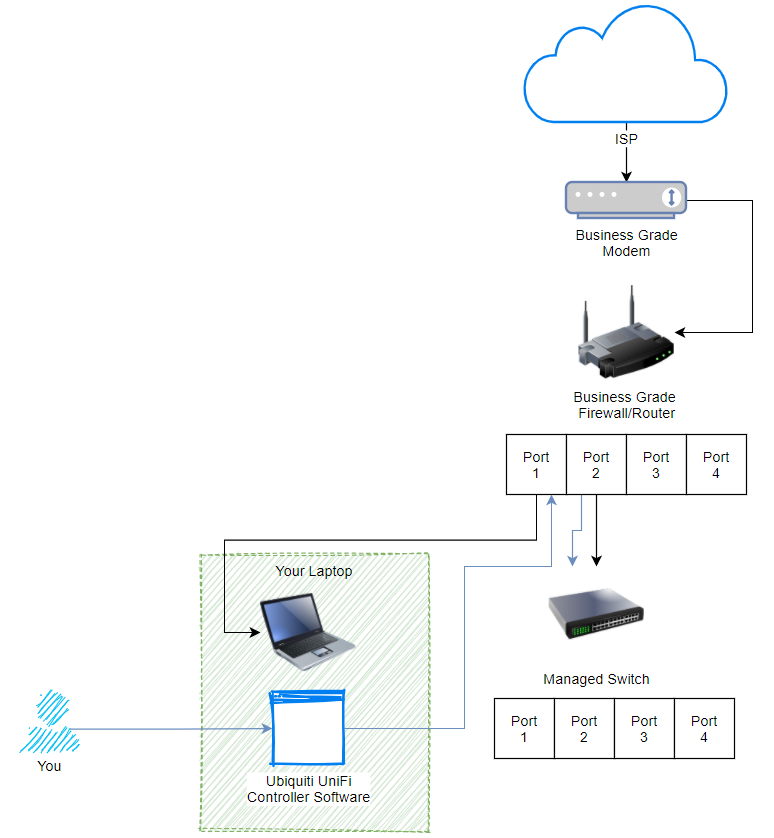
What we are looking at here, the black lines shows how everything is plugged in. The blue lines show how the process works for managing your UniFi managed switch. Pretty cool really, and this architecture of how all this works is one of the reasons that UniFi is completely blowing things away in the market with how there are designing and managing their networking hardware to make your life as easy as possible. Whether you are a small office/home office user or working up towards medium and large sized businesses. The Ubiquiti kit really is amazing.
Install and Open UniFi Controller Software
Ok, so once you’ve downloaded the Ubiquiti UniFi Controller Software and installed it on your computer. Simply run the software (Windows Start Menu > Ubiquiti UniFi > UniFi);
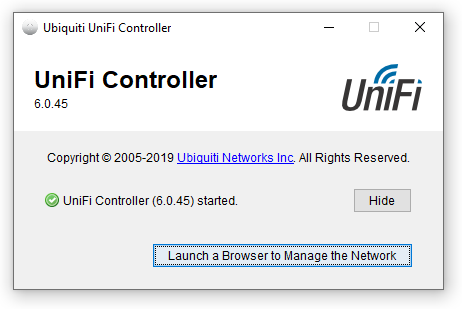
Click the button to launch the site in the browser. If this is the first time you’re doing this, you’re going to need to go through the registration process. The browser will open the URL, https://localhost:8443/manage/account/login. You will get a certificate error but just ignore that if you are on a secure network, which it is highly likely that you will be if you are doing this type of work.
Once the web browser opens you will be presented with a login screen;
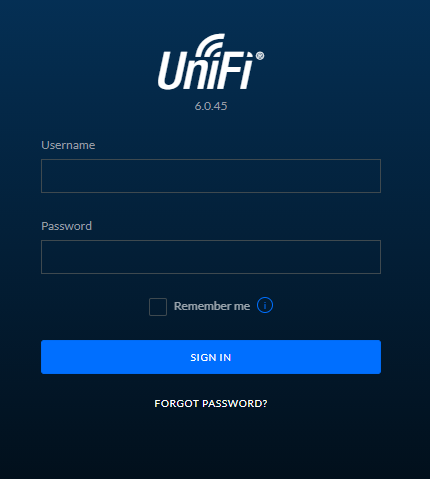
You’ll notice there isn’t a registration button here. If you don’t already have an account then you’ll need to create a Ubiquiti UniFi account here, https://account.ui.com/register. Once you’ve created your account, you will then be able to login to your device. For the purpose of simplicity in this blog post, we are going to assume that you are not using a UniFi Cloud Key. First of all, the UniFi Cloud Keys are an awesome piece of tech that allows you to easily manage your network completely remotely. This comes in extremely handy for IT managed service providers like ourselves who manage the network infrastructure on behalf of clients. We’ll cover that off in a different topic though at a later date.
View Current UniFi Network
Once you’re logged in you will land on the dashboard;
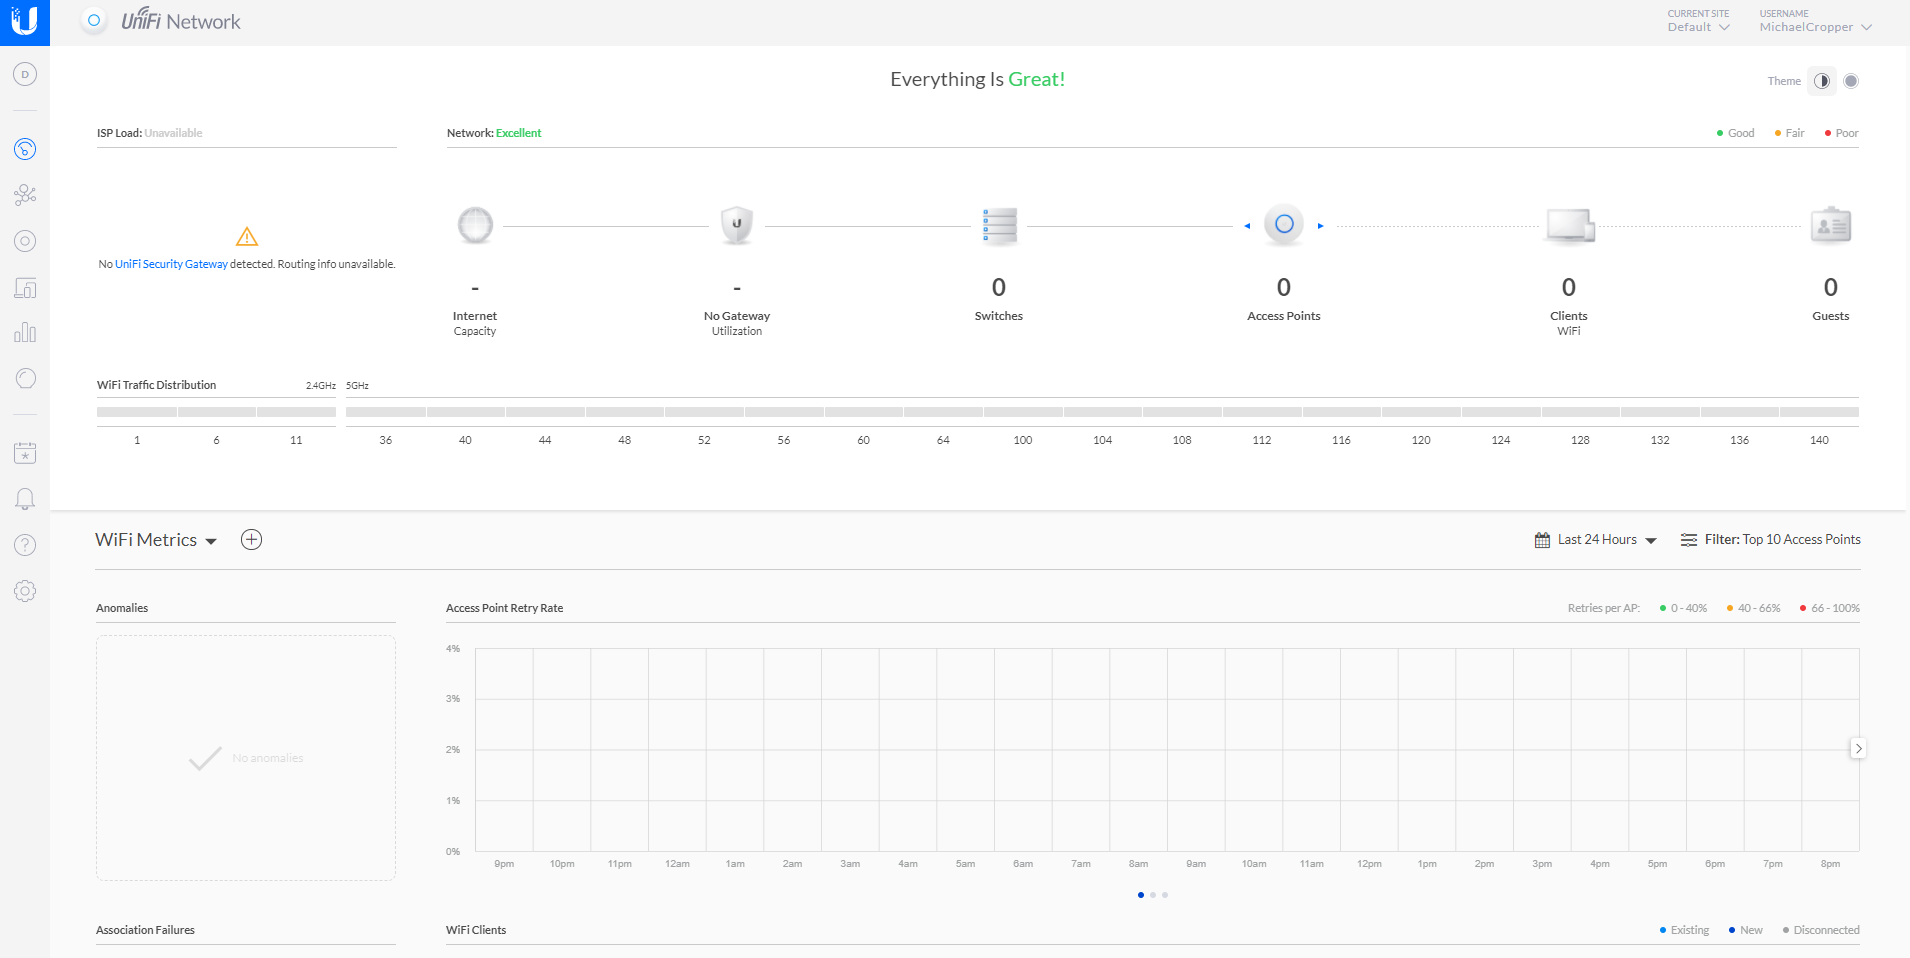
You’ll notice in the picture above that there is nothing there, you have no UniFi devices on your network. Sounds odd at first since you have your UniFi managed switch plugged in, but there is a reason why it is not showing up in your network yet and we’ll look at that now.
Adopt UniFi Managed Switch to Your Network
Firstly, you know you’ve just plugged in a UniFi managed switch into you network, so let’s click on the Switches icon;
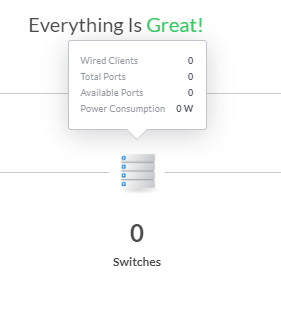
What you’ll notice when you click into that page is that the UniFi managed switch is now showing, but it is showing at the Pending Adoption stage;
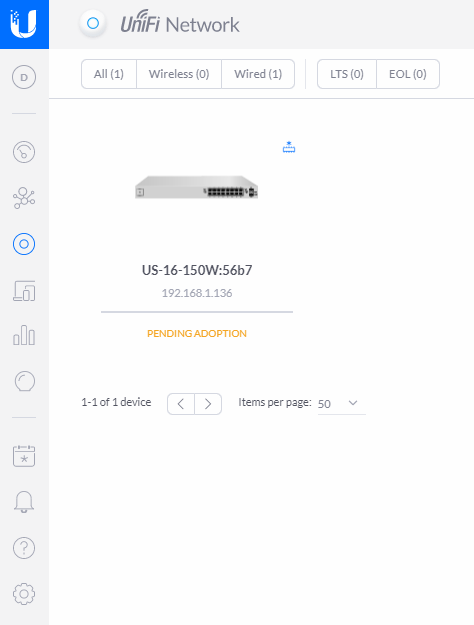
Device Adoption is simply the process of connecting a UniFi device to your UniFi Controller Software so that you can manage it accordingly. You can read more about that here if you are interested. Just before we jump into adopting the device. A couple of nice little features within the UniFi dashboard are worth pointing out. Firstly, the Events button in the left navigation, the one that looks like a calendar icon with an * in the middle. Here you can see the exact date and time you plugged the UniFi managed switch into your network;
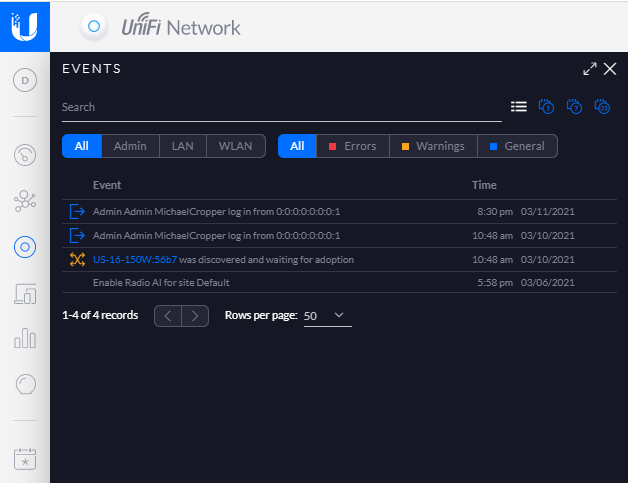
The fact that the software has automatically detected this and logged this event is pretty awesome, particularly for both auditing and debugging purposes. The one of the core benefits of the UniFi Controller Software is to ensure you can’t just go plugging hardware into your network and having that hardware automatically work. The UniFi platform can help to protect you from that attack vector.
So back to the previous image. Click on the managed switch that is pending adoption. You’ll notice a pop out appear;
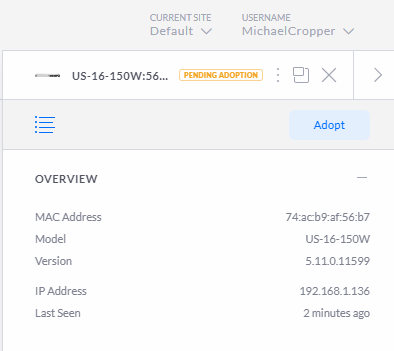
Then you will see that the managed switch moves through to the Adopting stage, this means that the managed switch is being adopted by your UniFi Controller Software so that it can be managed;
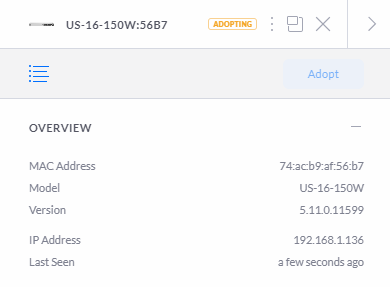
Next you will see the status move through to the Provisioning status. The provisioning status means that the device is in the process of applying updates and/or changes to the configuration and will temporarily reboot so the changes take effect. In this specific example, this makes no real difference as you are just getting setup but in any real world scenario this can result in a momentary blip in the connectivity for your users. Depending on your wider network configuration, you may need to schedule these types of activities to happen at times of low network activity. This is a very difficult thing to balance in corporate environments as you’ll generally find that backups and similar activities are also happening at off-peak times so you really need to fully understand your network and infrastructure architecture at all levels to be able to safely perform these activities. Otherwise, you’re just acting on a “click and hope” mentality. For a single managed switch setup that we’re working through here, this is not really an issue either way. But for larger networks you really need to understand which configuration changes have propagated through to each and every device on the network. If you are getting issues with provisioning configuration settings on specific devices this is really going to screw with your network and cause lots of random problems all over the place.
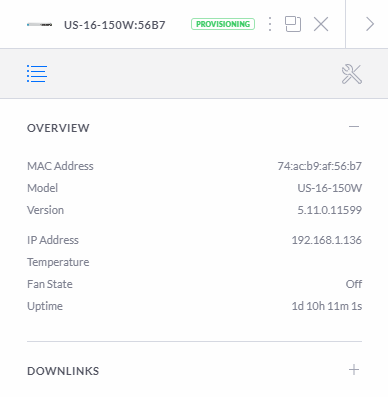
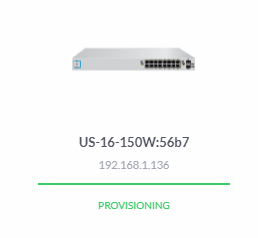
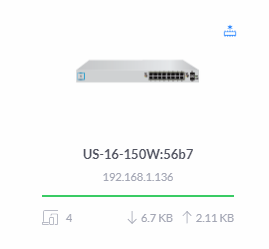
Once this is complete, you’ll start to see your devices listed as being in the Connected status;
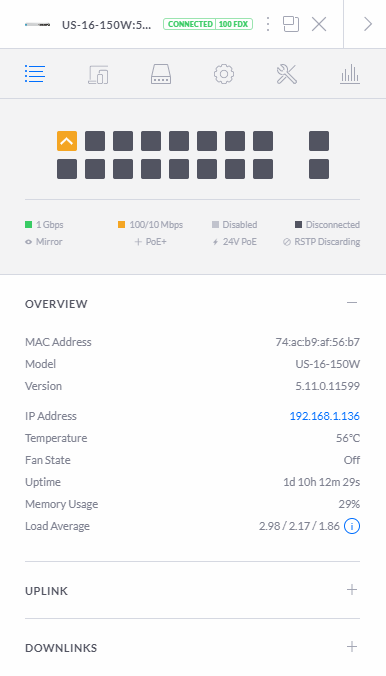
What is interesting in the image above is that you’ll notice that this port diagram exactly represents the port connectivity in the photograph from the very start of this blog posts that shows you how you have connected your physical UniFi managed switch into your network. This is showing you your physically connected ports in a digital view to help you visualise what is currently connected and what availability you have for future planning. While not that relevant for this blog post, it’s worth noting that this is a very handy feature particularly for larger networks spanning multiple geographical locations, knowing what is plugged in where and how this is all configured is extremely valuable so you can plan for future growth and projects as your networking needs expand.
Once you’ve done you’ll notice that your network on your dashboard now looks like the following;

UniFi Cloud Connectivity
What is interesting once you’ve logged into your local UniFi Controller Software locally is that if you view your UniFi account on the UniFi website, you’ll notice the exact same details listed. This is extremely handy to see what is happening on your local network from anywhere in the world. The reality is though is that this functionality is only

In the above image you’ll notice a “Launch” action on the right hand side. What this does is it enables a connection from the UniFi cloud platform straight through to the computer that is running the UniFi Controller Software. Generally these things are powered by the powerful UPnP (Universal Plug and Play) Protocol. I’ve not dug into the details of how this specifically works for the UniFi kit, but I’m going to take an educated guess that it is highly likely that it is UPnP that is powering this functionality. Either way, awesome, as this is a cool piece of tech.
This functionality is basically what the UniFi Cloud Key does, the only difference being that the UniFi Controller Software doesn’t need to be running on your laptop, but instead there is basically a RaspberryPi-like device plugged into the network to perform this feature. The UniFi Cloud Key is actually very similar to how one of the products we’ve designed and built works, the GeezerCloud platform which monitors temperature controlled environments remotely with ease for companies including restaurants and food manufacturing businesses.
Back to looping at the specifics of the UniFi Cloud Platform and how this works though. Once you have clicked on the Launch option, you’ll notice that the UniFi cloud platform is completely aware of your local UniFi network as you have seen in previous images – the only difference is the URL that you are accessing this information from. If you understand what this means, you’ve probably got your eyes raised too as you realise how amazing this feature is. If you don’t understand what this means, add 10+ years to your career and it will sink in why this is so awesome – Apologies on that point but it is difficult at times to convey breakthrough moments in technology like this without understanding the technology stack in a serious way both wide and deep, that stuff only comes with years of experience and knowledge and can’t be easily conveyed in a basic blog post – but – if you have questions, do put them in the comments on this blog post to get the answers you seek.
Back again to once you’ve clicked that Launch button mentioned earlier. What you’ll notice is that once you’ve clicked that, the URL is on the UniFi Cloud Platform, yet it is displaying information from your local network exactly as if you were viewing the information via your locally installed UniFi Controller Software;

All Connected Now Time to Configure
Awesome, now your managed switch is part of your network you are good to start to configure it in the way you like. We’re going to stop this blog post here as the configuration elements of a network can get very detailed so we’ll pick that up in a future blog post.
There are so many different ways to configure your UniFi managed switch that this all depends on the entire network architecture and devices (both UniFi and non-UniFi) that you are working with throughout your network.
Summary
Hopefully this has been a useful insight and tutorial on how to set up a Ubiquiti UniFi managed switch on your network. This guide has been focused on a starting point from nothing, so if you are working with an established network, very similar principles apply, although you’ll need to take extra precaution and understanding of the wider network piece before randomly plugging an additional managed switch into your network.
by Michael Cropper | Mar 10, 2021 | Client Friendly, IT, Networking |
This is one of the most misunderstood concepts when people start to get into the murky world of networking and computer networks. It’s no real surprise why there is so much confusion as the manufacturers confuse things further as it’s not always 100% clear when looking on certain websites whether a switch is managed or unmanaged. Then there is even more confusion since folks in IT like to just talk about ‘Switches’ as a general topic without being specific about which specific type of switch they are talking about. So hopefully by the end of this blog post you’ll have a good understanding of what the difference is between a Managed Switch and an Unmanaged Switch.
Baseline Physical Architecture
To help with discussions throughout this blog post, let’s look at common variations of a very basic network architecture.
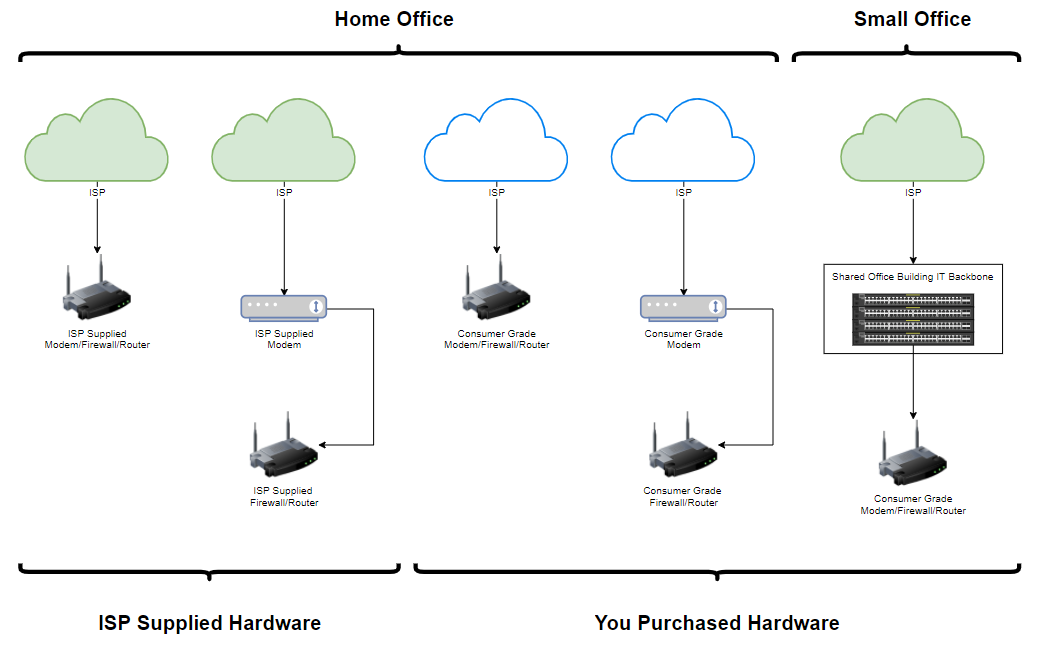
In the above image we have given five basic examples of how the vast majority of Small Office or Home Office networks are set up. We’ve only included everything up to your core router/firewall in this example above to highlight some of the common setups that we see. This helps to pave the way for discussing Managed Switches and Unmanaged Switches as this is where things start to get a little more complex.
What is an Unmanaged Switch – Basic Concept
The basic concept of an unmanaged switch is that it is designed for ease of use to easily extend your network without worrying about networking. I say that in the sense that you can purchase an unmanaged switch and simply plug in the cables and everything magically works.
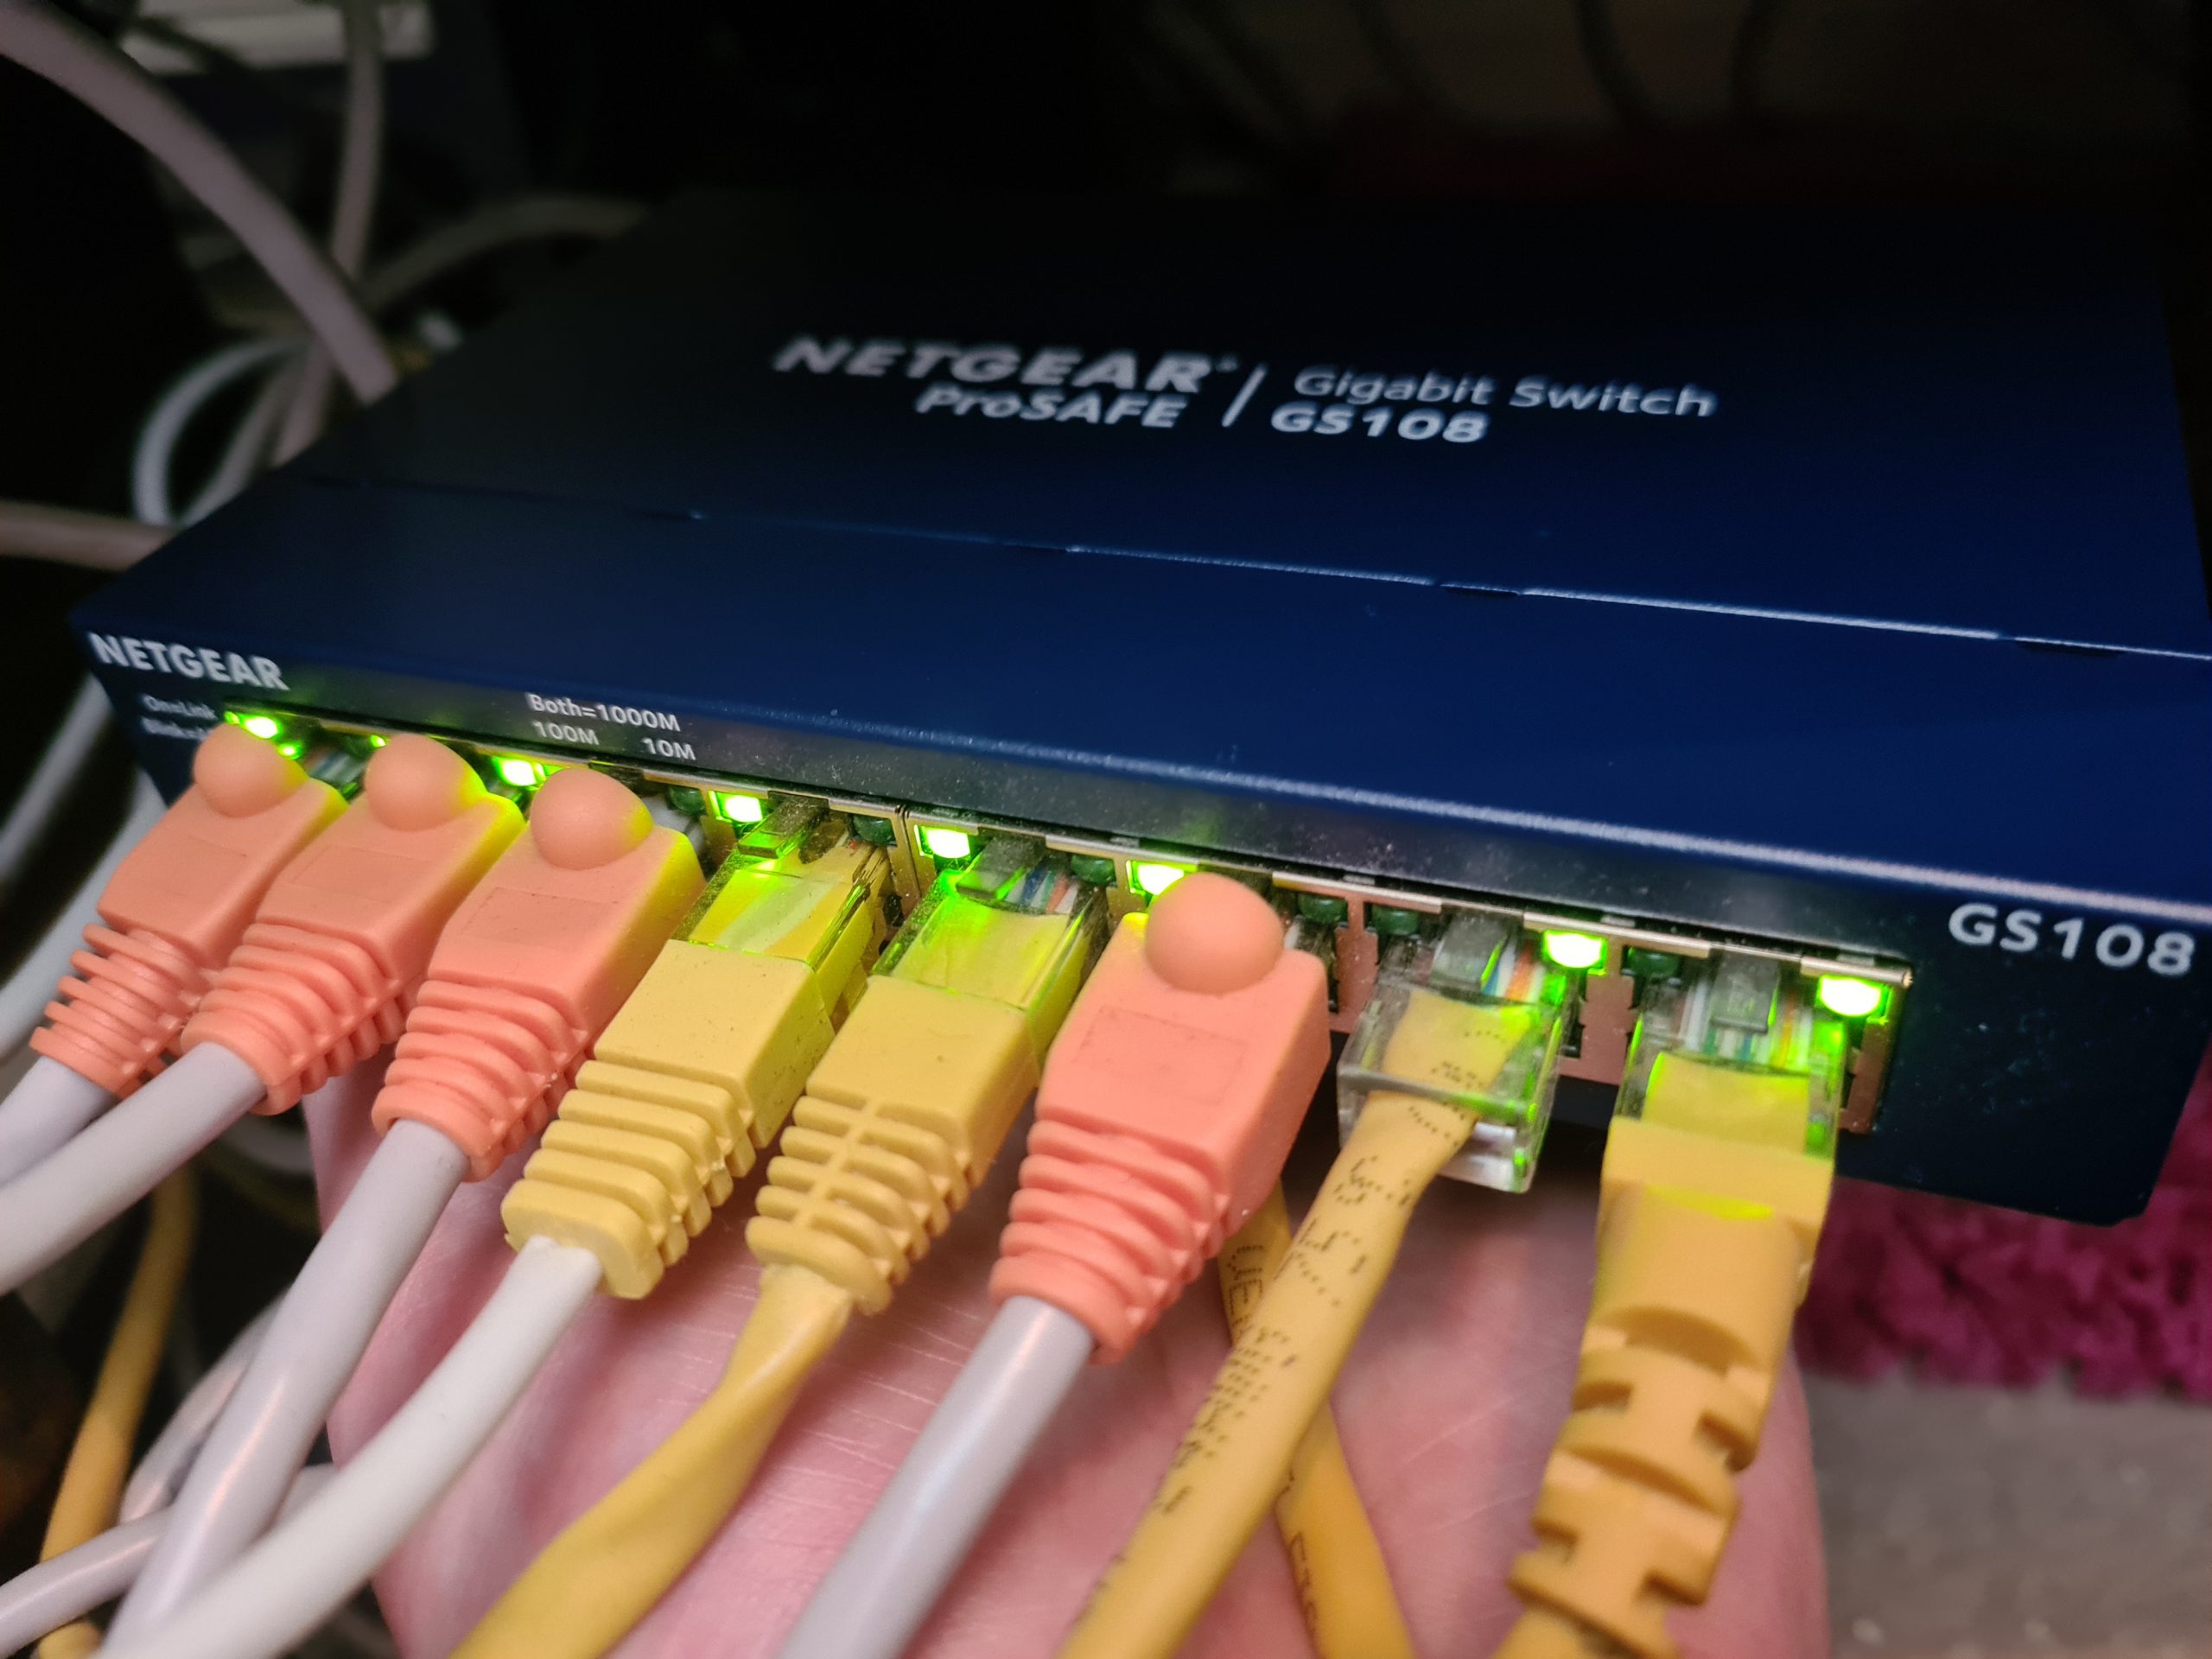
You can see an example of an unmanaged switch above, this is the Netgear ProSafe GS108 Unmanaged Switch. In this example, this is an 8-Port unmanaged switch. So let’s take a look at what that means for the baseline diagram.
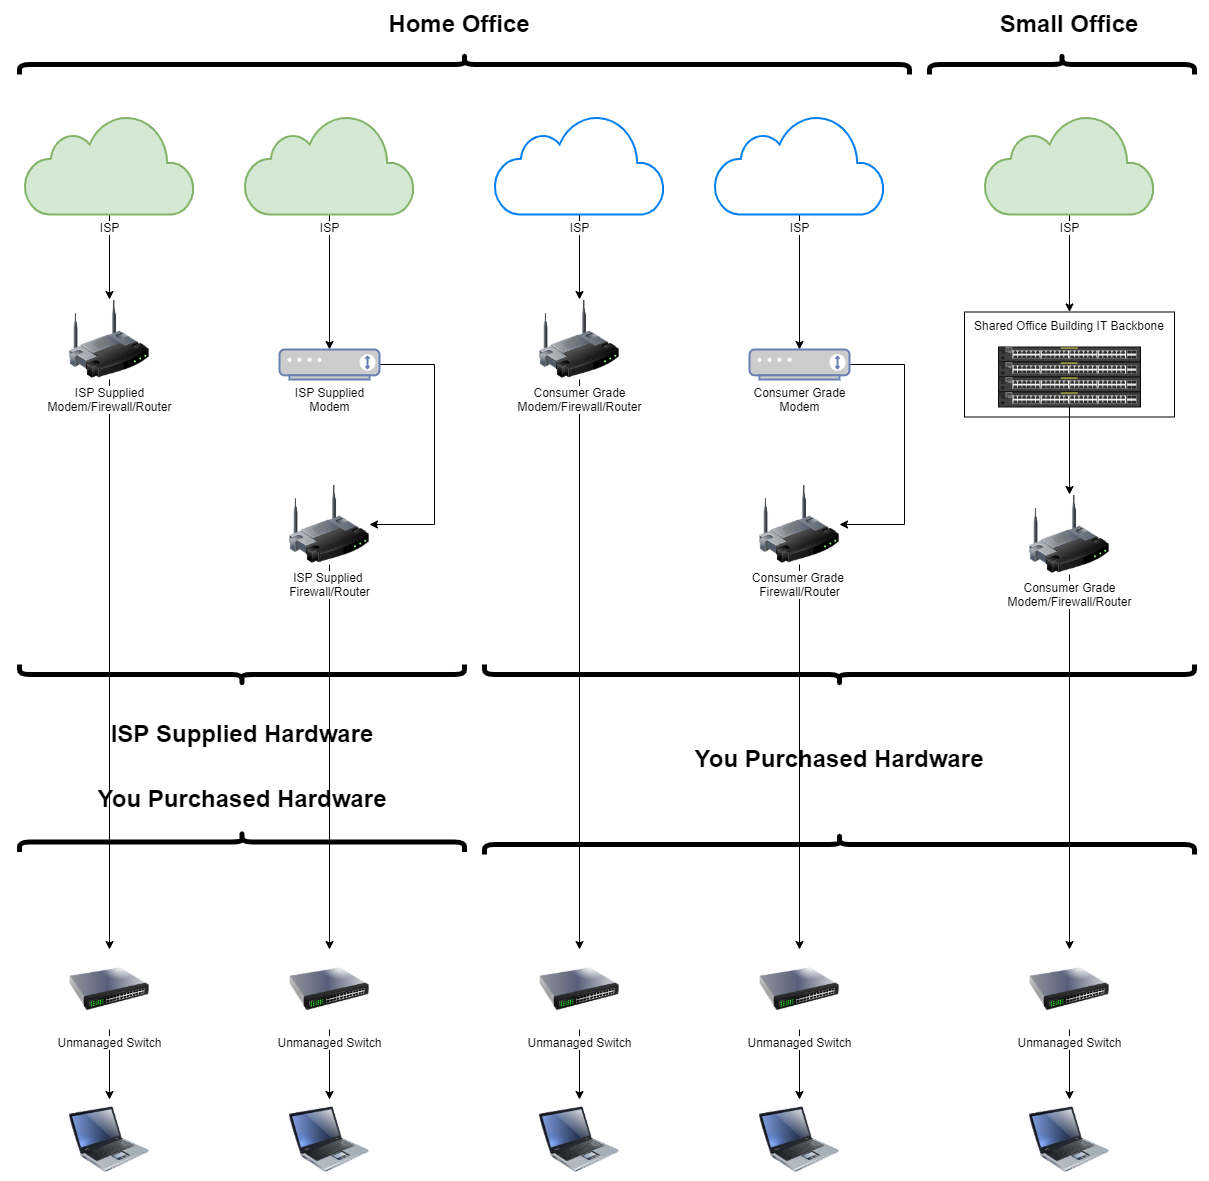
In the above image you can see that all we’ve done here is place an unmanaged switch in between your laptop and your primary router. Simple. No configuration required, all you’ve had to do is to plug the cables in and you’re good to go. This is the beauty of unmanaged switches, they are extremely handy to use when you want to get additional devices connected into a single network. And this is an important point that we’ll come onto next. Granted in the above example, we don’t actually need an unmanaged switch for this to work as you could just plug your laptop directly into the router/firewall, or connect over WiFi. But the reality is that you likely have more than one device here so it can be beneficial to use unmanaged switches depending on the physical layout of your home office or small office to make your networking life as easy as possible.
The example we’ve looked at above is what is commonly referred to a as a Flat Network, meaning that every device that is plugged in is on the same network, meaning that every device can see and talk to every other device. Ok, it’s a little more complex than that as every end device generally has a level of protection built into that too, but you get the point. Ultimately though, what this means is that every device on the network can see the network traffic that is flowing through the network which is a large security risk for complex networks, and should be a serious consideration for any networks both small and large in the modern world we live in.
Take Internet of Things (IoT) devices as an example. The second you plug one of these into your network (or connect it wirelessly), then if that device becomes a target for attack, that single device can flood through your network and at best, ‘only’ snoop on all your internet traffic, and at worst, spread throughout your network and infect all your machines.
There are endless stories coming out daily about these types of attacks happening to businesses of all sizes. If you’re still in the mind set of ‘why would anyone target us?’ then you need to have a strong word with yourself and start taking security seriously. Anyhow, that rant over.
Hopefully you now understand why an unmanaged switch is called an unmanaged switch… because you don’t have to manage anything, it just works.
What is a Managed Switch – Basic Concept
Ok, so let’s compare all of the above with a Managed Switch. As you can probably guess, with managed switches…. You need to manage them, aka. Configure them to work in the way that you want them to. And this is where things get from zero complexity to 100x complexity as there are endless ways you can configure your managed switch depending on your use cases and network design.
Generally speaking managed switches are physically larger in size as can be seen in the image below which is a Ubiquiti UniFi 1 Port PoE Managed Switch.


You can get managed switches that are much smaller and of similar sizes and with varying levels of functionality which can make managed and unmanaged switches physically difficult to see the difference between them.
Most importantly about managed switches is that you now have to administer them. They don’t just work by plugging them in. You need to configure which physical ports on the managed switch are used for what purposes, and this all comes down to how you want your network to be configured.
The core difference between unmanaged switches and managed switches is that unmanaged switches do not receive an IP address that is visible within your firewall/router, whereas managed switches appear in your firewall/router with an IP address as can be seen below;

While the managed switch has an IP address, it doesn’t necessarily mean that you can pop the IP address into your web browser and login to it like you can do with your Router/Firewall. The reason for this is because this is totally dependent on how your managed switch works. Some managed switches, and particularly either older models or higher end enterprise clunky makes/models, you will find that you are presented with a user interface when you access the IP address into the web browser. And it likely looks like something that was built in the 1990s, maybe early 2000s, it certainly won’t look like a modern user interface and the features and functionality you see in there will remain fairly static throughout the lifecycle of the managed switch from purchase to dispose and recycle. You tend to find more modern managed switches have external controller based software that gives you a fully modern and nice user interface to managed your switches and multiple devices on your network, whether you have a single managed switch or hundreds.
Some of the core features and functionality you get with managed switches that you don’t get with unmanaged switches to get you a flavour of the differences;
- VLAN 802.1q Tagging
- Redundancy Features
- Managing Physical Ports for VLANs
- Managed Quality of Service (QoS) – i.e. phone network getting higher priority than backup network
- Monitor and Control Network Traffic
- Traffic Filtering
- Security Policies
- Access Control Lists
To visualise how a managed switch fits into your physical architecture, well, it’s exactly the same as where an unmanaged switch fits into the picture. The core difference being is that you now get into the virtualised layer where you start to configure how to securely segment traffic on your network and how this then maps through to physical ports on your managed switch. Let’s take a look at that in a little more detail below.

The above is a relatively straight forward example for visualising how managed switches fit into a network and how they are configured. You can configure all of the different types of things you want to be specific against physical ports and VLANs which gives you the full control over what you need to do to manage your network effectively.
What you will notice when you start to plug in a managed switch into your network. To do this properly you need to be working with business grade modems and firewall/routers to ensure things just work without issues. You’ll find that even with high end consumer grade hardware, that they just don’t work very well as they are all combo devices that don’t do anything particularly well.
What you will also notice in the image above is how both managed and unmanaged switches can work together. They both serve a different purpose.
Things to Look Out For on Managed Switches and Unmanaged Switches
This is where things get a little more nuanced. Well, more like there are a lot of nuances which aren’t always obvious when looking at different makes/models of both managed and unmanaged switches. Researching IT hardware is an absolute nightmare, I’m not going to sugar coat this. Do significantly more hardware research than you think you need to so that you can minimise the risk of purchasing IT hardware that is not fit for your specific use case. You also need to consider that there is often a difference between what manufacturers list as features from a branding perspective VS the reality of how much they truly support the specific feature. This often isn’t always possible to tell up front either which makes life difficult.
The best advice would be to create a list of features that you want your managed switch to support then you can research and properly assess the various hardware available that fits your specific use case. We’ve already covered off some of the features above that may be a consideration for you. There are other considerations you may want to make including specific network level protocols and/or configurability and propagation across many devices and complex network infrastructures etc. You will also find that some unmanaged switches will pass through network traffic containing tagged VLANs, whereas others will strip off that part of the message as it travels through the unmanaged switch which is the equivalent of posting a letter into your local post box, only for the post box to then remove the address, so by the time the letter goes to the sorting office, they have no idea what to do with the letter so just throw it in the bin. You get the idea.
It’s difficult to provide a full list of things to look out for, but I wanted to call this out as a section to make sure you really think through your requirements and understand what you are looking for. You may also find that some managed switches may or may not support routing capabilities or may or may not support VLAN capabilities, certain managed switches come with Power over Ethernet (PoE) which can support either smaller or larger number of devices/ports, some managed switches will come with licencing implications whereas others are licence free etc. It’s a complex area.
Choosing Between Managed and Unmanaged Switches
Suffice to say that any Small Office or Home Office and above should absolutely be using at least one managed switch, and will naturally be using one or more unmanaged switches deeper in the network to solve the available physical ports problem. In this day and age you cannot afford to be using flat networks to simply connect all your devices together, you need to be doing this in a safe and secure way to protect yourself and your business, regardless of how big or small your business is. After all, even big global brands have ended up with security breaches because someone in the office thought it’d be great to plug in an internet connected coffee machine to the network which allowed unauthorised access to the network causing a security breach. Don’t let this be you!
As can be seen in the diagram in the managed switches section earlier, both managed and unmanaged switches work together but independently serve very important purposes so you need to understand what to user where and why.
Summary
Hopefully that gives you a good understanding of the core differences between managed and unmanaged switches and where they fit into a network architecture. There is no right or wrong answer about which one or how many of both you need, this all comes down to the design and implementation of your network depending on your needs.
If in doubt, you need to be speaking to a professional who understands how to design networks to fit your specific business requirements. If in doubt, get in touch.
by Michael Cropper | Feb 25, 2021 | Client Friendly, Developer, Software Development, Technical |
In this guide we’re going to look at how to setup Selenium using Java and Apache NetBeans as an end to end guide so you can be up and running in no time. If you’ve not set this up before, there are a few nuances throughout the end to end process and other areas where the official documentation isn’t the best at times. So hopefully this guide can clear up some of the questions you likely have so you can start working on using Selenium to run automated browser based testing for your web applications.
Create a New Maven Java Application Project
Firstly we’re going to use Maven to simplify the installation process. If you aren’t familiar with Maven, it is essentially a package manager that allows you to easily import your project dependencies without having to manually download JAR files and add them to your libraries. You can manually install the JAR files if you like, it’s just a bit more time consuming to find all of the dependencies that you are going to need.
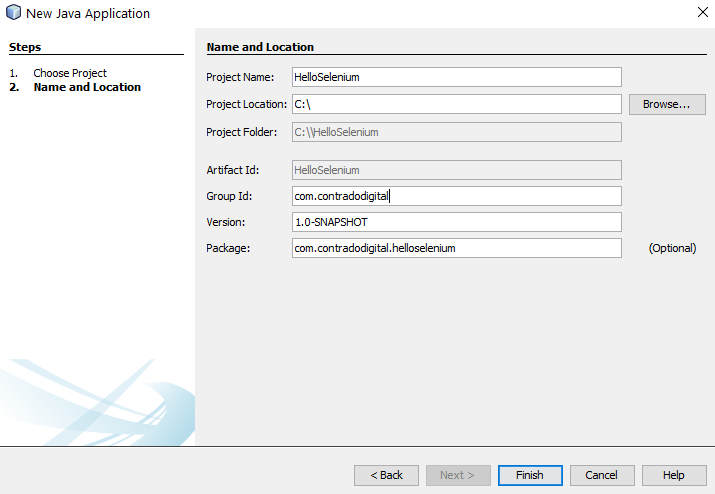
To create a new Maven project, click File > New Project and select Maven then Java Application;
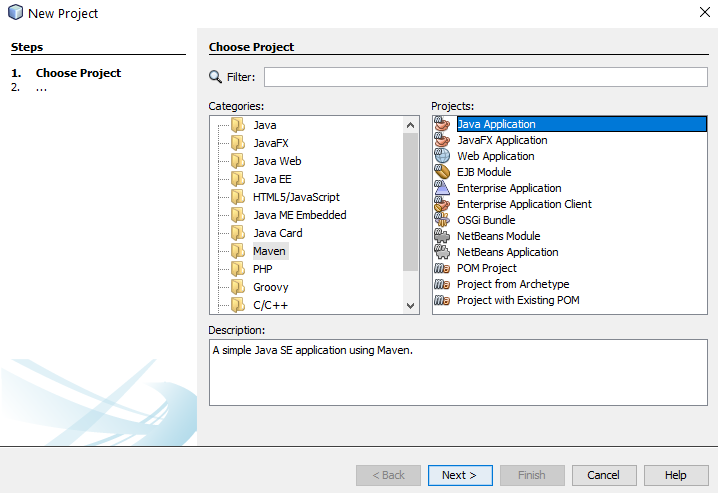
Configure Maven Project and Location
Next you need to configure some details for your project. For the purpose of simplicity we’re going to call this project HelloSelenium. And you’ll notice that when you enter the Group ID field, set this to the canonical name of your package which you generally want to set to your primary domain name in reverse, i.e. com.contradodigital, which will then automatically populate the Package name at the bottom to be com.contradodigital.helloselenium. This is industry best practice for naming your packages so that they have a unique reference.
Open Your Pom.xml File
Next we need to configure your pom.xml file which is used for Maven projects to manage your dependencies. Out of the box within NetBeans, when you create a Maven project, a very basic pom.xml file is created for you. Which sounds like it would be handy, but it doesn’t contain a great deal of information so can be more confusing than helpful for those less familiar with Maven.
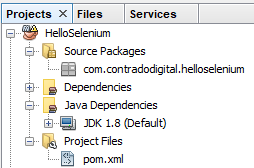
When you open up the default pom.xml file, it will look similar to the following;
<?xml version="1.0" encoding="UTF-8"?>
<project xmlns="http://maven.apache.org/POM/4.0.0" xmlns:xsi="http://www.w3.org/2001/XMLSchema-instance" xsi:schemaLocation="http://maven.apache.org/POM/4.0.0 http://maven.apache.org/xsd/maven-4.0.0.xsd">
    <modelVersion>4.0.0</modelVersion>
    <groupId>com.contradodigital</groupId>
    <artifactId>HelloSelenium</artifactId>
    <version>1.0-SNAPSHOT</version>
    <packaging>jar</packaging>
    <properties>
        <project.build.sourceEncoding>UTF-8</project.build.sourceEncoding>
        <maven.compiler.source>1.8</maven.compiler.source>
        <maven.compiler.target>1.8</maven.compiler.target>
    </properties>
    <name>HelloSelenium</name>
</project>
Which looks like a good starting point, but is a long way for you to be able to simply add in the relevant dependencies and get this working. So let’s look next at what your pom.xml file needs to look like to get you up and running with Maven.
Configure Your Pom.xml File
Before we jump into what your pom.xml file needs to look like, let’s first take a look to see what the required primary libraries are that we need to get Selenium up and running. There are a fairly small number, but behind the scenes there are quite a few dependencies too which aren’t always obvious.
Just don’t ask me why you need all these and what the differences are. The Selenium documentation isn’t that great and it just seems that these are needed to get things working. If you fancy having a play with the combinations of the above to see what the absolute minimum set of libraries are, then please do comment below with your findings.
So now we know this, there are a few bits that we need to configure in your pom.xml file which include;
- Plugin Repositories – By default there are none configured. So we need to get the Maven Central Repository added in
- Repositories – As above
- Dependencies – We need to add the 6x project dependencies so that they can be imported directly into your NetBeans environment
So to do all the above, your pom.xml file needs to look like the following;
    <?xml version="1.0" encoding="UTF-8"?>
<project xmlns="https://maven.apache.org/POM/4.0.0" xmlns:xsi="http://www.w3.org/2001/XMLSchema-instance" xsi:schemaLocation="https://maven.apache.org/POM/4.0.0 http://maven.apache.org/xsd/maven-4.0.0.xsd">
    <modelVersion>4.0.0</modelVersion>
    <groupId>com.contradodigital</groupId>
    <artifactId>HelloSelenium</artifactId>
    <version>1.0-SNAPSHOT</version>
    <packaging>jar</packaging>
    <properties>
        <project.build.sourceEncoding>UTF-8</project.build.sourceEncoding>
        <maven.compiler.source>1.8</maven.compiler.source>
        <maven.compiler.target>1.8</maven.compiler.target>
    </properties>
    <pluginRepositories>
        <pluginRepository>
            <id>central</id>
            <name>Central Repository</name>
            <url>https://repo.maven.apache.org/maven2</url>
            <layout>default</layout>
            <snapshots>
                <enabled>false</enabled>
            </snapshots>
            <releases>
                <updatePolicy>never</updatePolicy>
            </releases>
        </pluginRepository>
    </pluginRepositories>
    <repositories>
        <repository>
            <id>central</id>
            <name>Central Repository</name>
            <url>https://repo.maven.apache.org/maven2</url>
            <layout>default</layout>
            <snapshots>
                <enabled>false</enabled>
            </snapshots>
        </repository>
    </repositories>
    <dependencies>
        <!-- https://mvnrepository.com/artifact/org.seleniumhq.selenium/selenium-java -->
        <dependency>
            <groupId>org.seleniumhq.selenium</groupId>
            <artifactId>selenium-java</artifactId>
            <version>3.141.59</version>
        </dependency>
        <!-- https://mvnrepository.com/artifact/org.seleniumhq.selenium/selenium-api -->
        <dependency>
            <groupId>org.seleniumhq.selenium</groupId>
            <artifactId>selenium-api</artifactId>
            <version>3.141.59</version>
        </dependency>
        <!-- https://mvnrepository.com/artifact/org.seleniumhq.selenium/selenium-server -->
        <dependency>
            <groupId>org.seleniumhq.selenium</groupId>
            <artifactId>selenium-server</artifactId>
            <version>3.141.59</version>
        </dependency>
        <!-- https://mvnrepository.com/artifact/org.seleniumhq.selenium/selenium-chrome-driver -->
        <dependency>
            <groupId>org.seleniumhq.selenium</groupId>
            <artifactId>selenium-chrome-driver</artifactId>
            <version>3.141.59</version>
        </dependency>
        <!-- https://mvnrepository.com/artifact/org.seleniumhq.selenium/selenium-remote-driver -->
        <dependency>
            <groupId>org.seleniumhq.selenium</groupId>
            <artifactId>selenium-remote-driver</artifactId>
            <version>3.141.59</version>
        </dependency>
        <!-- https://mvnrepository.com/artifact/junit/junit -->
        <dependency>
            <groupId>junit</groupId>
            <artifactId>junit</artifactId>
            <version>4.13.2</version>
            <scope>test</scope>
        </dependency>
    </dependencies>
</project>
Once you’ve done this, save. Then Right Click on your project name and select ‘Build with Dependencies’ which will pull all of the dependencies into your NetBeans project. You should see a successful build message here;

And you should also notice that within your NetBeans Project the total number of Dependencies and Test Dependencies that have now been imported have grown to significantly more than 6 JAR files that have been imported. This is one of the huge benefits of using a package dependency management system such as Maven as it just helps you get things working with ease. Can you imagine having to find all of the different libraries that have now been imported manually and keeping everything in sync? Here is what has now been imported for you automatically;
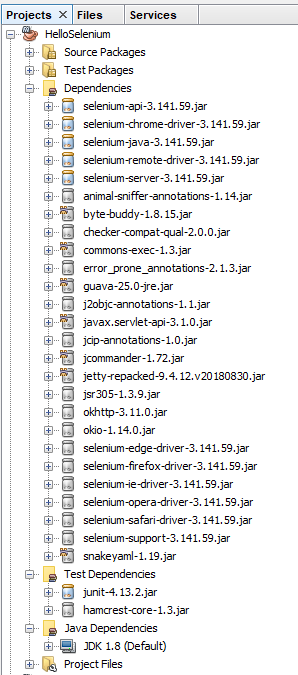
Note, if this is the first time you are getting Maven set up on your machine, you may find a few issues along the way. One of the common issues relates to an error that NetBeans throws which states;
“Cannot run program “cmd”, Malformed argument has embedded quote”
Thankfully to fix this you simply need to edit the file, C:\Program Files\NetBeans 8.2\etc\netbeans.conf and append some text to the line that contains netbeans_default_options;
-J-Djdk.lang.Process.allowAmbiguousCommands=true
So that the full line now reads;
netbeans_default_options=”-J-client -J-Xss2m -J-Xms32m -J-Dapple.laf.useScreenMenuBar=true -J-Dapple.awt.graphics.UseQuartz=true -J-Dsun.java2d.noddraw=true -J-Dsun.java2d.dpiaware=true -J-Dsun.zip.disableMemoryMapping=true -J-Djdk.lang.Process.allowAmbiguousCommands=true”
If you’re interested in why this is required, this release note outlines the issue in more detail.
You will find there will be the odd nuance like this depending on the version of NetBeans / Java / JDK / Maven etc. that you are running. Rarely do things seamlessly line up. So if you encounter any slightly different issues within your setup, then please do leave a comment below once you’ve found a solution to help others in the future.
Install Selenium IDE
Ok, so now we’ve got our NetBeans environment up and running. It’s time to make life as easy as possible. I’m assuming you don’t want to be writing everything manually for your web browser test scripts? I mean, if you do, enjoy yourself, but personally I prefer to make life as easy as possible by using the available tools at hand. This is where the Selenium IDE comes into play.
The Selenium IDE is a Google Chrome Extension that you can easily download and install at the click of a button;
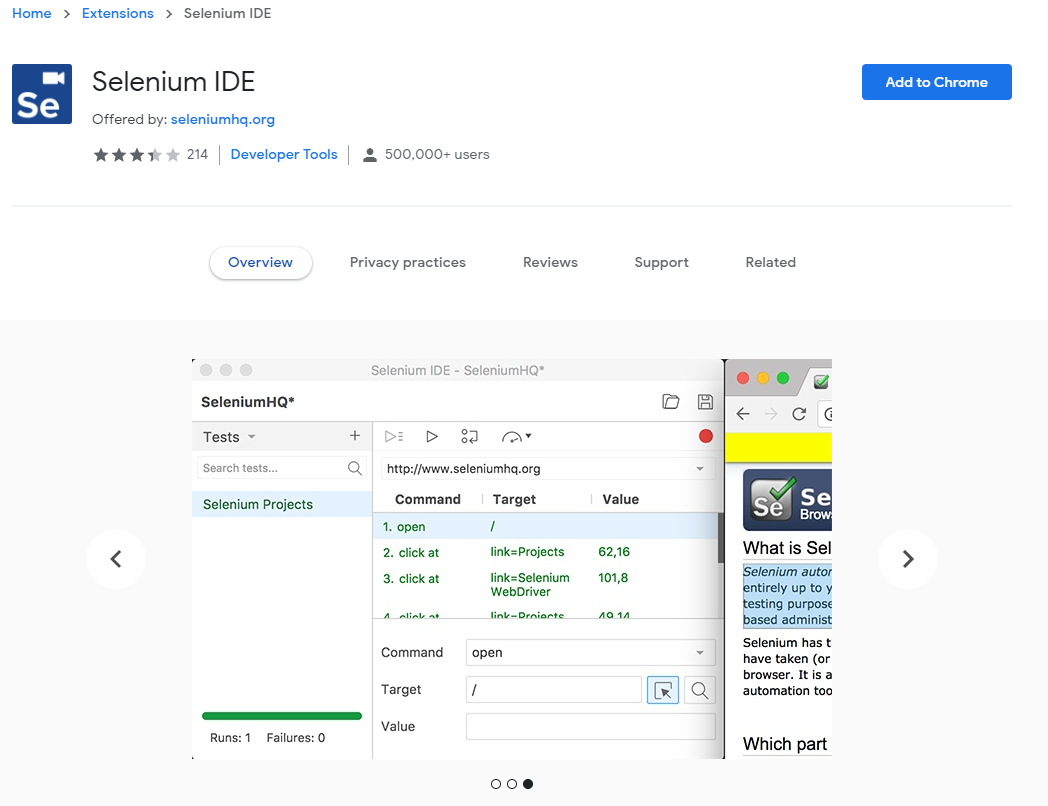
Once you’ve done this you will notice that the Extension has added a button at the top right of your Chrome browser that you can click on to open the Selenium IDE. If you’re from a tech heavy software development background, you’re probably expecting an installed desktop application whenever you hear the word IDE mentioned, but in this case it is nothing more than a Chrome Extension.
Click the Selenium IDE icon in Chrome to open it up. Once it is open for the first time you will notice a basic welcome screen;
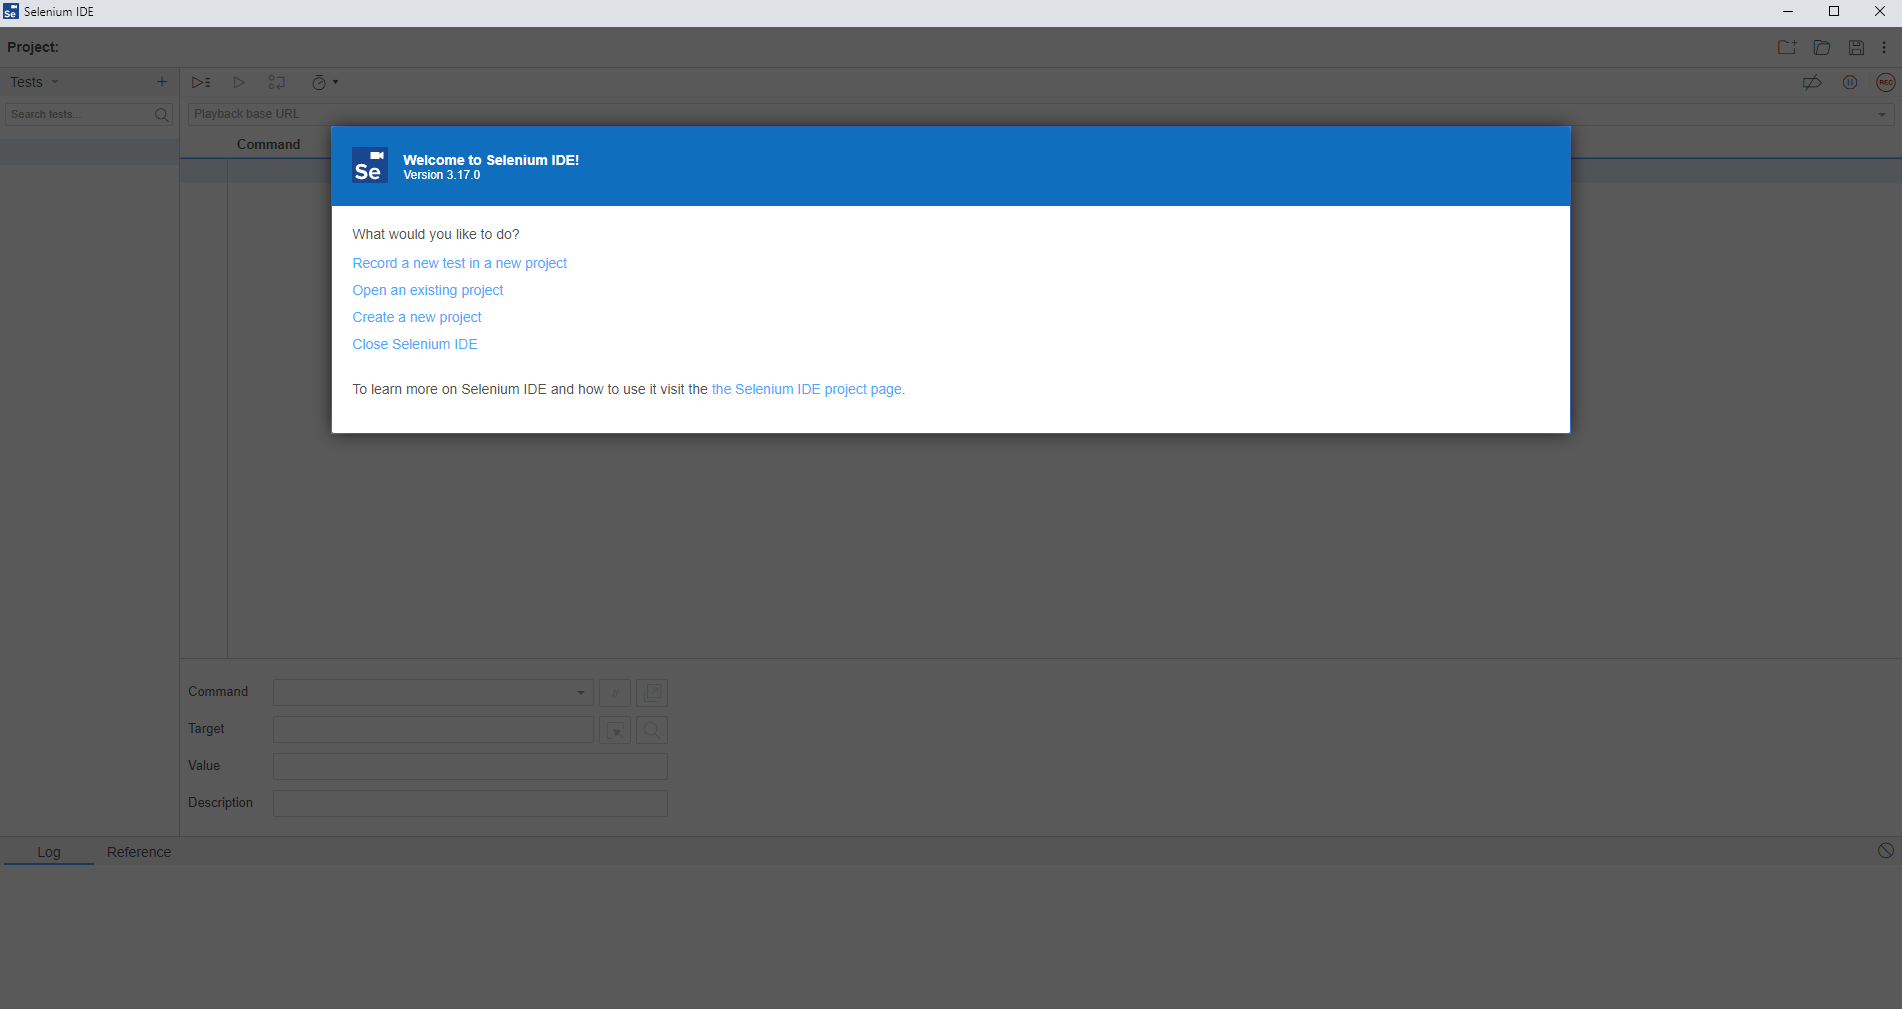
Click on Create a New Project to get started. Give your project a name so it’s clear what you are testing. In this example we’re going to be doing some testing on YumInfo which is an application we created to help software developers and infrastructure engineers easily search through the 20,000 packages that are contained within common Yum Repositories. Exactly like we have the Maven Central Repository for installing Java packages, it’s the same thing, just focused on Linux level software packages instead.

Create Your First Automated Web Browser Test in Selenium IDE
Ok, so now we’ve got Selenium installed and a new project created, let’s get onto creating your first automated browser test so you can get a feel for how all this works. It’s extremely simple to do so.
Firstly click on the + button to add a new test;
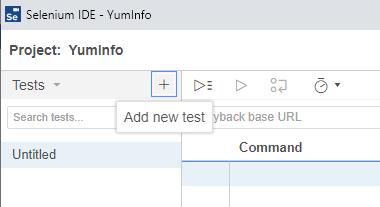
This will then open up the popup which allows you to give your new test a name. In this example, we’re going to test if we can use the search functionality on the YumInfo site to easily find a useful package.

Once you’ve done this, you’ll notice that a new Test Case has been created for you which is in the left section of the screenshot below, but you’ll notice there are no steps that have been created yet which is why the section on the right of the screenshot below is still all blank.

What you will notice in the above screenshot is there are two core sections that we are going to look at next;
- Playback base URL – This is the landing page that you are going to start your tests from. Generally speaking this is so you can test in the same way that your users would use the website.
- Record Button – This is in the top right coloured in red. This allows you to start the process running for recording your automated test scripts within Selenium IDE.
To get started, enter the base URL you want to work with. In our case we’re going to enter https://yum-info.contradodigital.com as that is the website we are doing the automated browser based testing on.
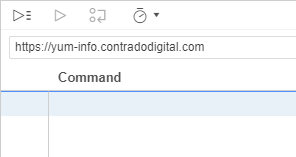
Then once you’ve done that. Click the red Record Button at the top right.
This step will open a brand new Chrome window and it will inform you that recording has started. It’s a very similar concept as you can record Macros in Excel if you have ever used those before.
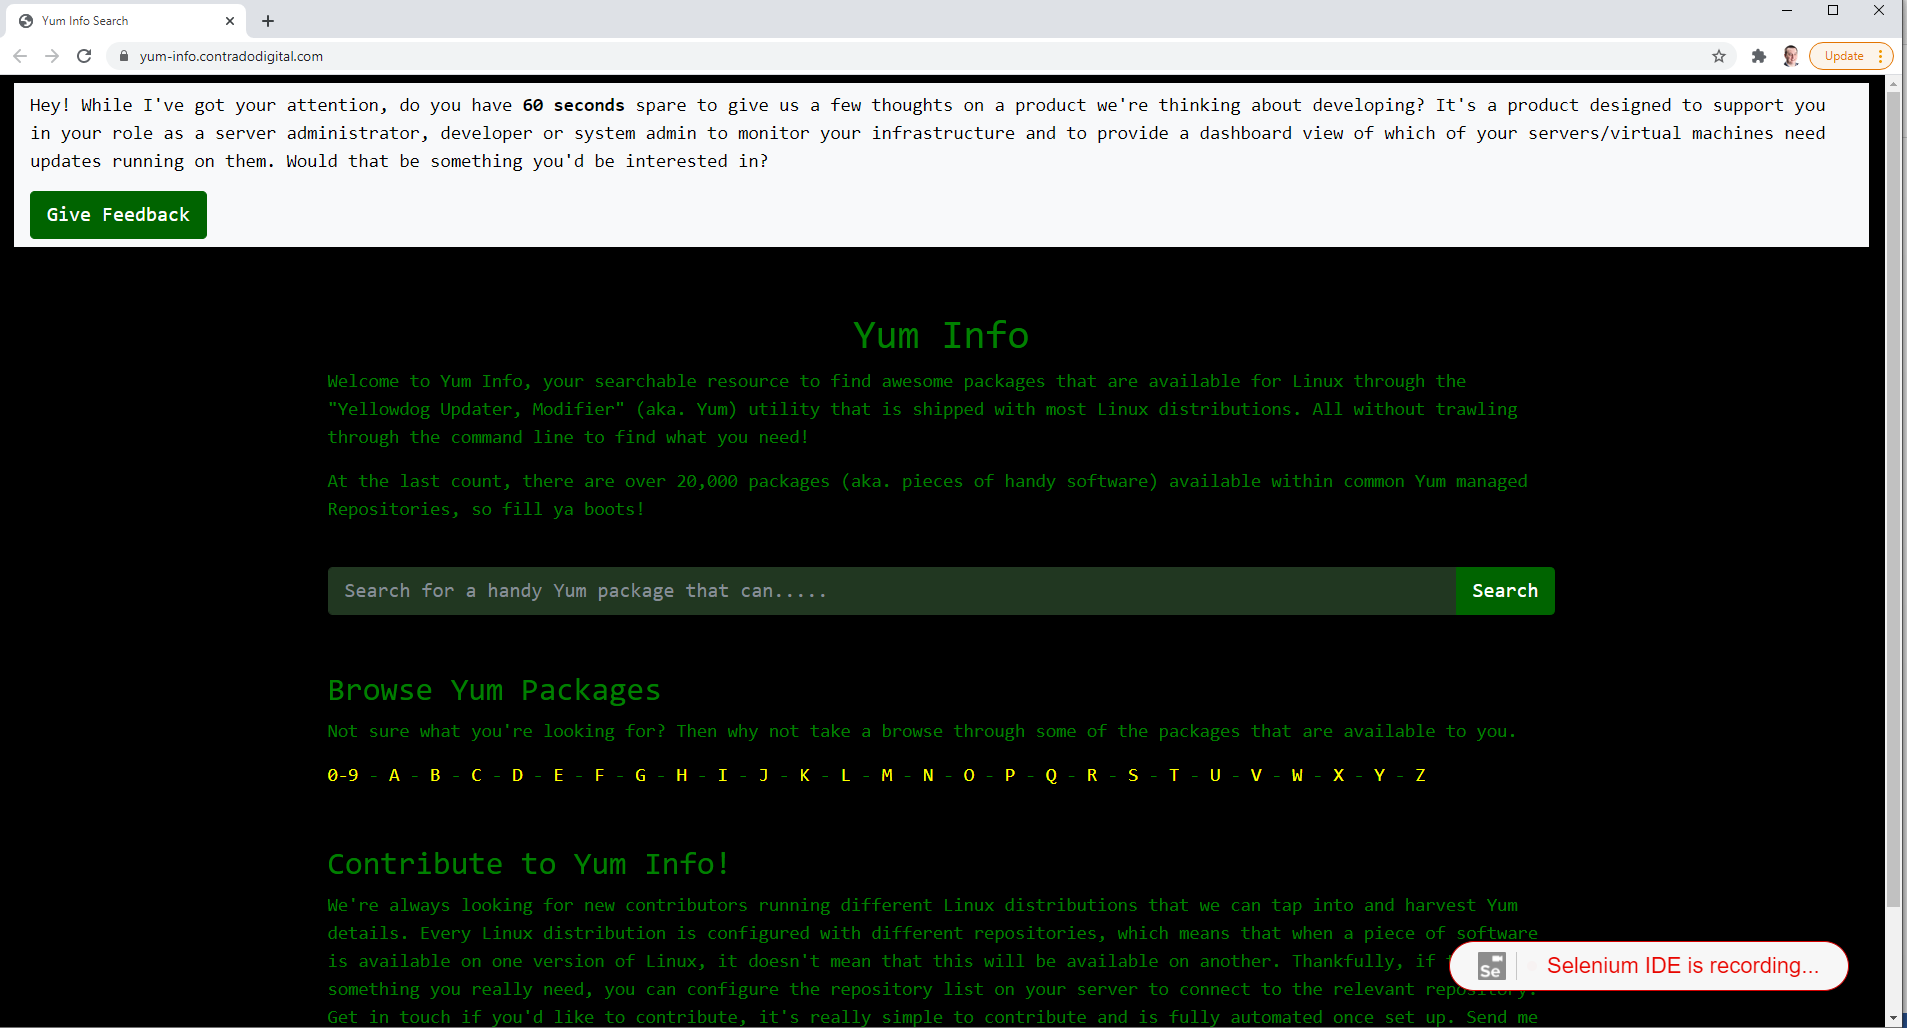
Now all you need to do is to click around your website and use it like a user would. In this case, as this specific Test Case we are looking to search for a package and then view the package information we’re going to do just that.
Once you are done clicking around, simply navigate back to your Selenium IDE that is open and click on Stop Recording. Once you have done that you will notice that the specific steps that you have just taken within the web browser have been recorded within Selenium IDE. Awesome!
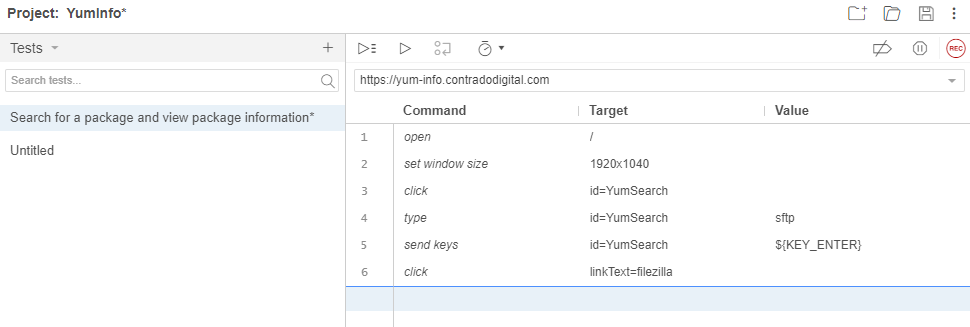
What the above steps are saying is that I followed these actions;
- Open the Base URL https://yum-info.contradodigital.com
- Set the browser window size to the default of your computer setup
- Click on the HTML Element that has an ID of ‘YumSearch’, which in this case is the search box that allows users to search for packages
- Type into the search box “sftp” without the quotes
- Then click Enter to trigger the search
- And finally, click on the link titled FileZilla which is a relevant package that can handle SFTP based communications
What all this has shown us is that as a user doing these steps, this all works as expected on the website. Hopefully this isn’t an unexpected result that basic functionality on your website is working. But this is just a simple example we are using to get you up and running.
Save this Test Case so you can reference back to it later down the line.
Re-Run Your First Automated Web Browser Test Case
Now that you have recorded your first test, you want to replay it so that you are confident that it has been recorded accurately. For traditionally built websites that use a single Request/Response you’ll find that these test generally record perfectly first time around. Whereas for websites build using more Single Page Applications / Front End Frameworks that load content dynamically into the page past the initial page load, you’ll find you will likely have a few issues with the default recordings and that the automated recording will need some manual intervention to get them to work properly.
To re-run the test you have just created, simply click on the Play button;
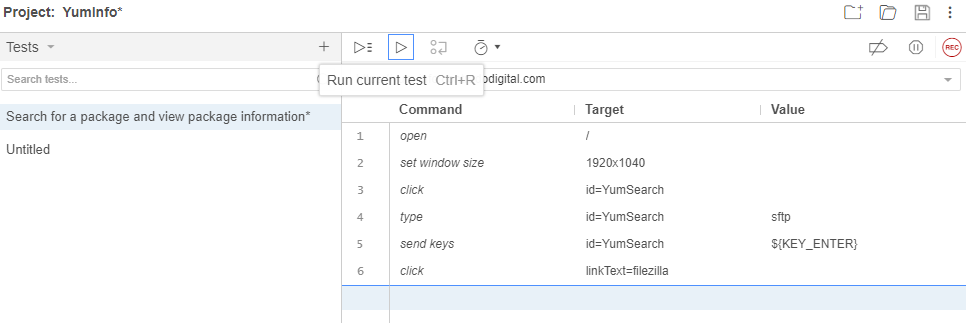
Once you click that button, you will notice that magic starts to happen. Your web browser will open and the exact steps that you just took will be replicated in real time right in front of your eyes. Most importantly, once it is complete, you will see that it has completed successfully.
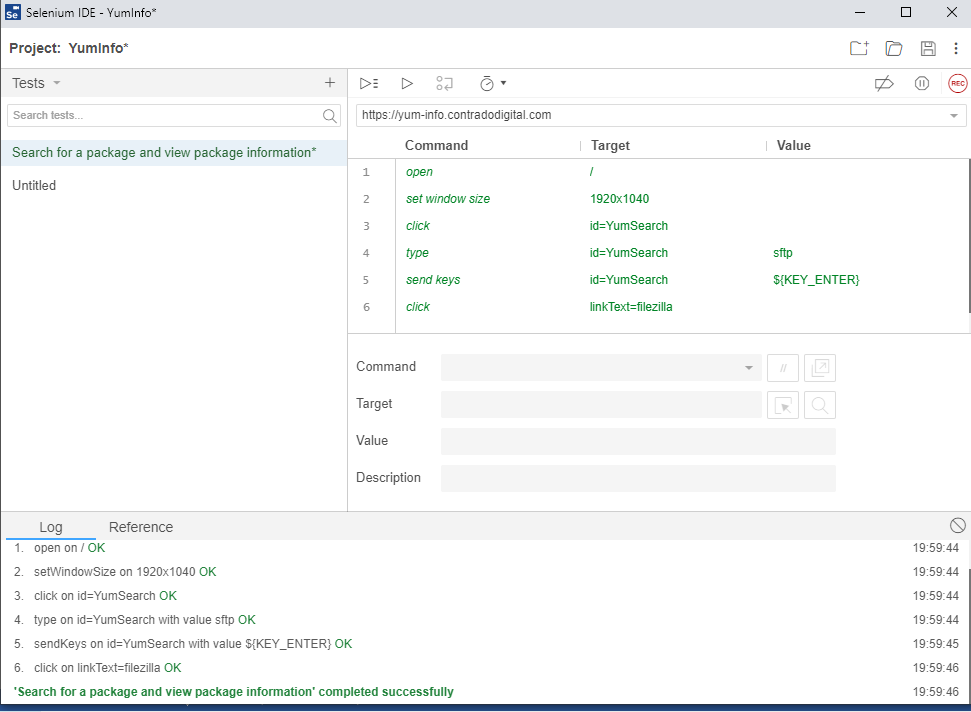
By doing this you have just proved that the Test Case has been recorded successfully and can run through to the end to confirm this end to end process works correctly. This is important as you build up your Test Cases as you will find many larger websites can have 1000s and even 10,000s of Test Cases created over time that ensure the stability of the platform.
Why Build a Library of Test Cases in Selenium IDE for Automated Web Browser Testing?
Just stepping back a little though, why are we even bothering to do this? Well quite frankly, that is a very good question – and one that you should genuinely be asking for any project that you are working on. Yes, many people say this is best practice to build automated web browser testing for web applications, and there is a very solid argument to this. Then on the other hand, if you are working with solid web application development principles, and you have awesome developers, and you have an extremely slick development process to fix forward, then you may find that Selenium automated web browser testing is just an added burden that adds very little value.
The reality is that most organisations, this isn’t the reality, so Selenium comes in extremely handy to mitigate any risk of pushing bad code through to the live environment and streamlines regression testing. Meaning that you can run a significant amount of automated tests without ever having to worry about getting users to manually test features and functionality every time you want to do a release.
Download Chrome Web Driver
Now we’ve utilised the power of the Selenium IDE to create our automated web browser for us, it’s time to take that and move it into a proper software development environment, aka. NetBeans. Before we jump into the details we’re going to need to download the Chrome Web Driver. This will allow you to make NetBeans, more specifically the Selenium and JUnit dependencies, interact with your Chrome web browser.
As with anything, versioning is important. So the first thing you need to do is understand what version of Google Chrome you are running. To do this, go into Google Chrome > Settings > About Chrome and you will see your version number there;
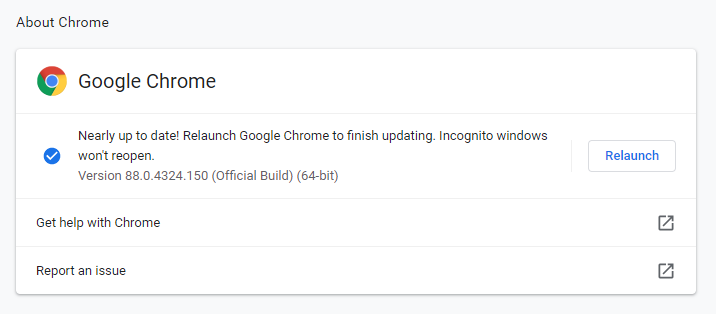
Now you know what version of Google Chrome you are using. Next you need to download the specific Google Chrome Driver that applies to your version of Google Chrome. Head over to the Chromium Chrome Driver Downloads page and find the version that applies to you.

Once you’ve downloaded the ChromeDriver and you have unzipped it, you have this on your system which we’ll reference a little later as we move your Selenium IDE generated Test Case into NetBeans.
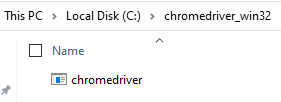
You want to put this file into a location that you aren’t going to change next week as your code will break. You need this in a handy reference location that suits how you personally organise your development environments.
Export Test Case from Selenium IDE to JUnit Format
Next we need to export the Test Case that we created in Selenium IDE so that we can then import that into NetBeans. To do this go back to Selenium IDE and right click the Test Case you created then click on Export;
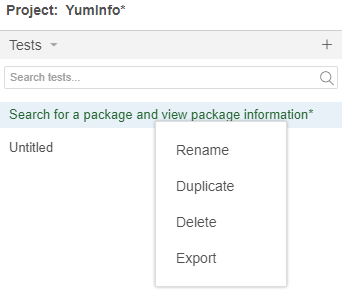
Then select the language we want to export the file to. The beauty of the Selenium IDE is that it is cross language compatible which means that you can import the Test Case into any number of your preferred automated web browser testing setups you use, in this case we’re using JUnit in Java, but you could quite easily use either NUnit or xUnit for C#, or Mocha for JavaScipt or pytest for Python or RSpec for Ruby. The choice is yours.
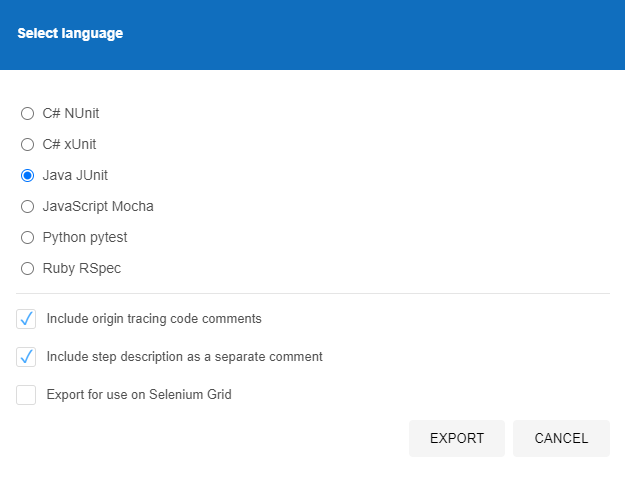
Once this has been exported, this will save a .java file in our example to your local file system which will look as follows;
// Generated by Selenium IDE
import org.junit.Test;
import org.junit.Before;
import org.junit.After;
import static org.junit.Assert.*;
import static org.hamcrest.CoreMatchers.is;
import static org.hamcrest.core.IsNot.not;
import org.openqa.selenium.By;
import org.openqa.selenium.WebDriver;
import org.openqa.selenium.firefox.FirefoxDriver;
import org.openqa.selenium.chrome.ChromeDriver;
import org.openqa.selenium.remote.RemoteWebDriver;
import org.openqa.selenium.remote.DesiredCapabilities;
import org.openqa.selenium.Dimension;
import org.openqa.selenium.WebElement;
import org.openqa.selenium.interactions.Actions;
import org.openqa.selenium.support.ui.ExpectedConditions;
import org.openqa.selenium.support.ui.WebDriverWait;
import org.openqa.selenium.JavascriptExecutor;
import org.openqa.selenium.Alert;
import org.openqa.selenium.Keys;
import java.util.*;
import java.net.MalformedURLException;
import java.net.URL;
public class SearchforapackageandviewpackageinformationTest {
  private WebDriver driver;
  private Map<String, Object> vars;
  JavascriptExecutor js;
  @Before
  public void setUp() {
    driver = new ChromeDriver();
    js = (JavascriptExecutor) driver;
    vars = new HashMap<String, Object>();
  }
  @After
  public void tearDown() {
    driver.quit();
  }
  @Test
  public void searchforapackageandviewpackageinformation() {
    // Test name: Search for a package and view package information
    // Step # | name | target | value
    // 1 | open | / |
    driver.get("https://yum-info.contradodigital.com/");
    // 2 | setWindowSize | 1920x1040 |
    driver.manage().window().setSize(new Dimension(1920, 1040));
    // 3 | click | id=YumSearch |
    driver.findElement(By.id("YumSearch")).click();
    // 4 | type | id=YumSearch | sftp
    driver.findElement(By.id("YumSearch")).sendKeys("sftp");
    // 5 | sendKeys | id=YumSearch | ${KEY_ENTER}
    driver.findElement(By.id("YumSearch")).sendKeys(Keys.ENTER);
    // 6 | click | linkText=filezilla |
    driver.findElement(By.linkText("filezilla")).click();
  }
}
The core bits of information that are relevant for this are the following;
  @Test
  public void searchforapackageandviewpackageinformation() {
    // Test name: Search for a package and view package information
    // Step # | name | target | value
    // 1 | open | / |
    driver.get("https://yum-info.contradodigital.com/");
    // 2 | setWindowSize | 1920x1040 |
    driver.manage().window().setSize(new Dimension(1920, 1040));
    // 3 | click | id=YumSearch |
    driver.findElement(By.id("YumSearch")).click();
    // 4 | type | id=YumSearch | sftp
    driver.findElement(By.id("YumSearch")).sendKeys("sftp");
    // 5 | sendKeys | id=YumSearch | ${KEY_ENTER}
    driver.findElement(By.id("YumSearch")).sendKeys(Keys.ENTER);
    // 6 | click | linkText=filezilla |
    driver.findElement(By.linkText("filezilla")).click();
  }
Here you can see the 6 steps that were in the original Selenium IDE which are visualised as code. This is extremely handy as this now gives you full control over every aspect of Selenium by using the power of the library to do what you need to do and more by using the power of JUnit too. Selenium by itself will only take you so far, you need to integrate Selenium with a proper testing framework such as JUnit to get the most from the technology. By exporting this code, this is the first step of the process to enhancing your automated web browser testing setup.
Create a New JUnit Test File in NetBeans
Ok, so back over to NetBeans. We want to import the Exported JUnit file from Selenium IDE into NetBeans so that we can manage the lifecycle of this Test Case better and work collaboratively with our colleagues. We’ll jump into more around the team collaboration elements of Selenium a little later. For now, let’s first jump in and get the JUnit Test added to NetBeans. To do this, right click on a folder in your project in NetBeans and select New File, then search for JUnit, then select JUnit Test and click Next.
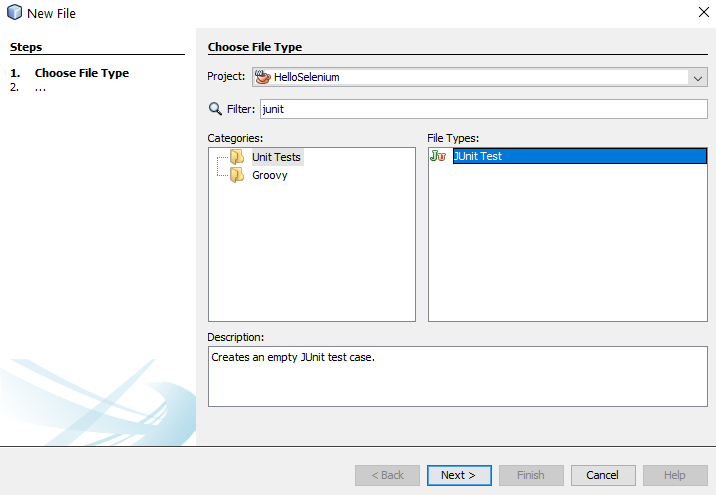
Once you’ve done that, give your new JUnit Test a Class Name and click Finish.
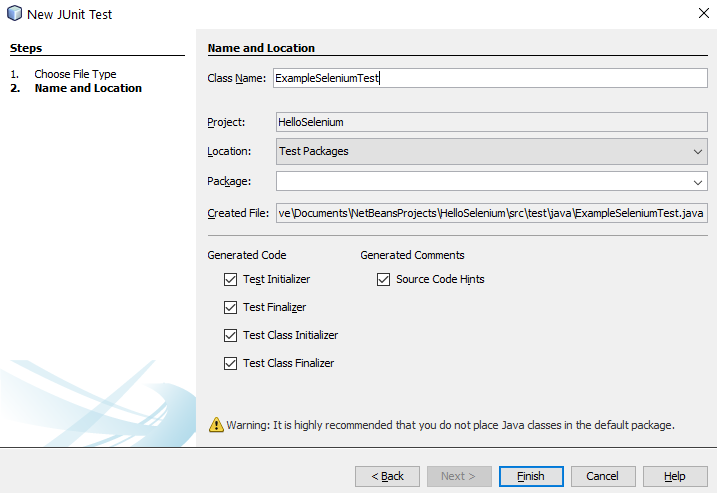
You will notice that this has generated a bunch of code for your automatically which is quite handy. This is great, but what you will also notice is that this doesn’t quite align 100% with the code that has been generated by the Selenium IDE. This is because here you have created a specific JUnit Test based on what NetBeans thinks a Test looks like, whereas the code that was generated in Selenium IDE was code that was a JUnit test that is specific to the test you created.
import org.junit.After;
import org.junit.AfterClass;
import org.junit.Before;
import org.junit.BeforeClass;
import org.junit.Test;
import static org.junit.Assert.*;
import org.openqa.selenium.By;
import org.openqa.selenium.WebDriver;
import org.openqa.selenium.WebElement;
import org.openqa.selenium.chrome.ChromeDriver;

/**
 *
 * @author Michael Cropper
 */
public class ExampleSeleniumTest {

    public ExampleSeleniumTest() {
    }

    @BeforeClass
    public static void setUpClass() {
    }

    @AfterClass
    public static void tearDownClass() {
    }

    @Before
    public void setUp() {
    }

    @After
    public void tearDown() {
    }

    // TODO add test methods here.
    // The methods must be annotated with annotation @Test. For example:
    //
    // @Test
    // public void hello() {}
}
Merge Your Exported Selenium IDE Test Case Into Your NetBeans JUnit Test Class
The next step is generally best to be done as a copy and paste to fit the automatically generated Selenium IDE Test Case code into the standardised approach you use for your JUnit Test Classes within NetBeans. Don’t just blindly copy and paste the code as while the automatically generated code is handy, you need to manage this code to fit with your specific needs and use cases.
In this example, here’s what the JUnit Test Class looks like now I’ve manually merged this code;
import org.junit.After;
import org.junit.AfterClass;
import org.junit.Before;
import org.junit.BeforeClass;
import org.junit.Test;
import static org.junit.Assert.*;
import org.openqa.selenium.By;
import org.openqa.selenium.Dimension;
import org.openqa.selenium.Keys;
import org.openqa.selenium.WebDriver;
import org.openqa.selenium.WebElement;
import org.openqa.selenium.chrome.ChromeDriver;

/**
 *
 * @author Michael Cropper
 */
public class ExampleSeleniumTest {

    public ExampleSeleniumTest() {
    }

    @BeforeClass
    public static void setUpClass() {
    }

    @AfterClass
    public static void tearDownClass() {
    }

    private WebDriver driver;

    @Before
    public void setUp() {
        System.setProperty("webdriver.chrome.driver", "C:/chromedriver_win32/chromedriver.exe");
        driver = new ChromeDriver();
    }

    @After
    public void tearDown() {
        driver.quit();
    }

    @Test
    public void searchforapackageandviewpackageinformation() {
        // Test name: Search for a package and view package information
        // Step # | name | target | value
        // 1 | open | / |
        driver.get("https://yum-info.contradodigital.com/");
        // 2 | setWindowSize | 1920x1040 |
        driver.manage().window().setSize(new Dimension(1920, 1040));
        // 3 | click | id=YumSearch |
        driver.findElement(By.id("YumSearch")).click();
        // 4 | type | id=YumSearch | sftp
        driver.findElement(By.id("YumSearch")).sendKeys("sftp");
        // 5 | sendKeys | id=YumSearch | ${KEY_ENTER}
        driver.findElement(By.id("YumSearch")).sendKeys(Keys.ENTER);
        // 6 | click | linkText=filezilla |
        driver.findElement(By.linkText("filezilla")).click();
    }
}
A couple of really important parts to be made aware of in the above code snippet are these;
private WebDriver driver;

    @Before
    public void setUp() {
        System.setProperty("webdriver.chrome.driver", "C:/chromedriver_win32/chromedriver.exe");
        driver = new ChromeDriver();
    }

    @After
    public void tearDown() {
        driver.quit();
    }
These are the following lines of code / methods;
- private WebDriver driver;
- This line of code is required to ensure you can easily open/close the WebDriver at the start and end of this Test Class. Over time you may have many Tests contained within a single Test Class, so by using this approach it is significantly more efficient and allows you to re-use the object without having to instantiate it every single time you run a Test within this Test Class.
- This then aligns with the contain within the setup() method and the teardown()
- setProperty(“webdriver.chrome.driver”, “C:/chromedriver_win32/chromedriver.exe”);
- This is what enables your JUnit code to communicate with your Google Chrome Web Browser and control it.
- public void searchforapackageandviewpackageinformation()
- Hopefully you recognise the contents of this method which is the automatically generated code produced by Selenium IDE that we have merged into this JUnit Test Class.
Run Your JUnit Test Class
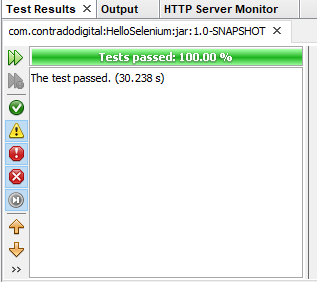
Excellent, now we’re at a point that we can actually run our JUnit Test Class to confirm everything is still working as expected. To do this simply Right Click and select Test File within your JUnit Test Class. If everything has merged successfully you should see your Google Chrome Web Browser kick into action, run the test and the test should pass.
Collaborating with Colleagues
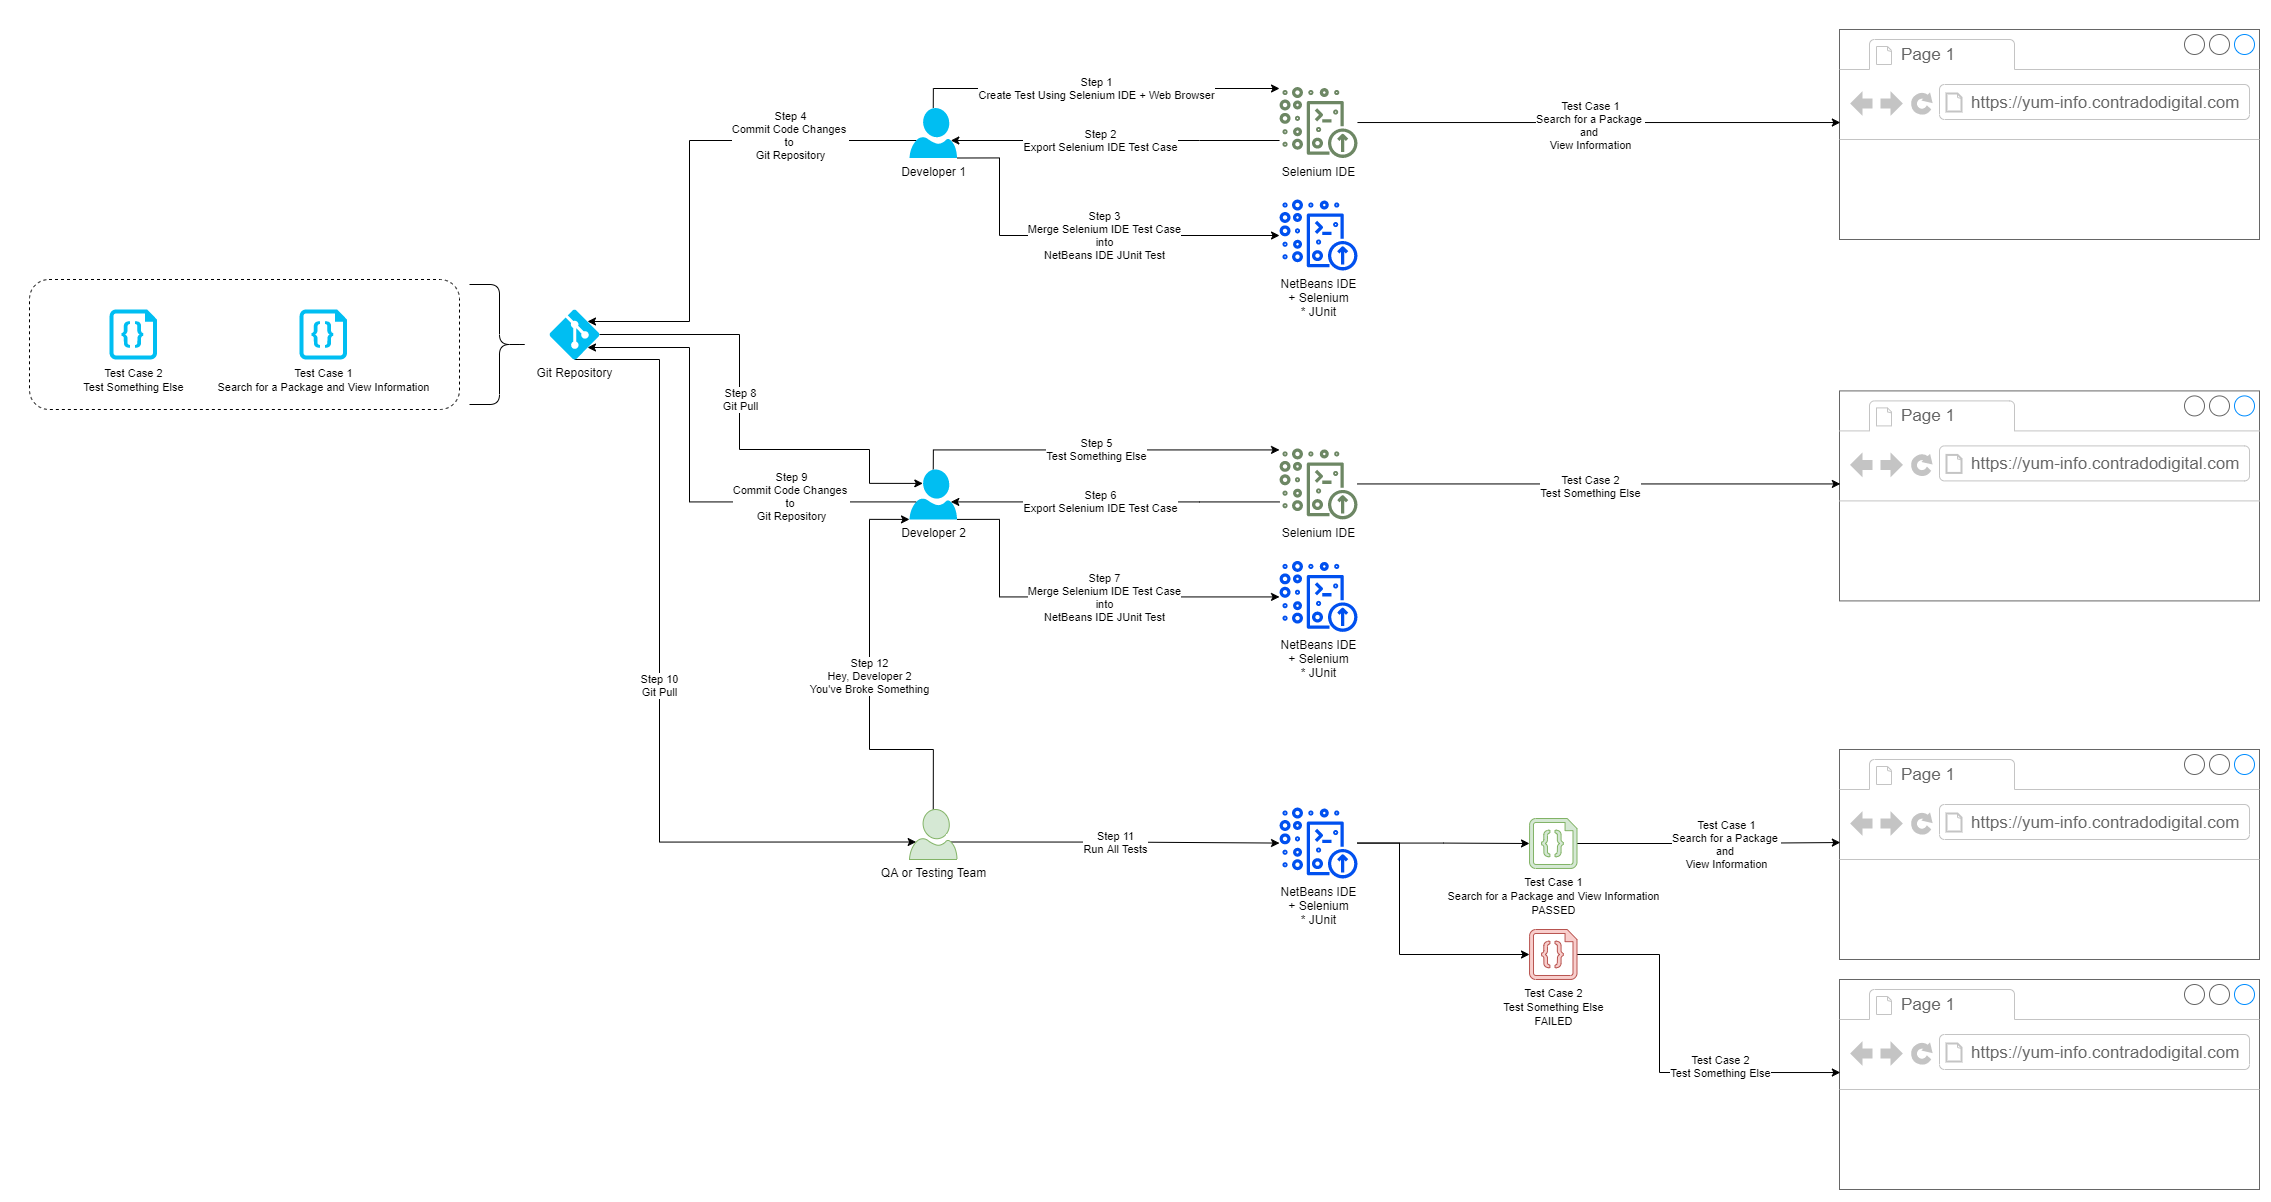
Finally we’re going to briefly touch on how you now collaborate with colleagues using Selenium and JUnit Test Classes. Everything we have done so far is excellent if you are working by yourself and just having a play around. But in any real world environment you are going to be working with a lot of colleagues that span different roles/responsibilities and even departments. This is where the collaboration element really kicks in. For the purpose of this blog post and to keep things fairly simplistic we’re going to highlight how this approach works when you are working between Developers and Quality Assurance (QA) or Test people.
One point to note is that this isn’t going to be a tutorial on how to use Git, so if you are unfamiliar with some of the concepts below then you are going to need to do a bit of background reading. To get up to speed with how to use Git and why it is important, then read the Git Book. Once you’ve read that about 10x from a standing start with zero knowledge you’ll probably understand it. We’ll do a write up on Git in a bit more detail at some point as it is a topic that is hugely misunderstood and often implemented incorrectly which can cause a lot of problems.
Below is a diagram of a generic process that can be handy to implement in organisations to show you how the different steps fit together along the Software Development Life Cycle, specifically focused around Selenium and team collaboration.
Summary
Hopefully this guide on how to setup Selenium using Java and Apache NetBeans has been helpful to get you up and running with Selenium in no time at all. This is very much the basics of automated web browser testing using a very specific set of technology, tooling and processes. There is an awful lot more that could be covered on this topic and that is perhaps one for another day. For now, this is just the very basics about getting up and running.


